The Canyonlands Needles District is pretty much off the beaten track. Most people visiting Southern Utah stay further north, around Moab and Arches National Park. If they venture to Canyonlands National Park, then usually only to the Island in the Sky District. So if you are seeking solitude, head a bit further south and go to the Needles District. This was actually my first ever night of camping out in the wilderness and also the first time I successfully managed to take a picture of the Milky Way. The landscape is just out of this world, or rather prehistoric: at every turn I was expecting to come across a dinosaur or Fred Flintstone. It’s a great trip, but the whole of Southern Utah is just so amazing, I doubt you can do a bad hike out there.
How long?
2 days, 1 night (really just two half days, and a night)
How many miles?
10.5 miles / 17km
How?
Hiking + wilderness camping
Map & compass required
Maps?
National Geographic Trails Illustrated maps 311 or 210
Itinerary:
Squaw Canyon trailhead / campground -> Squaw Canyon -> Elephant Canyon -> Squaw Canyon trailhead / campground
To get to the Needles District, you have to drive some 70-75 miles south from Moab. There are a few optional stops along the road, such as the Hole N” The Rock (on route 191) or the Newspaper Rock (an route 211). Note that petrol stations are few and far between so your best bet is to fuel up in Moab before setting off.
Leg 1: Squaw Flat trailhead to Squaw Canyon 1 (SQ1) camp site
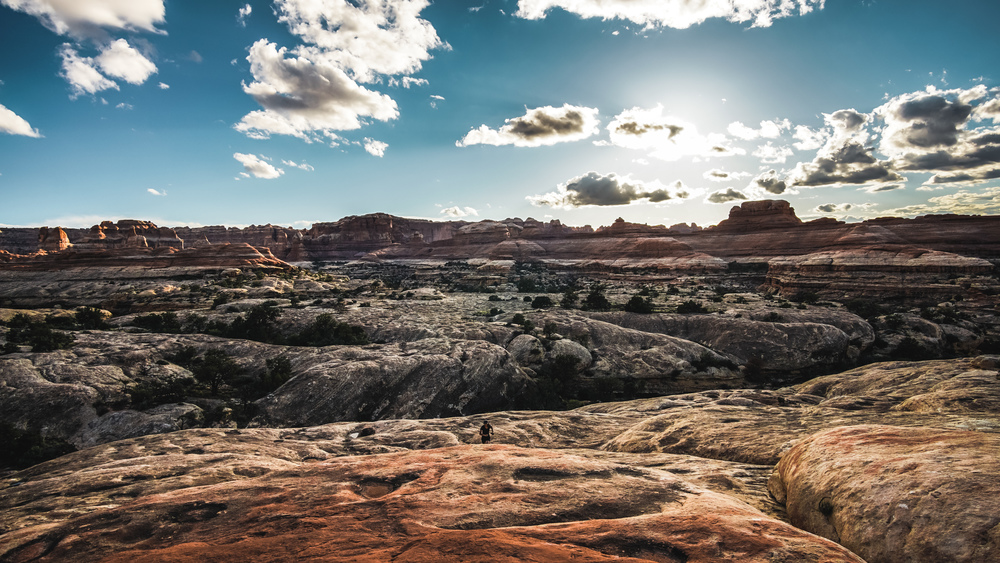
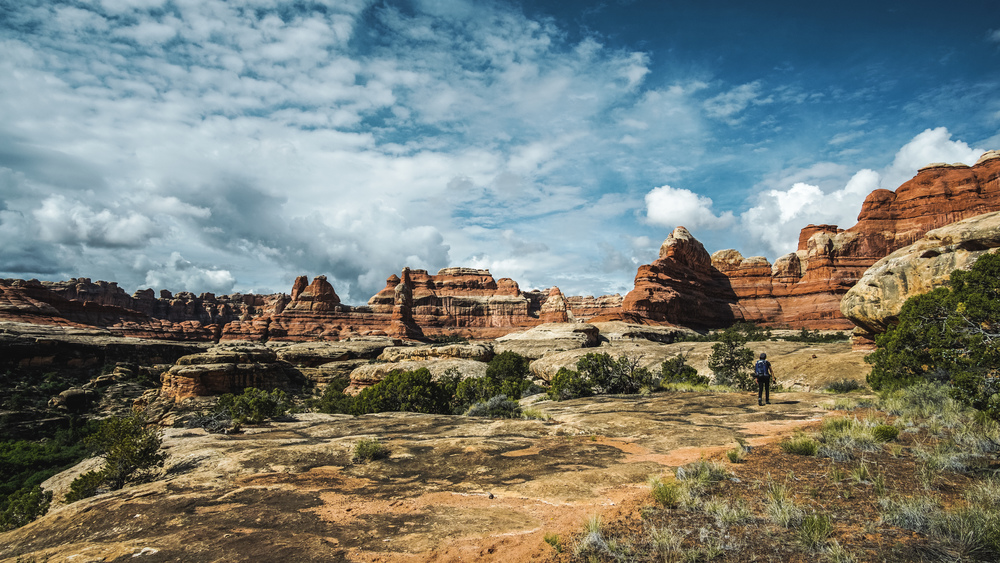
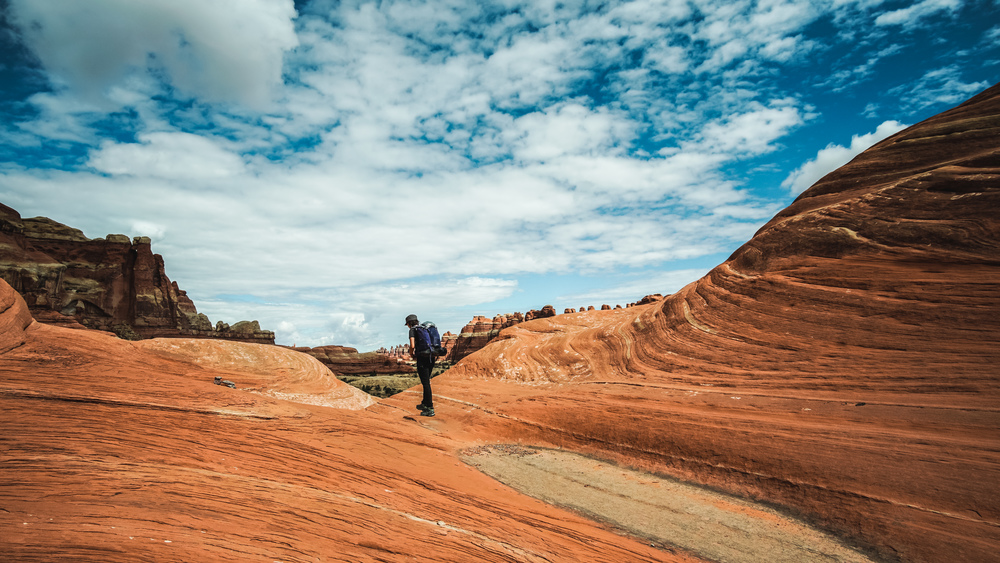
When you had out from the Squaw Flat trailhead, there are many trails you can choose, and you can combine them in any way you feel up to. The trails are well marked (where there’s vegetation it’s difficult to go wrong, see the picture below, on the slickrock there are cairns to mark the trail and at every junction there will be a signpost to guide you) and easy to follow. Every time you cross from one canyon into the other, you will have to go over (or through at one point) the canyon wall, so the trip is a bit on the strenuous side. Also, in summer it gets super hot here, so be prepared and carry enough water (there is some water out there, but it’s limited and definitely will need to be treated) and sunscreen.
The route is straightforward enough: from Squaw Flat campground, follow the Peekaboo Trail, then take a right to head into Squaw Canyon. From Squaw Canyon, continue all the way until you reach the junction to head into Elephant Canyon (involves climbing a ladder up and another one down). When you get out of Elephant Canyon, head east back to Squaw Flat Canyon.
A backcountry permit is required and you can reserve yours online well in advance of your trip or pick one up at the visitor center on the day.
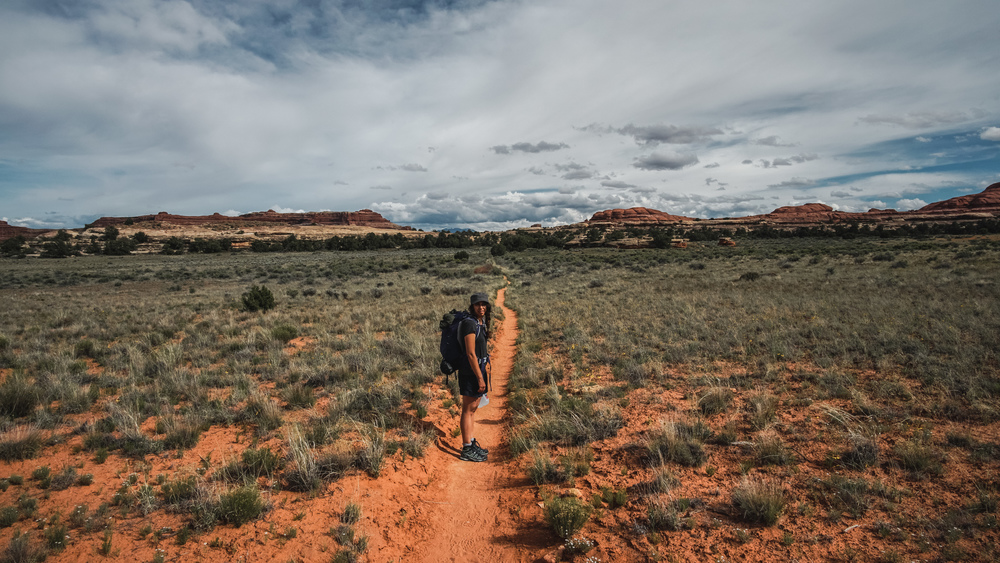
We set out quite late in the afternoon (we spent the morning and early afternoon in Arches NP and it is a bit of a drive down from there), so we only hiked a moderate 2 miles to our backcountry camp site (in Squaw Canyon, SQ1). But, the scenery in this part of the world is such that after hardly more than half a mile of hiking, you will found yourself in a wild, prehistoric-looking landscape. I probably spend the whole trip with my jaw dropped – it’s maddeningly stunning out there.
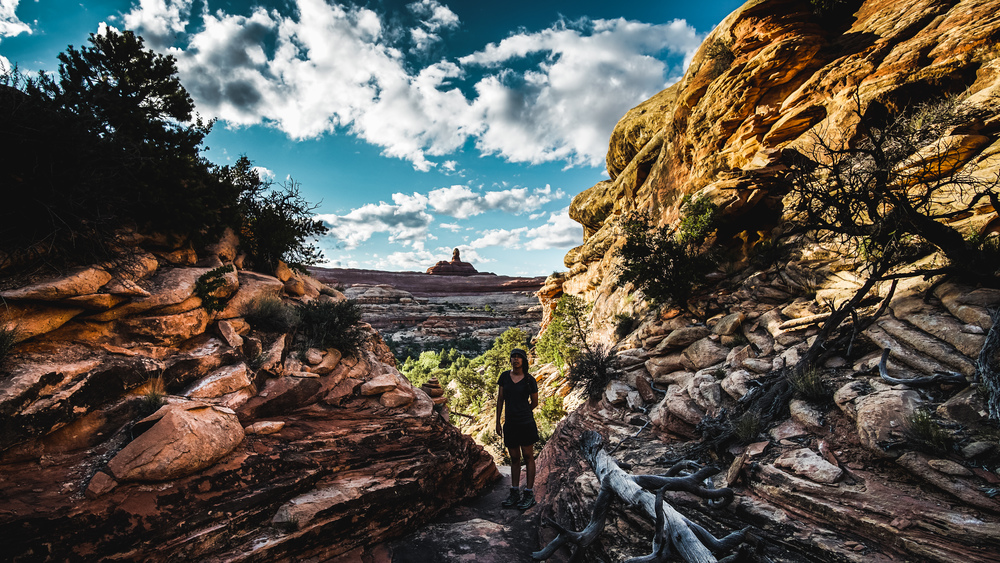
We pitched our tent, left our backpacks and then, there still being plenty of sunshine left for the day, we explored the area a bit. So without heavy bags, we hiked a bit further into Squaw Canyon, then headed up over into Lost Canyon. You will head up a narrow passage between two rock walls, but when you look back, you get glimpses of the great view you can get by scrambling up a bit the canyon wall on your left (east).
So, the sun starting to set, we headed up the canyon wall and enjoyed an amazing view. This is a general rule: every time we were on a canyon wall, the views were simply stunning.
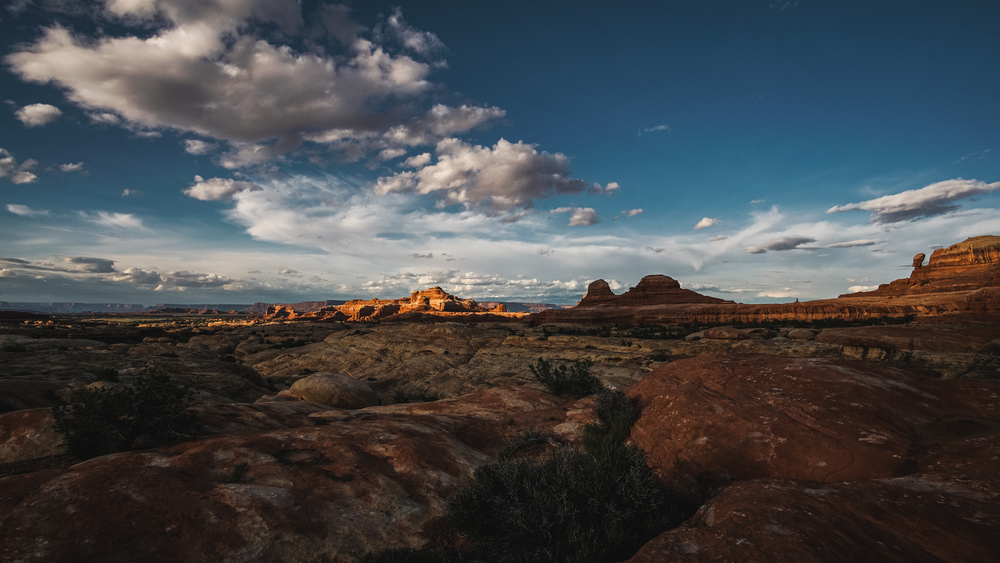
Needless to say, the sunset was spectacular. We just sat down and enjoyed the show.
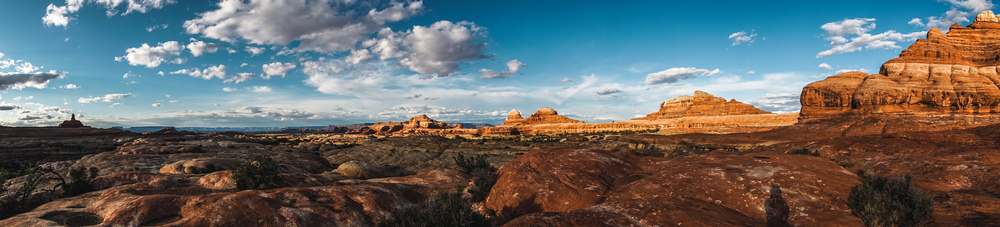
It is a scenery straight from a Western, the view and red rocks seemingly endless. Soon enough though the sunlight started to fade, so we headed back to our camp for the night.
What surprised us a bit was the difference in temperature once the sun has set. In fact you are at altitude and so it will cool down quite a bit at night. When we did this trip (late May 2015) the temperature hit the low 40s or high 30s during the night. In fact we had only brought our summer sleeping bags, so we spend a bit of a chilly night. To make up for it though was the night sky.
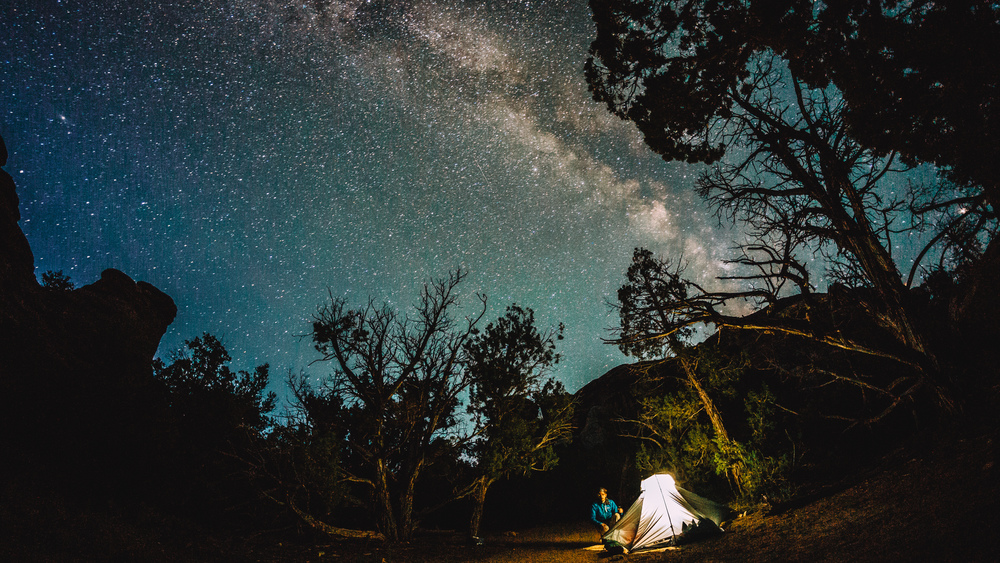
I had recently bought a “serious” photo camera, and had read several tutorials (I suggest you check out www.lonelyspeck.com — you will find all the tips you need to get started) on how to capture the Milky Way. So you can imagine that I was itching to try my luck. So I set my alarm for 3am and when I woke, the sky was so dark (the moon had set quite early in the night), it was easy enough for a total beginner like me to get a good shot. The moment I saw the Milky Way peeking back at me from the camera screen was so sweet. I went back to bed happy.
Leg 2: Squaw Canyon to Squaw Flat trailhead via Elephant Canyon
In the morning I got up early and went for a short run. For this, I headed back up the Squaw Canyon, then took a right onto the Peekaboo Trail, heading towards Lost Canyon (the other end than the one from which we watched the sunset). Here too, you have to scramble up onto the canyon wall, and the view is equally stunning.
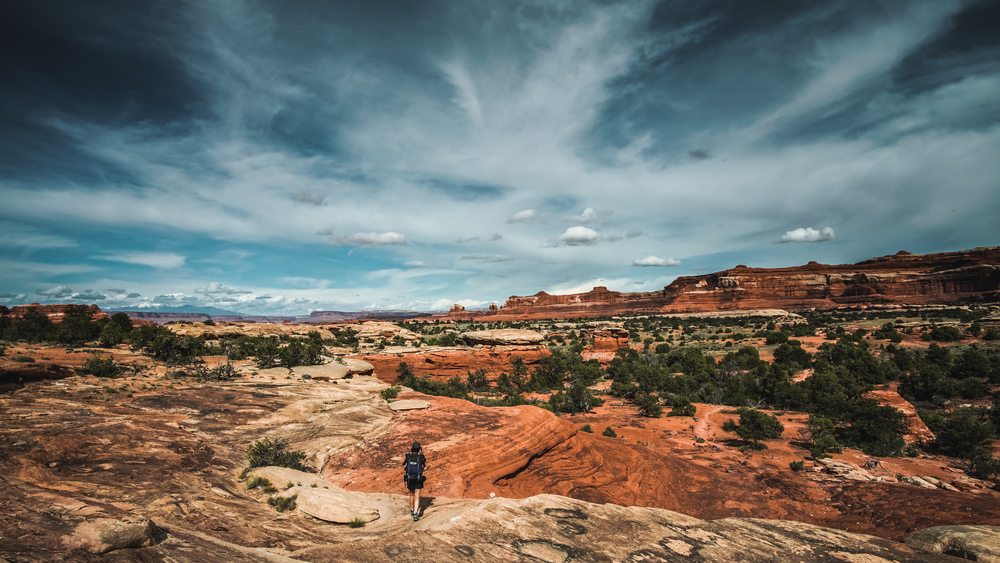
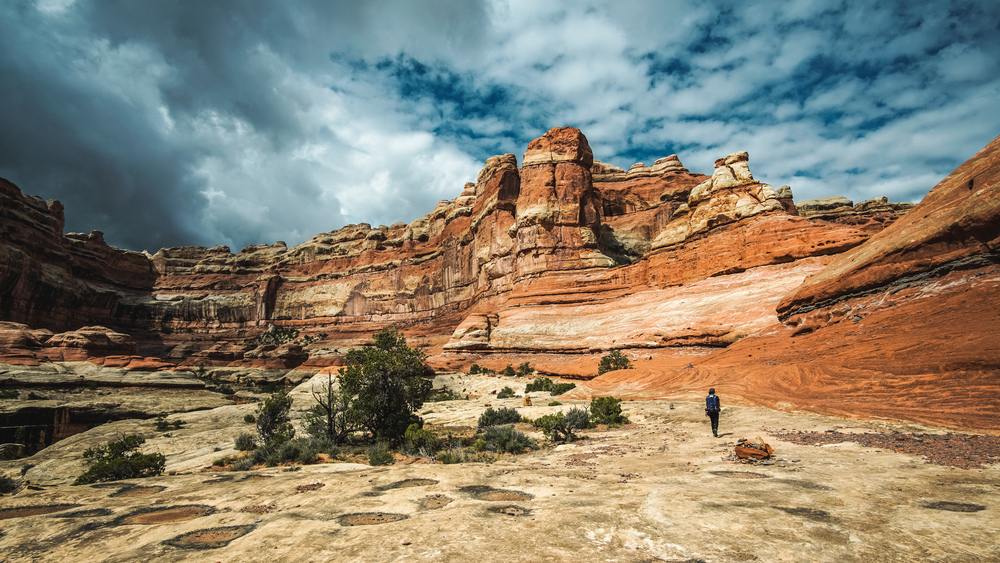
After a good breakfast, we packed up the tent and the rest of our stuff and headed further down Squaw Canyon. We pressed on past the Lost Canyon junction. After a half mile or so, the trail takes you up to a ledge, mid-way up the canyon wall. You then continue along this ledge for the next mile and a half or so. This section, until you climb a ladder to get into Elephant Canyon is the most scenic along the route: it is truly jawdroppingly beautiful. I couldn’t really contain my emotions and walked around wide-eyed and smiling like a kid in a toy or sweet shop.
A third into this beautiful stretch of the route, at the junction with Big Spring Canyon, you have to squeeze through a tight tunnel to continue along Squaw Canyon. We actually had to take our backpacks off to be able to squeeze through. When there are two of you, it is easy enough to pass the backpacks through, but this could be a bit more awkward if you are on your own.
You then continue walking right below sheer cliffs on your left until you reach a ladder that takes you up to a gap in the canyon wall, and after that there is another ladder down into Elephant Canyon.
You will walk right down into a wash and more or less follow this one for the next two miles. At some point you reach the junction with the Druid Arch Trail. For this route you just continue north, but if you are up for a 4 mile return detour to Druid Arch, then head left / south. We decided to skip that detour and headed straight north.
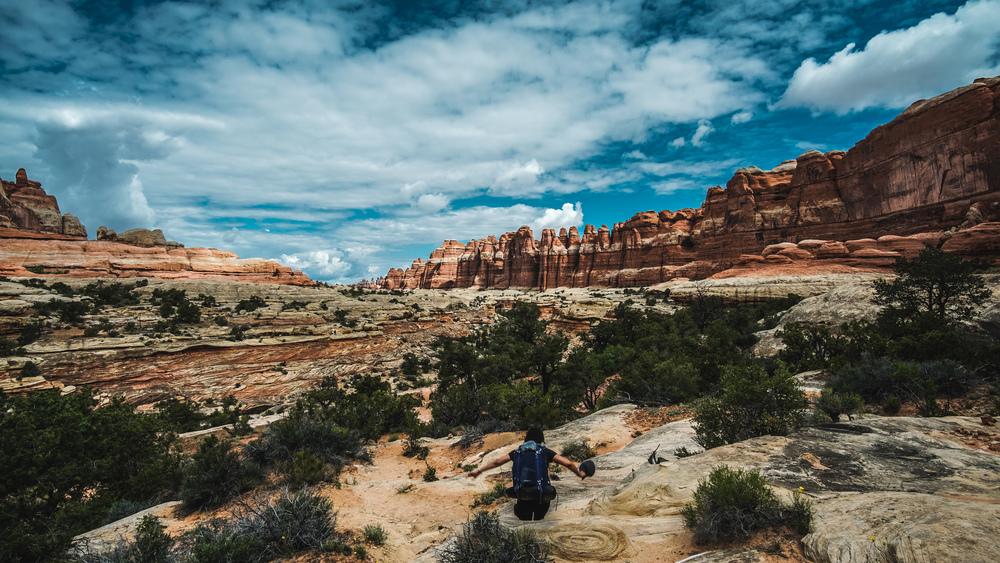
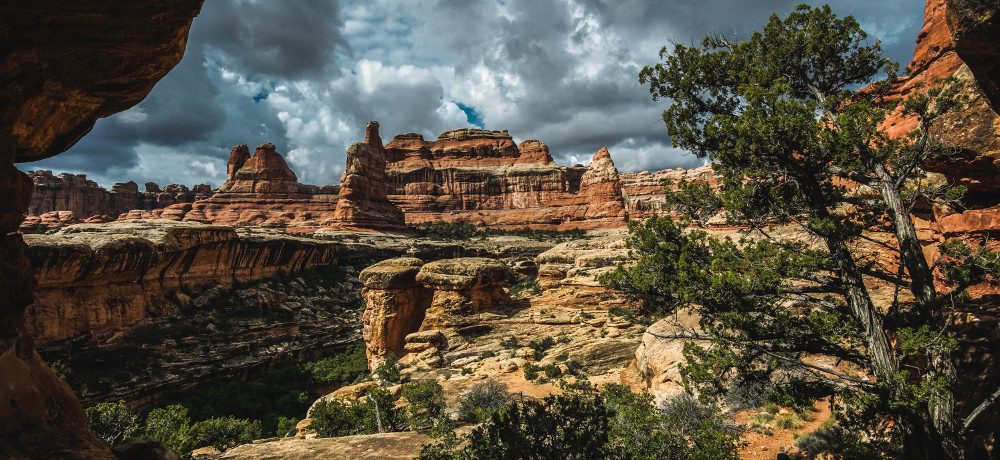
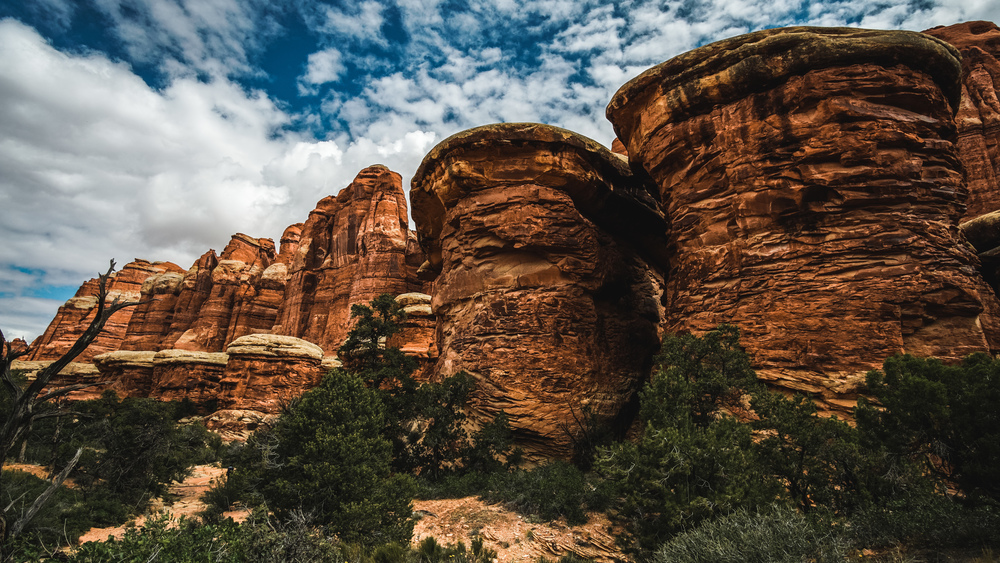
In Elephant Canyon you can truly appreciate where the Needles District got its name from: there’s rock spires (aka needles) stretching along the eastern canyon wall. In fact there’s plenty of weird rock shapes in Elephant Canyon and it is a really nice section of the route.
When you reach the next trail junction, head left / east: it’s about 4 miles back to the Squaw Flat trailhead. After an uphill half mile there will be a junction with the Chesler Park Trail, just press on straight ahead. As you head back to the trailhead, you are leaving the most impressive scenery behind, but it’s still a pleasant walk, if a bit strenuous at times.
So in summary this is a short-ish overnight backpacking trip, but it’s incredibly beautiful and reasonably strenuous. It is also a very quiet part of the Canyonlands National Park (we only came across people near the Squaw Flat trailhead and in Elephant Canyon on the Druid Arch Trail), so perfect for solitude seekers.
Data files (click on the links, then download whatever format you prefer from the gpsies site):
Complete route: http://www.gpsies.com/map.do?fileId=zaiwzoordnggadss
NB: I did not use a GPS watch when I did this trip. So I mapped the route from the trail information on Open Street Map — so best to use the GPS data as indication only and follow the route description, your map and trail markers.
Comments