How long?
1/2 day (running) or 1 day (hiking)
How many miles?
15.5 miles / 25 km
(~13 miles / 21km without any detour)
How?
Trail running or hiking
Map required, compass optional (i.e. well maintained & sign-posted trails & prominent features all around; still I would carry a compass just in case)
Maps?
New York New Jersey Trail Conference Map #119
Itinerary:
Manitou rail station-> Anthony’s Nose -> Bear Mountain Bridge -> Bear Mountain -> Manitou rail station
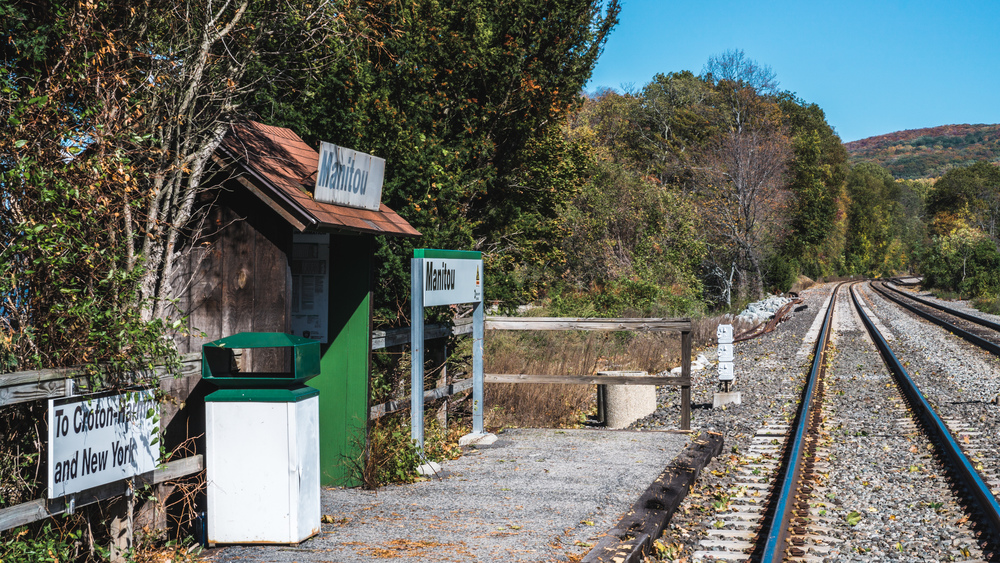
Metro North from Grand Central or 125th Street takes you from NYC to Manitou. Be sure to check that your train does indeed stop at Manitou as it is something of a request stop and you will need to be in the last 2 coaches to get off the train at Manitou (it’s just a level crossing with a shed; not really a proper train station at all).
Manitou -> Bear Mountain
When you get off the train, you just go straight on ahead along the road (Manitou Station Road), leaving the Hudson river behind you. Cross highway 9D and follow the dirt road for 200-300 meters, then take a right onto South Mountain Pass Road and follow this for half a mile until you hit the trailhead on your right (the Appalchian Trail (AT) crosses the road here).
Now that you are on the trail, follow the white blazes of the AT for a bit over a mile. At the beginning the AT will follow a wood road used by the military at Camp Smith, but then will shoot off to the right at some point, very easy to miss. Anyway it’s not too bad if you do miss this turn (if you download the GPX file below, you’ll see that I missed it on my way out and only got that part correct on the way back), as you will be able to get back on the AT before it meets up with the Camp Smith Trail (blue blazes). Here the AT plunges down the mountain on the right, and this is where you will need to go to get to the Bear Mountain Bridge and Bear Mountain. However, you can do an optional out-and-back detour (0.6 miles each way) to Anthony’s Nose. If you arrived on the first train and visibility is good, I urge you do this detour now: Anthony’s Nose will become busy later in the day, and the light is best in the morning here as you are looking due west.
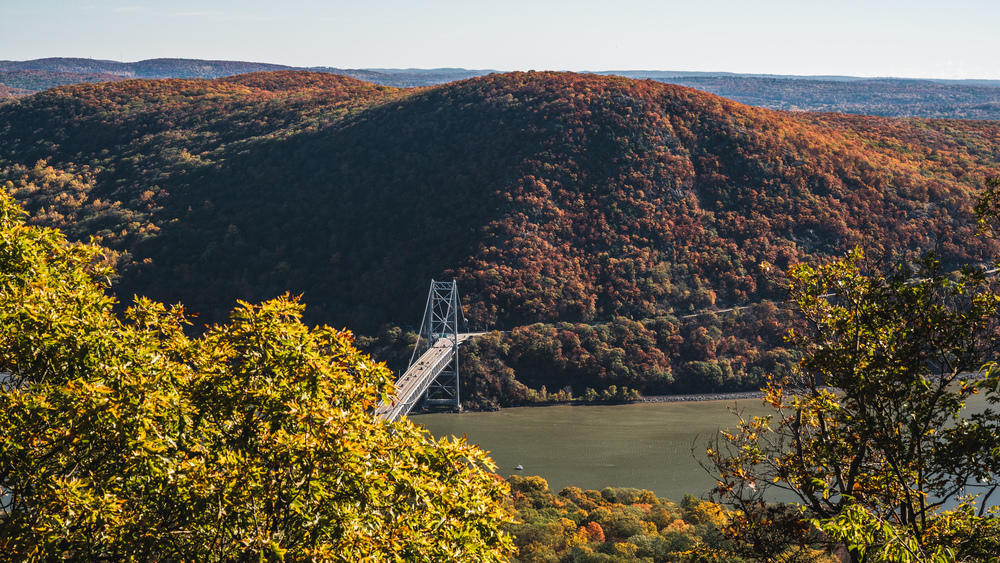
The view here is spectacular and it will give you a good idea of what is to come: you see the bridge you will cross shortly and Bear Mountain looms up before you across the Hudson.
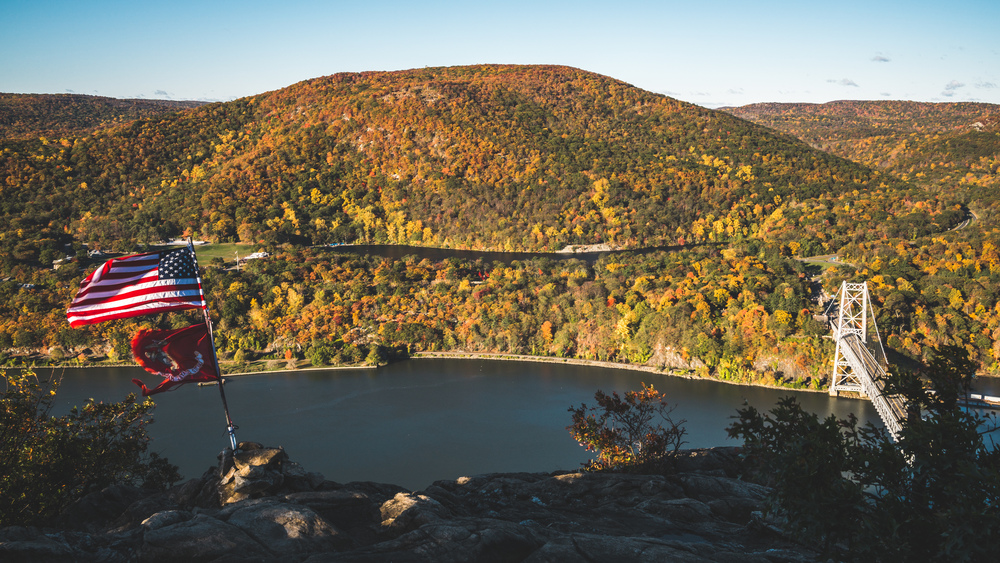
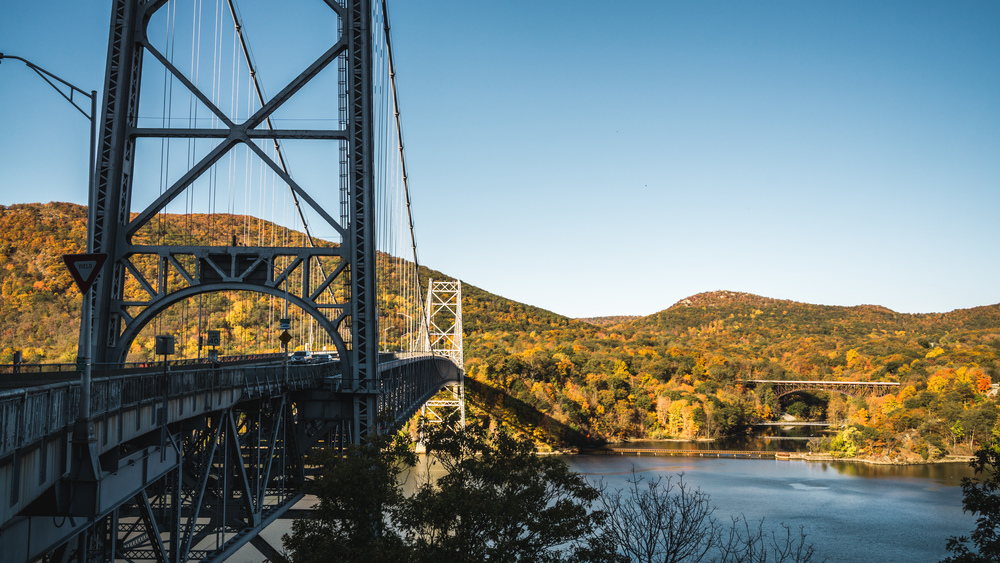
Once you took in the view, head back to the Camp Smith Trail and AT crossing, then head down the mountain to the Bear Mountain Bridge. It’s another gorgeous American bridge, a real pleasure to cross, and the view north is breathtaking.
Once on the other side, cross the road and head towards the shore of Hessian Lake. From here you will be on the loop of Bear Mountain. You can go either way: clockwise, heading up Bear Mountain on the AT, then down the Major Welch Trail (MWT), or anti-clockwise with the MWT first, then the AT. The MWT is good fun as you’ll be walking over slick rock to get up (resp. down) the mountain.
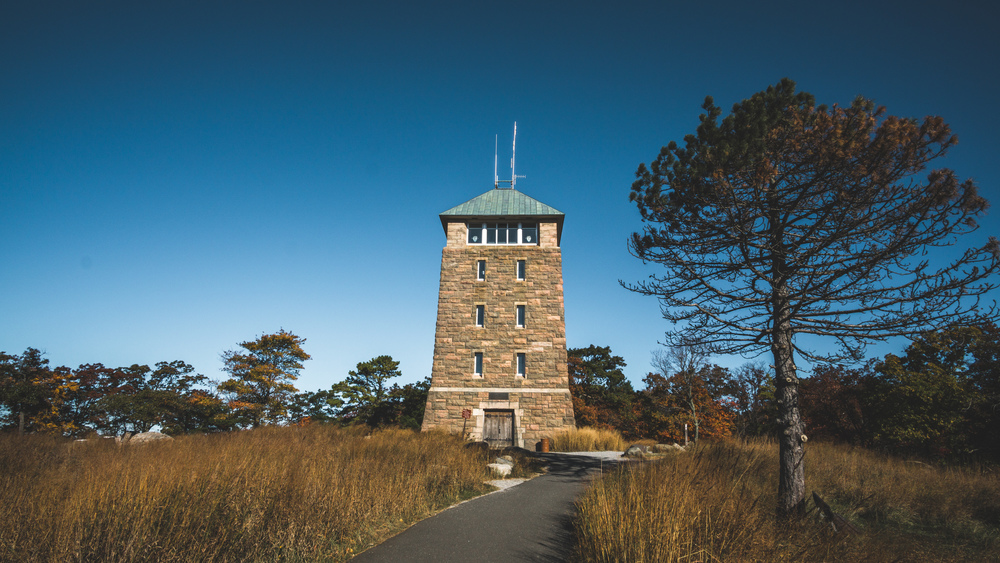
Whichever way you ascend (on this particular trip I went up the AT, down the MWT), though it’s not a very long ascent, it will knock the breath out of you and once you manage to get your sorry ass up to Perkins Tower, you will be greeted by fresh looking car drivers who haven’t really earned the gorgeous view that awaits you here.
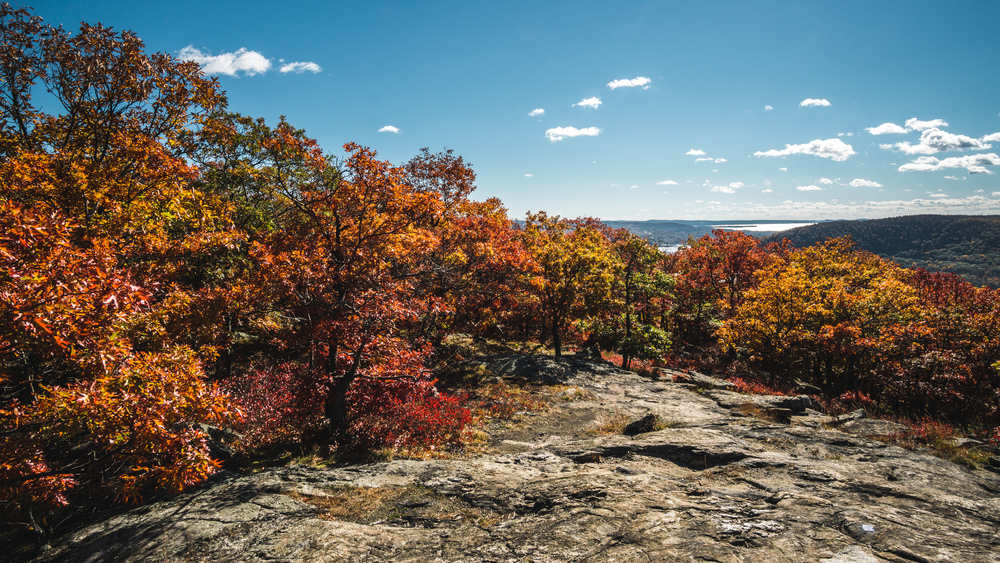
Bear Mountain
On good visibility days you can see the Manhattan skyline (~40 miles away) in the far distance when you are standing at the main viewpoint, looking south. In fact you can see the NYC skyline on the cover image to this post above. Rapper B.o.B. once took this fact as proof that the Earth was flat, not curved and was promptly corrected by Neil DeGrasse Tyson (which did not stop him to release a song, called Flatline, about his theory and he even mentions Tyson in it).
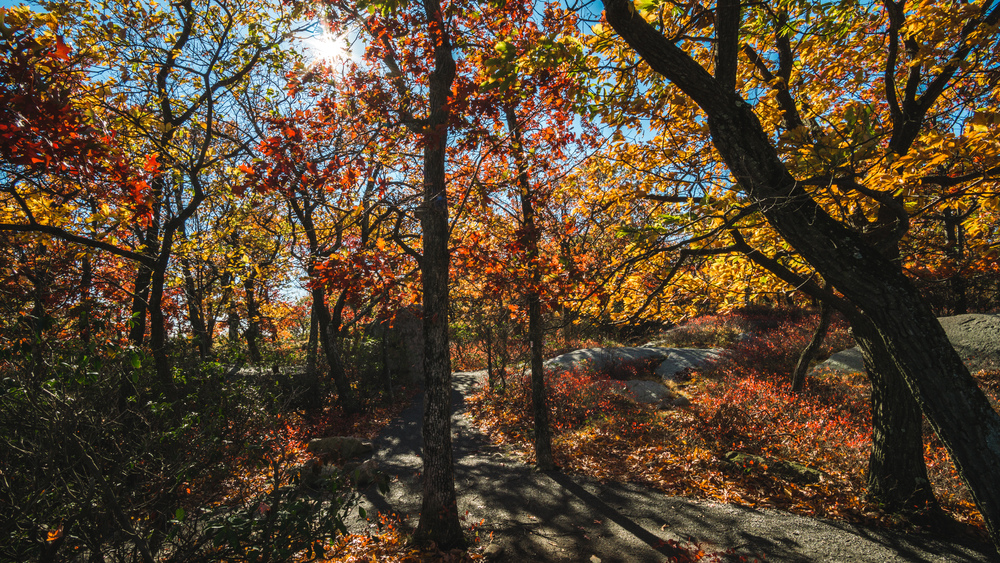
The trees and boulders on top of Bear Mountain are a delight in autumn, and particularly the top end of the MWT makes for a fine picnic spot (it’s also bit removed from all the crowds at Perkins Tower), so go for it – enjoy your lunch in nature.
On the MWT, just below the top of Bear Mountain, you will get a good view across the Hudson, looking over Bear Mountain Bridge the other way as earlier and opposite you will be Anthony’s Nose.
Bear Mountain -> Manitou
Once you completed the loop of Bear Mountain, you need to cross the Hudson again, and make the tough ascent of the AT. If you haven’t gone up to Anthony’s Nose before, you have another chance now. If you do go, there’s also a good view to be had a hundred yards south of Anthony’s Nose, along Camp Smith Trail (another good, quiet picnic spot, just a bit removed from the crowds at Anthony’s Nose). Once you are done here, you have two options: follow the Camp Smith Trail until its end, then continue along the road to Peekskill and take the train back from there. From Anthony’s Nose, this is a tough 6-7 miles. The other option is that you just head back along the Camp Smith Trail to the AT, then head back to the trailhead and then Manitou.
At Manitou, you can either head back to the station the way you came, or, if you’ve got spare time before the next train, loop back to the rail station via Manitou Point Reserve. It’s a nice detour, but not a must.
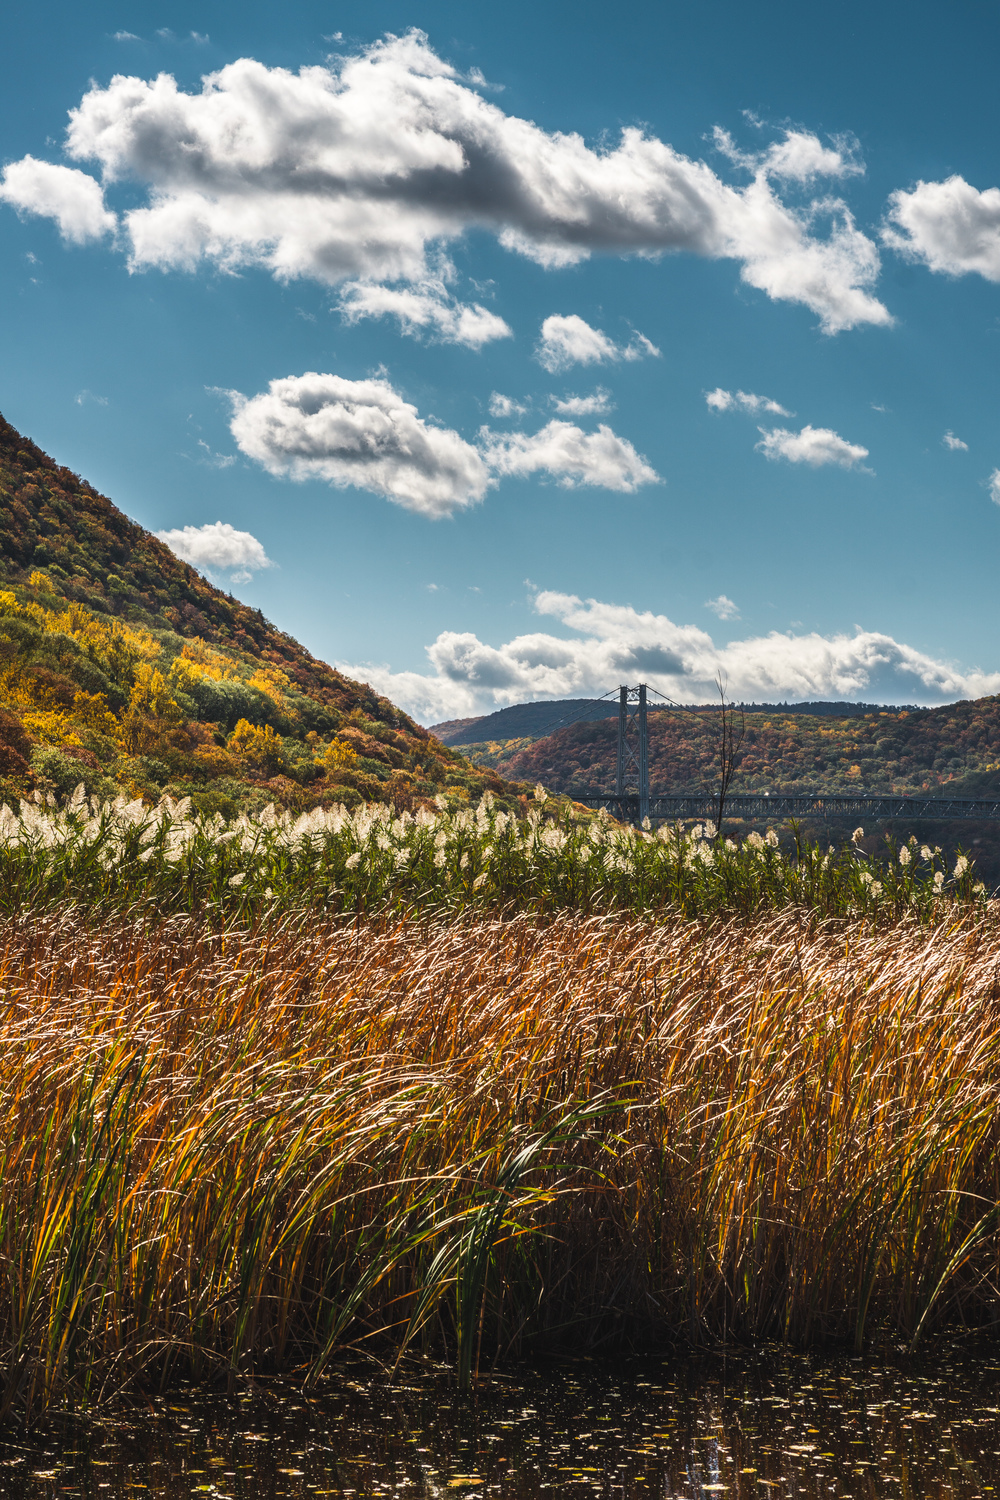
One of the finest views of the entire route is actually right at the Manitou rail station: look south across the little pond/swamp towards Bear Mountain Bridge — if the sun is out, it’s just gorgeous.
However, it’s safer to wait for the train on the other side of the rail crossing. You can actually wait for the train on a little beach on the Hudson, or else in the little shed that serves as the rail station. When the train arrives (again, make sure you checked the times beforehand as not every train stops here), everyone will need to get in through the same door. Relax for an hour on the train, enjoying the find views over the Palisades along the route, and you will be back in NYC.
Data file (click on the link, then download whatever format you prefer from the gpsies site):
Complete route (including detouring twice to Anthony’s Nose and once to Manitou Point Reserve): http://www.gpsies.com/map.do?fileId=zamewyqbxffnnpne
]]>How long?
1 day or 2 days, 1 night
How many miles?
25 miles / 40 km
How?
Run / hike as a day trip
Hike + wilderness or campground camping
Map required, compass optional (i.e. well maintained & sign-posted trail — just follow the red tags)
Maps?
New York New Jersey Trail Conference Trail Map 141 (Northeastern Catskill Trails)
(You can probably also get a National Geographic topo map to do this route — certainly I saw 2 hikers with such a map on the trail — but whenever you can, get one of the NYNJ Conference maps — they are really high-quality, made by and for hikers, and the profits from the sale go straight back to maintaining the trails.)
Itinerary:
Prediger Road trailhead -> Stony Clove Notch -> Spruceton Road trailhead
Pretty much since I moved to NYC, I wanted to do the Devil’s Path. It is reputedly the toughest hike on the entire eastern seaboard and one of the first things I read about it was that it is one of the deadliest hikes in the US. The latter is also a consequence of the trail being very popular with hikers — the more people on a trail in a year, the more people that can die while on the trail (so it’s partly just a numbers game; rest assured: almost everyone doing the Devil’s Path will make it out alive). So given this almost mythical reputation of the trail, it is a bit of a surprise it took me well over a year and a half to get out and do it. No doubt the fact that you need to rent a car to get up there contributed to why it took me so long to get it done.
The most annoying thing about this hike is that it is one-way and not a loop. So unless you plan to make it a grueling 50 miles out-and-back hike, you need to either drive up with some friend(s) in 2 cars and leave one car at either end of the trail or arrange for a taxi company to drive you from the end to the start, resp. pick you up at the end (the former is obviously much easier as phone signal is not great in the region and you’d anyway would have to wait for the taxi to make it to the trailhead). I organised this trip on a whim on a Friday lunch time, so booked a rental car in NYC to be picked up at 4am on Saturday, and arranged to meet Smiley’s taxi in Tannersville at 7am. I found Smiley’s through hiking forums and sure enough they know all about the trail, will be able and happy to give you plenty of advice and they will also make sure that you’ve got everything you need before you set off (e.g. they tell you that there aren’t really any reliable water sources on the eastern half etc). For a simple hike, the taxi fare ($70 to drive with the taxi from Tannersville to the Spruceton road trailhead, leave my car there, then be driven to the Prediger Road trailhead — all of which took about 1 hour) obviously makes this hike more expensive than most hikes around NYC, but well, if it’s the only way to do it, so be it.
With this set-up it meant I was going to do the Devil’s Path from the East to the West. The eastern half is really what gives the route its name and reputation, so you front-load the toughest bits. If you do it the other way, you get to the hard stuff by the time you are already tired. The route itself is dead easy: just follow the red trail blazes from start to finish. When I did the Devil’s Path the trail was in good condition, except for occasional patches where the summer vegetation had grown over the trail.; but at no time was I at a loss where the trail was headed.

Starting from Prediger Road, the first few miles are quite easy: flat or with just a modest incline. For the first hour I did almost 5 miles (NB I did this as a run/hike, meaning anywhere it was not too steep or dangerous, I would jog/run). But soon enough, the climb proper to Indian Head will come up and it will be steep, no doubt about it.
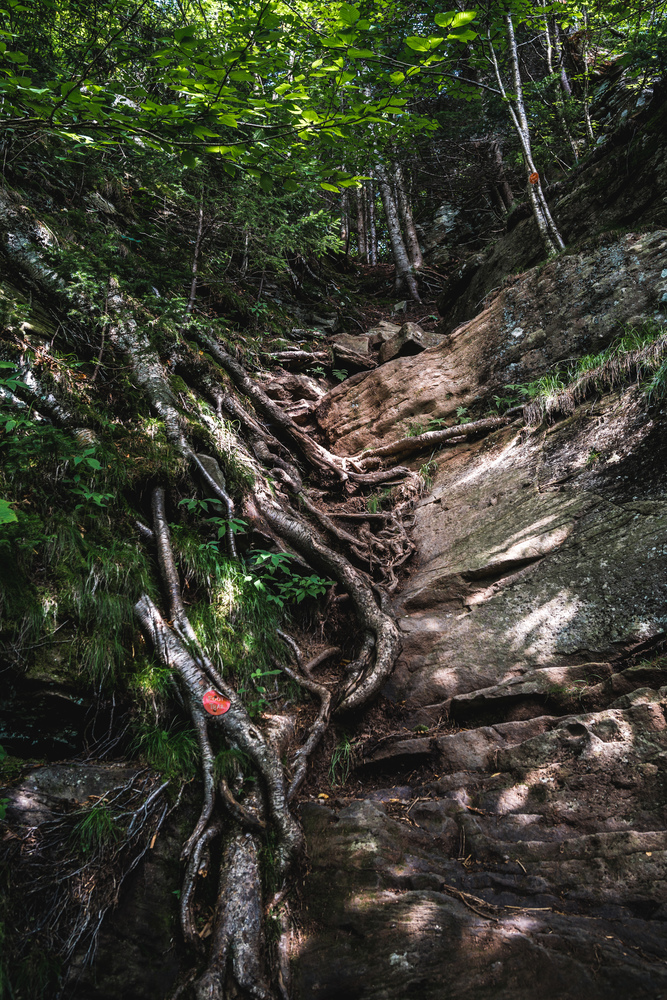
In fact over the next 25 miles you will occasionally have to navigate near vertical inclines, using tree roots and rock features to haul your sorry ass up. But it’s all good fun.
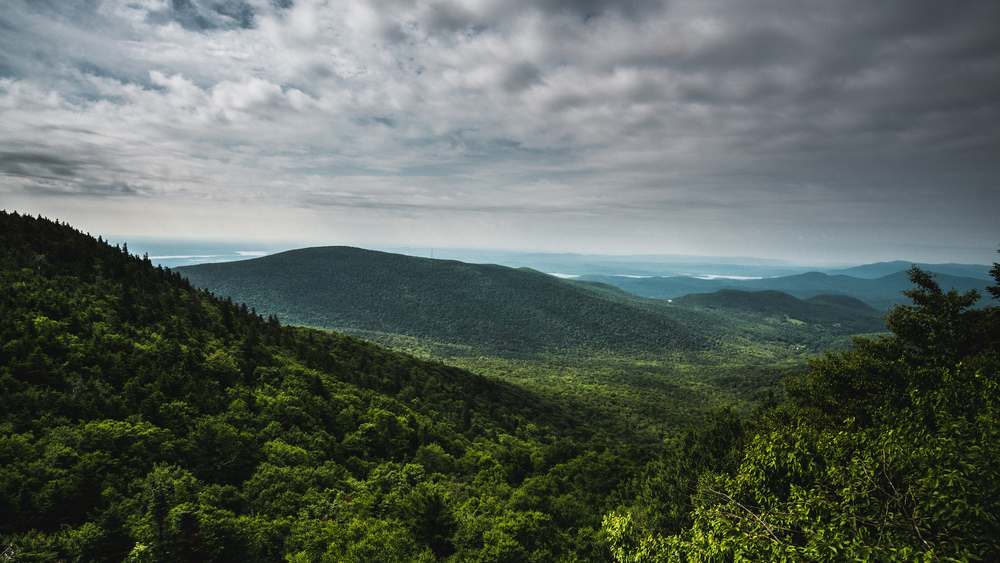
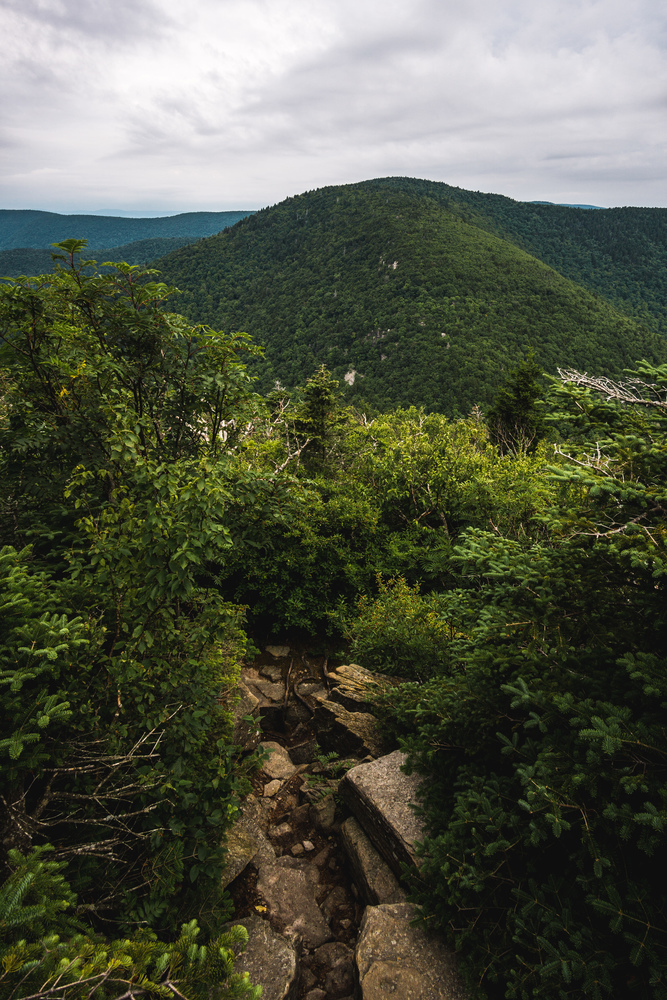
The Catskills have quite dense forest growing throughout and for almost all of the trail you will be hiking / running under a dense canopy, fairly oblivious to anything more than 100 yards off the trail. However, there will be occasional clearings, often rocky ledges, from which you get quite amazing, far-reaching vistas over the Catskills and even the Hudson river. There are really 3 main reasons why people do the Devil’s Path: i) the challenge, ii) the vistas, iii) the fact that you will bag 5 of the 35 Catskill High Peaks (defined as those over 3,500ft height). The 5 peaks you will get are: Indian Head, Twin, Sugarloaf, Plateau (all on the eastern half) and West Kill (on the western half). If you are OK to do 2 short-ish detours, you can claim 2 more: Hunter and Southwest Hunter.
The Devil’s Path is so tough because you go up and down and up and down and up and down. It’s no easy ridge hike. Each and every mountain along the route will need to be climbed from the bottom up. Also, do not underestimate the descents as these can be quite technical. Especially when you come down Twin Mountain, you have to navigate quite a few steep sections and sharp rocks. This slowed my progress quite a bit — you simply cannot run downhill on that stuff.
After Twin Mountsin, the trail takes you up the next Catkills Peak: Sugarloaf Mountain. If you have not felt the effort until now, you will certainly feel fatigue set in by the time you reach the summit of Sugarloaf. It’s another long, tough climb up and the descent from Sugarloaf is quite technical too with several sections of loose rocks and parts where you have to squeeze through in-between rocks. There was a solid rain shower as I made my way up Sugarloaf and this slowed my progress, since for the descents now, the rocks had become wet and slippery, so running was not always possible, even on the flatter sections.
After Sugarloaf you still have to get over Plateau Mountain and once you come down this, you will cross a road: route 214 at Stony Clove Notch. Though you technically have done a bit over half of the distance by now (certainly the toughest bits are done and dusted now), mentally it feels as half-way since the road divides the Devil’s Path into its eastern and western halves. At Stony Clove Notch there is a small artificial lake, Notch Lake, and if you walk a bit down the road there would be a ranger station and Devil’s Tombstone campground. If you plan to make it a 2-day hike and not camp in the wilderness or a lean-to, then this would be your base. Some people also leave their car at the trailhead parking in Stony Clove Notch (note though that parking fees apply at this trailhead), since that gives them the option to pull out half-way.
Anyway, there is a water fountain, so be sure to fill up your water bottle, and, if you did not already have lunch at one of the overviews, here would be a nice enough spot too.
After this, you only have two more significant ascents to make: up the side of Hunter Mountain (you don’t go to the top, you cross the saddle between Hunter and Southwest Hunter; going to the top of Hunter mountain is a 1.6 mile one-way detour, so would add ~3.2 miles / 5km to your route; going to SW Hunter is a ~1 mile one-way detour) and up West Kill. There is a little side-peak to West Kill that you ascend after West Kill which barely looks noticeable on the map, but that last steep ascent comes a bit as a surprise, and you really are tired by then, so be aware it is there waiting for you at the end.
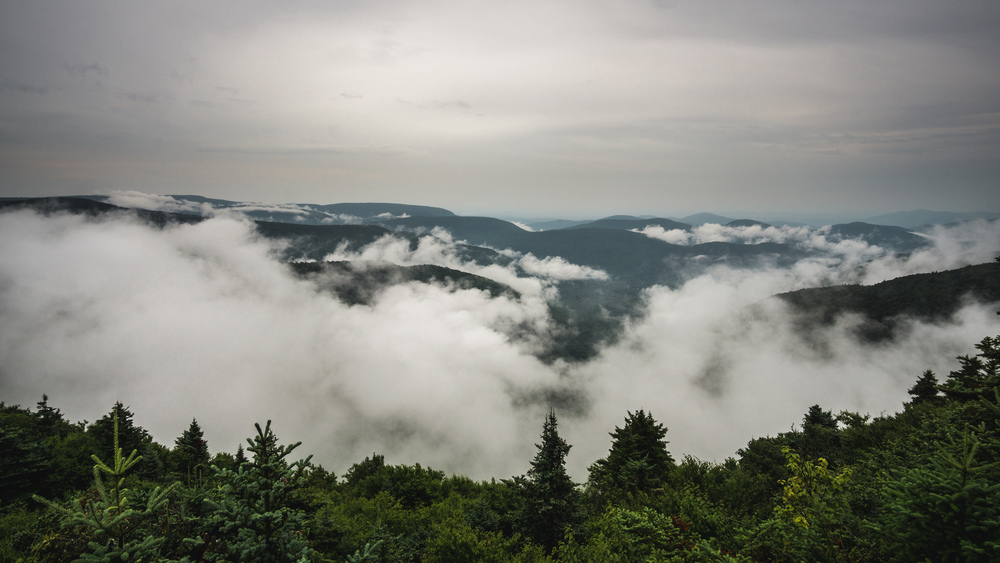
When I started going up Hunter Mountain, it started raining again and except for a short break in the downpour on top of West Kill, it kept raining for the rest of the day. Thankfully, this being July, it was fairly warm and so I did not suffer from hypothermia after becoming thoroughly soaked. Anyway, well prepared, I had spare dry clothes in my day pack, so could have changed if needed. The break in the rain was well-timed as it coincided with my arrival at one of the few viewpoints on the western half. The view from West Kill over the fog- and rain-swept Catskills was quite a sight to behold. I only encountered 3 other groups of hikers on the entire western part — the rain had kept people away (and 2 of those 3 groups were on their way down, after changing their plans due to the rain).
The descent from West Kills is fairly straightforward, though quite long. By this time I just wanted to get it over with: there were no more viewpoints, the forest is quite dense in this part and it was raining hard. The ground had become a wet mess and I slipped a few times — I still ran from time to time, but quite sparingly so; it was just too risky.
When I reached the car, I had been out on the trail for exactly 9 hours. I was a bit disappointed, as I thought I could have managed about 3 hours less, but it is a really tough route and the rain had prevented me from letting rip on the descents.
Final thoughts?
While super tough, I was a bit disappointed by the trail in the end. This is supposed to be the toughest, deadliest and generally most kick-ass trail in the eastern US; yet while some of the ascents are super steep and tough, there was less scrambling involved than I thought and I never once felt in real danger. I have done routes that involved scrambling on loose rock with a 600ft sheer drop to one side (e.g. the Snowdon Horseshoe loop), hence this slight anti-climax. Also, while a nice and rewarding hike, there are fewer viewpoints than you might expect — most of the time you are surrounded by dense bush. Don’t get me wrong: considering you cover 25 miles and numerous peaks, you will get your fair share of absolutely stunning vistas to behold, but you would have thought there would be more of those welcome breaks along the long, grueling hike. Most of the time you are “just” looking at trees, plants, rocks and the trail ahead of you. I am glad I have done it now finally, and as a day hike / run too, but I am not sure I will do it again any time soon (certainly not in its entirety).
Data files (click on the link, then download whatever format you prefer from the gpsies website):
One-way (drop you car at the final trailhead or arrange a pick-up for the end): http://www.gpsies.com/map.do?fileId=grixwiueoyzlljsg
]]>How long?
1/2 – 1 day
How many miles?
15 miles / 24km
How?
Trail running (or hiking)
Map required, compass optional
In winter: snow shoes and/or crampons might come in handy
Maps?
New York New Jersey Trail Conference Trail Map 118 (Southern Harriman Bear Mountain Trails)
Itinerary:
Tuxedo -> Claudius Smith’s Den -> Parker Cabin Mountain -> Lake Skenonto -> Lake Sebago -> Almost Perpendicular -> Claudius Smith’s Den -> Tuxedo
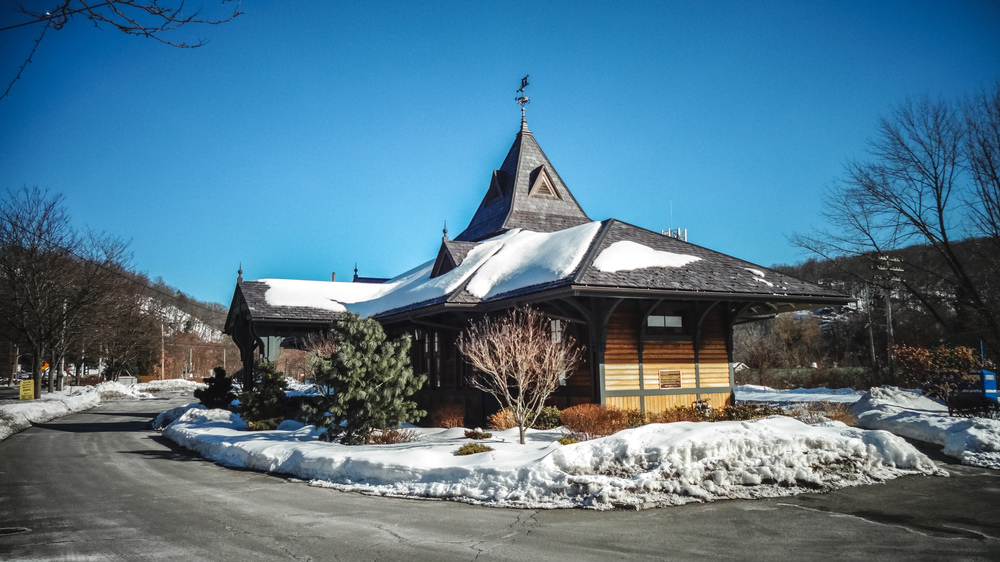
You can either take a bus or a train from NYC to get to Tuxedo, from where you set off. When I did this, in winter 2014/15, I took the bus (Short Line service from Port Authority Bus Terminal) as it was a direct journey and arrived before the earliest train arrived in Tuxedo (NJ transit to Port Jervis, but you need to change trains at Secaucus Junction). I find it quite unbelievable, especially after having lived in London in the UK for a few years prior to my move to NYC, but it only takes 50min to get to Tuxedo from Times Square in NYC. The bus stop is close to the rail station, but you still have to walk a short way up the road to get to the picturesque little rail station. After the rail station, continue up the road for another 150 meters, then head right on East Village road and cross the railway tracks. Follow the road and pass under interstate 87. After the underpass, take a left onto Grove Road. 200-250 meters up the road, the trailhead will be on your right.
There are 2 trails departing from the trailhead, one going off to the right / south (Kakiat, white blazes) and another one, Ramapo Dunderberg (red dot on white blazes), going off to the left / north. You want to take the RD trail and follow it to the first crossing. You could continue on the RD trail until you get to Parker Cabin Mountain, but if you do this, you will miss quite a few scenic views. So at the first crossing, take the Tuxedo-Mt. Ivy Trail (red dash on white blazes) and head west.

Just before the next crossing, where you’ll head north again (right) on the Blue Disc Trail, you’ll come past a rock with a small cave / den below it. This is Claudius’ Smith Den. Smith was an outlaw during the Revolutionary War and he and his men robbed the local folks, attacked / looted arsenal trains of the Continental Army and generally were up to no good and caused mayhem for everyone. They were eventually caught and hanged (January 1779 – quite a while back), but apparently they used this rock as a hideout from the local law enforcement.
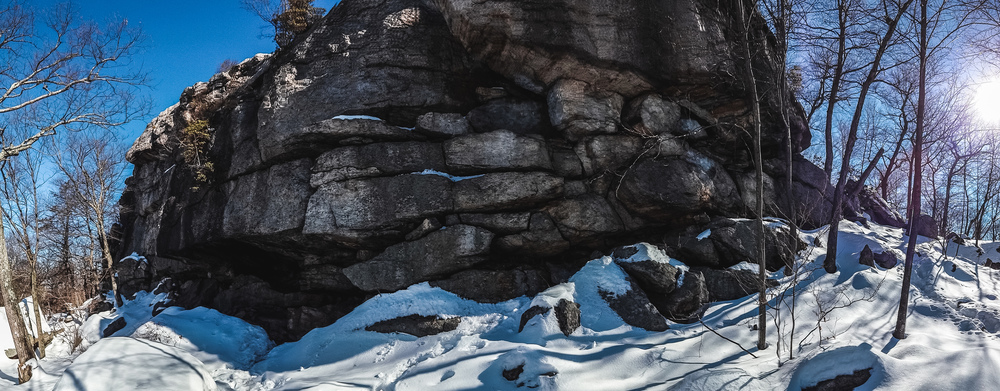
Anyway, the trail continues to the side of the rock, then up on top of it. There’s quite stunning view here, and after you took this in, you need to follow the BD trail (blue disc on white blazes). At the next crossing, you continue straight ahead, merging back onto the RD trail and follow it all the way up to Parker Cabin Mountain.
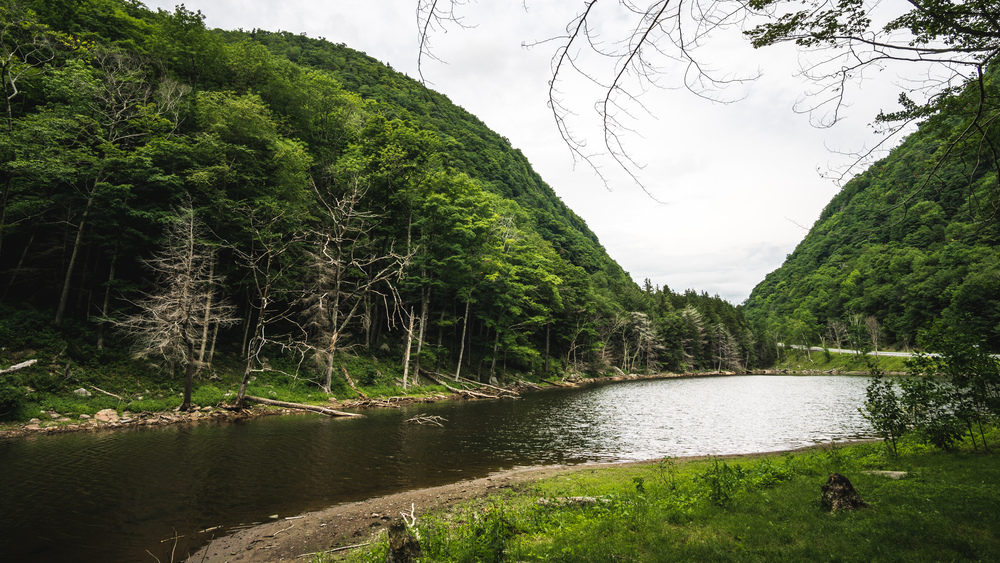
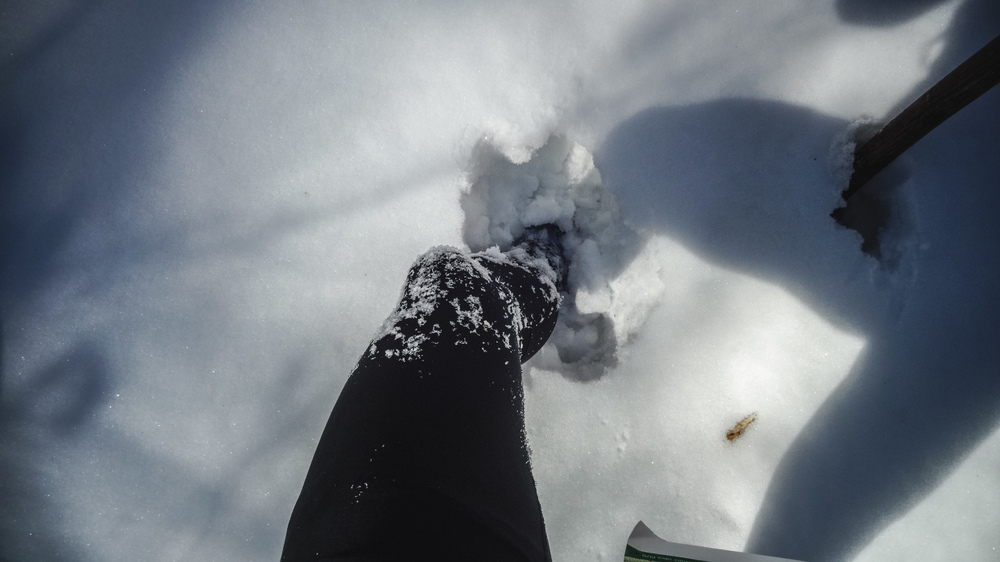
There are a couple of viewpoints on Parker Cabin Mountain where you can rest for a bit, then head down along the Triangle Trail (yellow triangle blazes). When I ran this route (February 2015), there was a power or phone line mast that had fallen over and I had to do an awkward limbo dance beneath it. Otherwise, the descent was easy. The snow on the trail was fairly solid, with only the top layer being fresh, so I could run down the hill at a decent pace, but conditions might be very different in another winter or in spring / summer/ autumn. You will cross a forest road, and shortly afterwards there will be access to Lake Skenonto. When I arrived at the lake, it was a big WOW moment: the lake was frozen solid with a brilliant white, virgin snow cover atop it. It is really strange to see such a perfectly flat stretch of the white stuff. I did not have snow shoes, so it took me a bit of courage to step onto the lake and I proceeded with great caution towards a small island in the middle of the southeast part of the lake. It was totally exhilarating to be standing in the middle of a frozen lake — I had never done anything like that before.
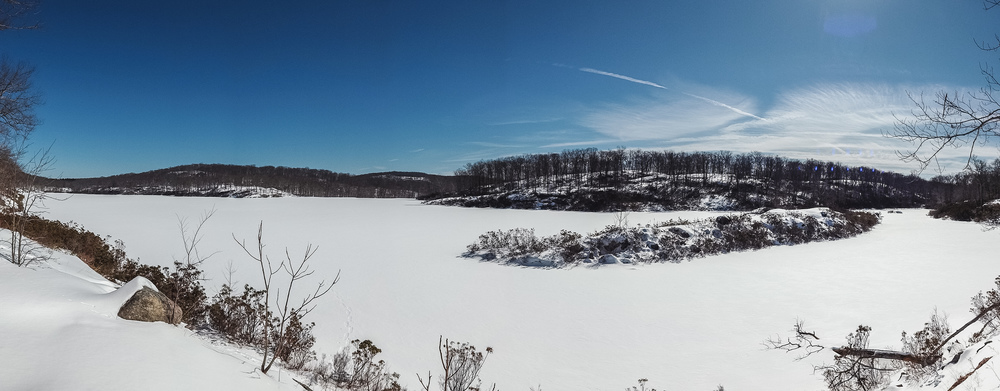
Head back to the trail, and follow the Triangle Trail past Lake Sebago (also frozen solid) and past the Dutch Doctor shelter. Now, a 100 or 200 meters past the shelter, you want to head left / east up on the Tuxedo-Mt. Ivy Trail (same one you were on earlier on). The trail blaze was hidden behind a few trees and very few people had gone up there yet since the last snow, so initially I ran right past the trail junction. Luckily there is a marsh on your right that is well indicated on the map, so soon enough I figured that I was wrong and headed back (but you can still spot this on the GPS track at the top and in the GPS file if you download it). The trail goes uphill for a bit, so you will have to work a bit harder here after a long stretch of downhill or flat terrain.
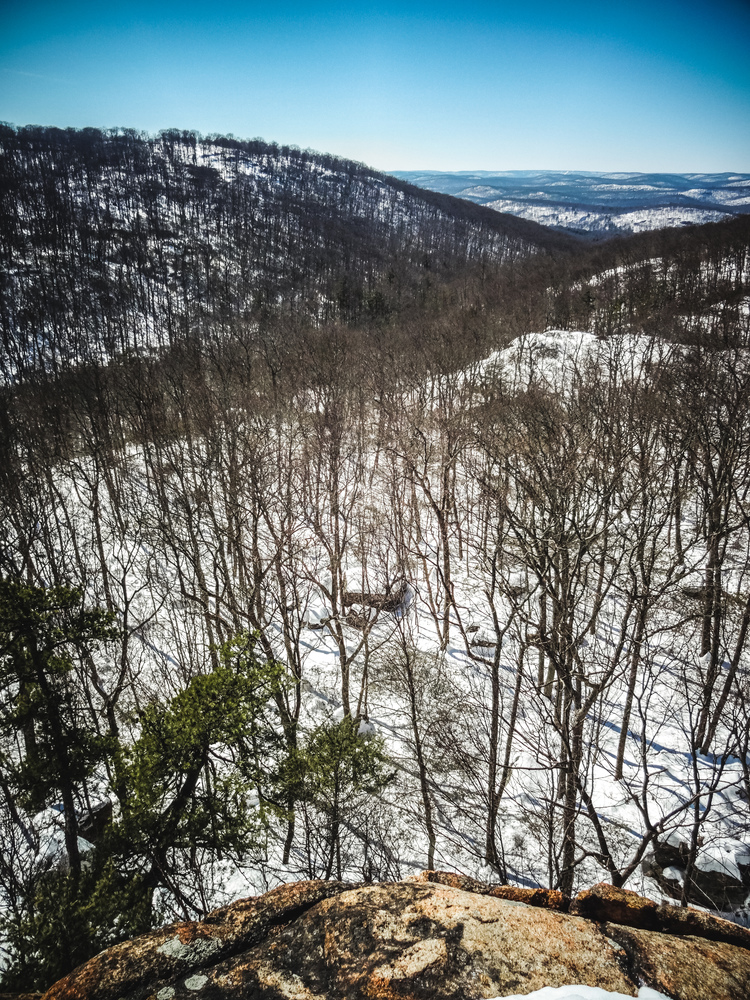
Now follow the trail past the southern end of Lake Sebago and then you have to do a bit of an awkward road crossing. When the trail hits the roads, you need to head left onto the road, run along the road until you have crossed a river, then head right back into the woods. Continue following the Tuxedo-Mt. Ivy Trail: it will take you uphill and finally you will reach a junction with the Seven Hills Trail (blue squares on white blazes). Take a right here and follow the SH trail for the next mile and a bit. You will run across the ridge of Diamond Mountain with a couple of good viewpoints along the way. Finally the trail will plunge down until it merges with the Kakiat Trail (white blazes). This is good fun running downhill here — very fast and a bit technical in places, but even with the fresh snow the conditions were quite safe to run.
Continue west on the Kakiat Trail until you cross Pine Meadow Brook over a wooden bridge. After this you need to keep a sharp eye out to your left. A hundred yards or so after the bridge, you need to cross what is now Stony Brook. The map actually says that the bridge is out here. In fact there was no bridge at all. The brook was mostly frozen and I managed to cross it fairly easily. However no one had yet been at all on this part of the Kakiat trail. That is why I struggled here a bit to find the trail at first: there was no trail in the snow, but eventually I managed to see the white blazes on the trees.
Another problem with this section was that the snow was all fresh, with no previous foot traffic to have compacted it. I went down knee deep and running was impossible. This was an incredibly tough and slow section. All in all it was just 3/4 of a mile, but it took me a long time. It got a bit easier after I had reached the top of the hill: on the other side there were deer tracks that made my way down a bit easier. Still: I would definitely have needed snow shoes for this section.
My relief was great when I reached the road at the bottom of the hill (Seven Lakes Drive — the same road that I crossed earlier while still on the Tuxedo-Mt. Ivy Trail). On the other side of the road, the Kakiat Trail was luckily more popular with hikers and the snow was mostly compacted by previous hikers. I made better progress. If you are in a hurry or tired, you can just follow the Kakiat Trail until the end: it will bring you right back to the trailhead in Tuxedo. However if you do so you will miss what is one of the best views of the route as well as a fun bit called the Elbow Brush.
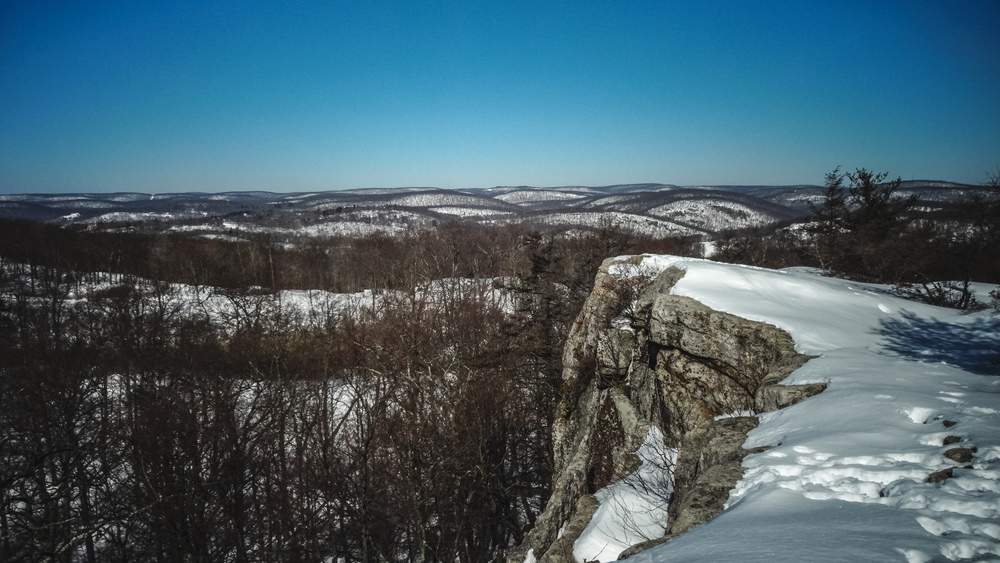
So if you are up for this, then take a right (northwest) at the junction of the Kakiat and Blue Disc trails. Now a super tough climb up to Almost Perpendicular awaits you. It is an impressive rock and truly deserves its name. The view from the top is stupendous (see the cover image of this post) and you will gladly rest there to recover from the ascent. From here you will be glad to know that it is mainly downhill to the end, with only a few short inclines left.
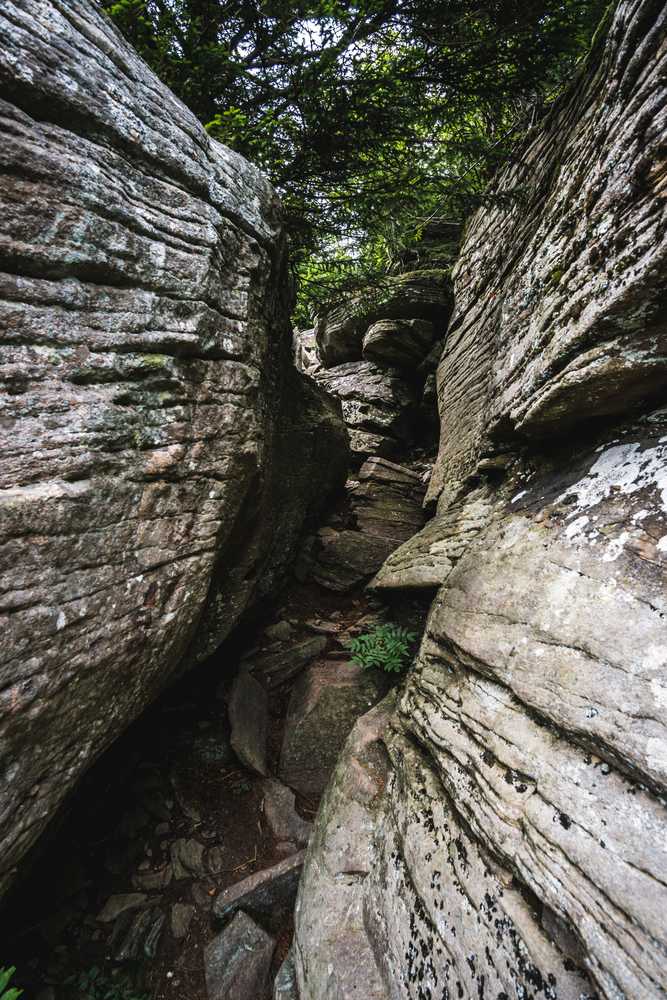
From Almost Perpendicular, follow the BD trail for 800 or 900 meters and then the trail will fork into two. It does not matter which fork you pick, they merge again after a while, but I highly suggest you take the left / western fork. This will take you through a narrow slot in the rocks known as the Elbow Brush (it deserves its name indeed).

After this, continue on the BD trail until you get back to Claudius’ Smith Den. From here take a left and follow the Tuxedo-Mt. Ivy and the Ramapo Dunderberg trails back to the trailhead in Tuxedo.
So this is a great, but fairly tough 15 mile trail run / day hike with plenty of endless views over Harriman State Park. I can guarantee you that in winter it is absolutely stunning and beautiful. Not sure how much of the viewpoints will be obstructed by leaves in spring and summer, but my guess is that it is still a wonderful route to do.
Notes
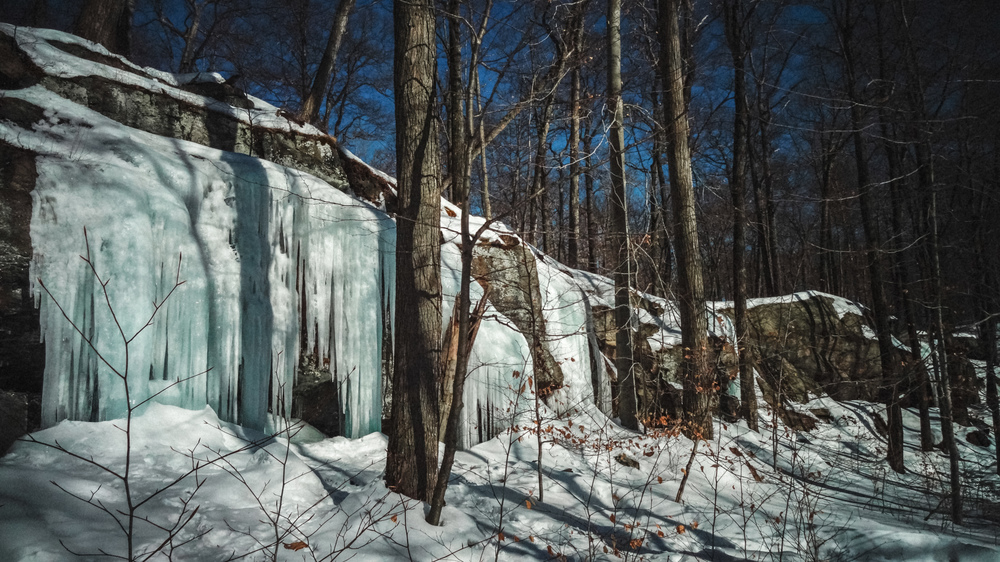
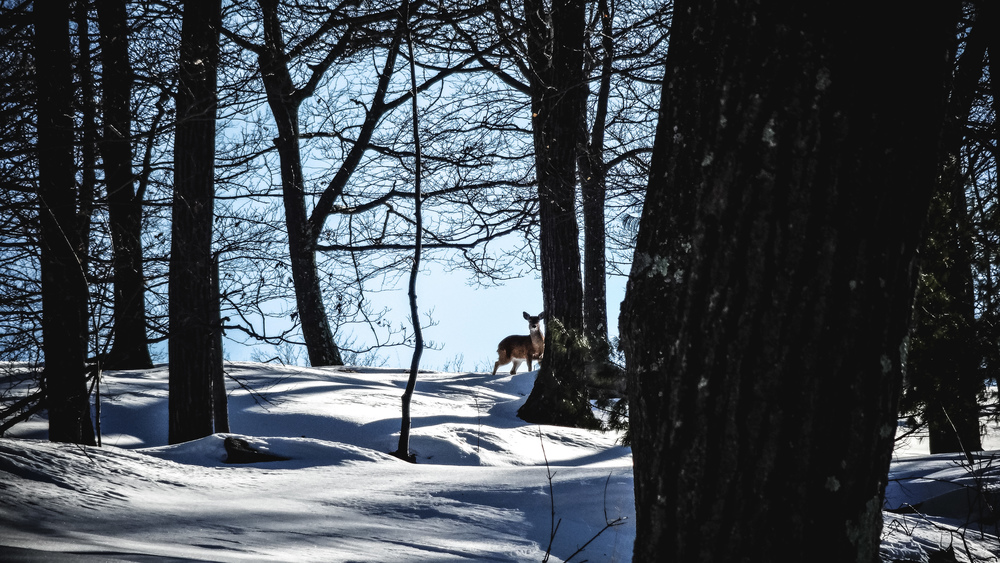
All pictures in this post were shot with small point-and-shoot camera, hence their much less than professional appearance.
Data files (click on the links, then download whatever format you prefer from the gpsies site):
Complete route: http://www.gpsies.com/map.do?fileId=eycsotccdkcsbegk
]]>