How long?
3 days, 2 nights (really just 2 half days, 1 full day and 2 nights)
How many miles?
26 miles / 42km
How?
Hiking + wilderness / backcountry camping
Map required, compass optional (i.e. well maintained & sign-posted trails & prominent features all around; still I would carry a compass just in case)
Maps?
National Geographic Trails Illustrated Map #206 or #306 (I’d recommend #306 over #206 though)
Itinerary:
Glacier Point -> Little Yosemite Valley campground -> valley between Illilouette Ridge and Mount Starr King -> Glacier Point
Leg 1: Glacier Point -> Little Yosemite Valley
The route for this leg is incredibly simple: starting from Glacier Point follow the Panorama trail until it merges with the John Muir trail and follow this one until Little Yosemite Valley. This first leg is just over 7 miles of hiking, and mostly downhill. So you can set off in the afternoon if you want to arrive at the campground in the early evening.
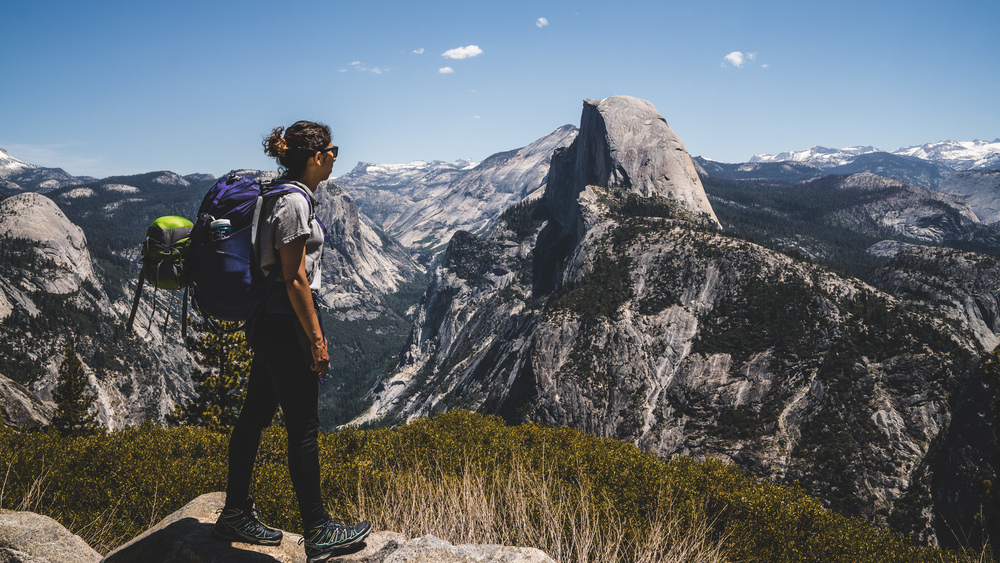
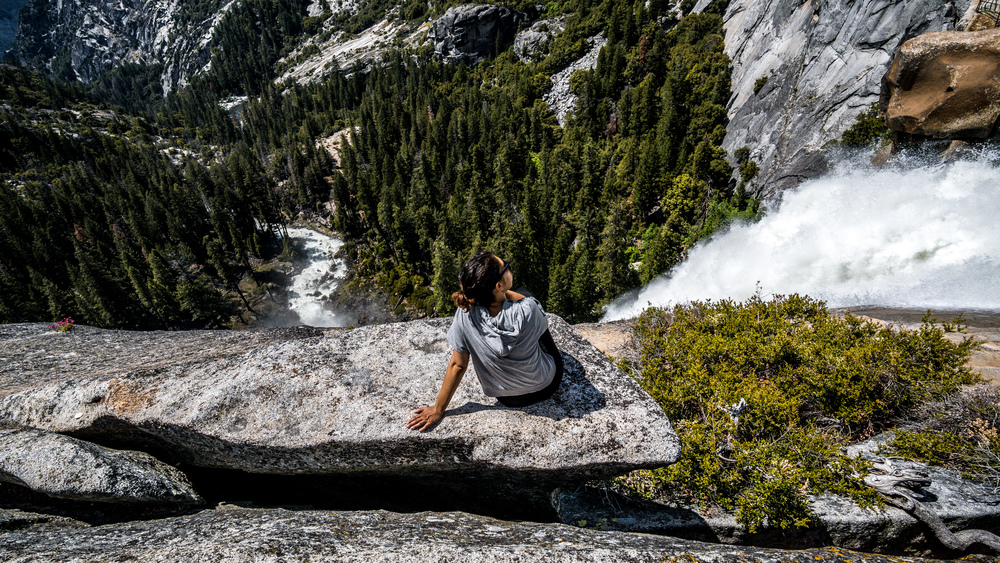
This leg is incredibly scenic. Stepping out of the parking lot, it’s just BOOM! and already you will be overwhelmed with a jaw-dropping view over Yosemite Valley and Half Dome. But it will continue: the Panorama trail has well deserved its name. You will also walk by two very beautiful water falls: Illilouette Falls, and then later, the much bigger (and popular) Nevada Falls.
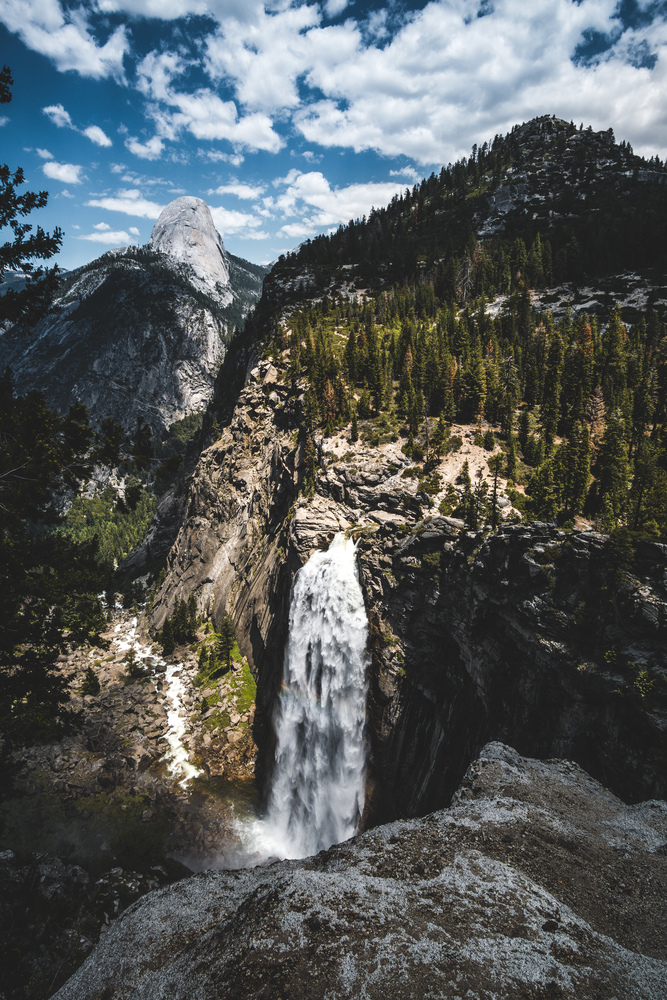
Since it’s so scenic, enjoy the views and take your time. Have a snack or, why not, a late lunch at either Illilouette Falls or Nevada Falls. Or just sit down and gaze over the valley below.
Pitch your tent at the Little Yosemite Valley campground. The whole point of pitching your tent here is so that you can leave your tent and all your heavy stuff here and only carry water and some snacks for the Half Dome ascent (that part is the real butt-kicker of this trip, so you want travel as lightly as possible on that bit) in the morning of the next day.
Half Dome ascent:
For the Half Dome ascent, simply follow the John Muir trail some more until the Half Dome ascent trail branches off. The trail will go uphill modestly at first and you will walk across a pleasant forest. Just before you get to the famous Half Dome cables, right after the sign telling you that you now really, really need a permit to continue on this trail, you will have to deal with a first, very steep section that will take you right above the tree line. The views will be worth the effort. You will be quite exposed to the elements here. In our case this was just the sun, but even at 8am it was already burning fiercely — remember you are at altitude here.
After that first serious uphill bit, you get a short respite and then you will reach the much dreaded cables. Be sure to bring gloves (though there is a good stockpile of old gloves at the foot of the cables) and shoes with solid grip. You don’t need any climbing skills to manage the cables, but it’s still not for the faint-hearted or those with serious vertigo issues. It’s quite steep and since you are at altitude you will find that you will need to catch your breath from time to time. You are also extremely exposed here (and will stay so at the top), so don’t attempt the ascent if you see a storm heading your way.
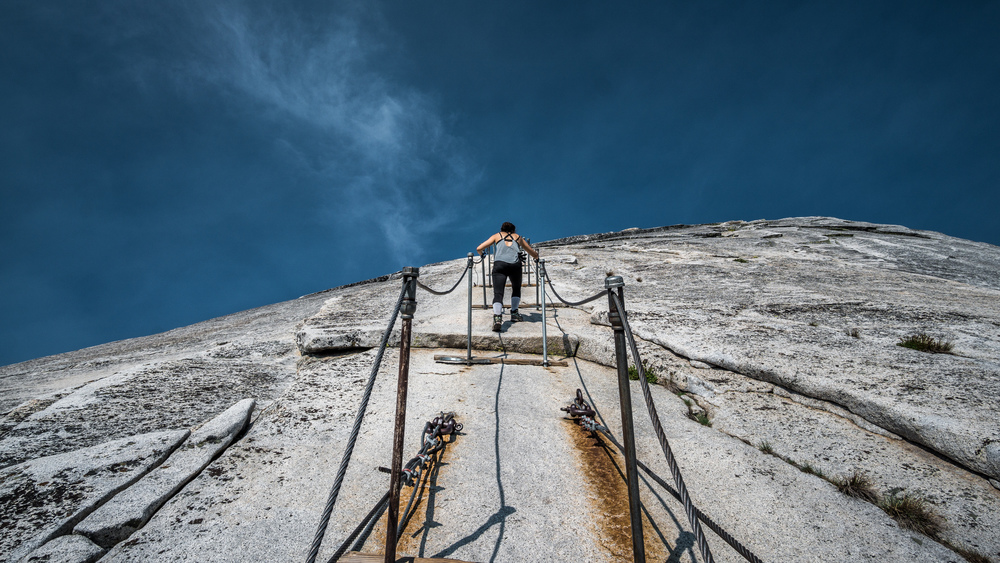
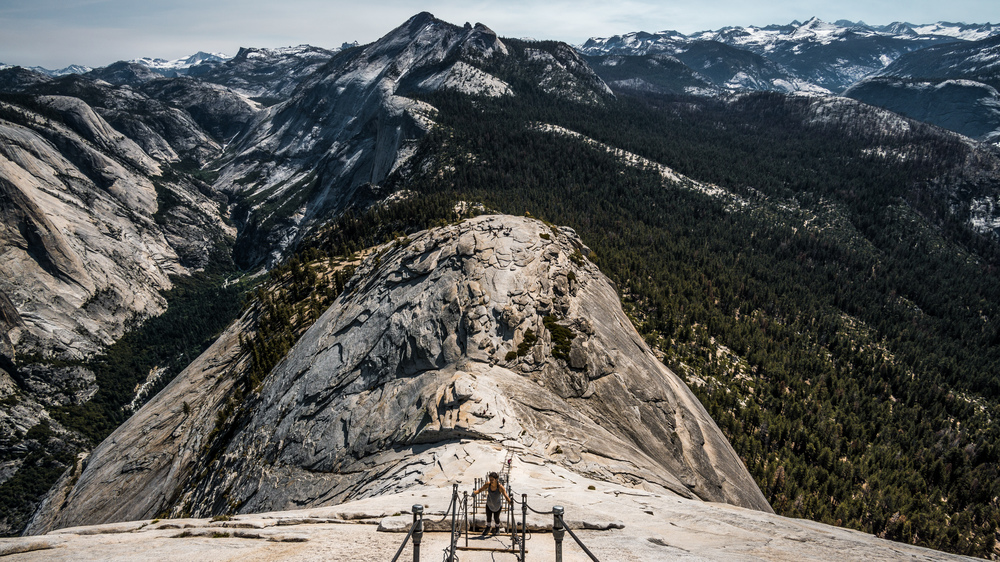
The view from the top will be well worth the effort though and just simply knock you off your feet. Enjoy it!
Once you have caught your breath and got your senses back from the stupendously amazing views, just retrace your steps back to Little Yosemite Valley. It’s all a walk in the park (well OK literally this whole trip is…) from here.
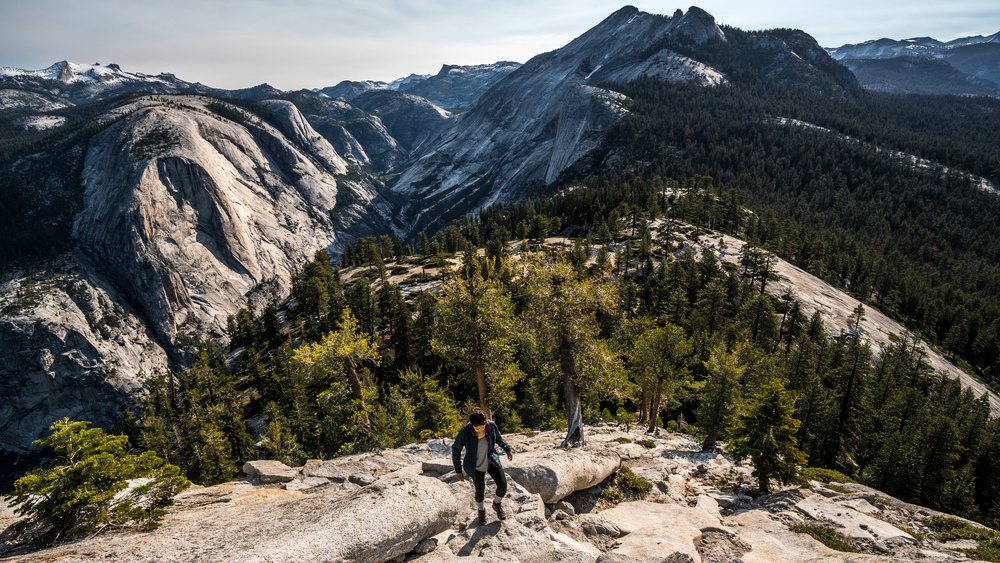
Leg 2: Little Yosemite Valley -> valley between Illilouette Ridge and Mt. Starr King
Follow the Jon Muir trail until the Panorama trail branches off, follow this one for just a short, but steep ascent through a wooded area, then take stop following the Panorama trail and instead take the trail that branches off to the left. Follow this one for one km or so, until you reach a fork in the trail, follow the left one for about 3 miles, then when you reach the next crossing at the foot of a big rock, follow the trail to the right and cross the little stream.

Follow this trail for about a mile until you reach a clearing with good views of the Illilouette Ridge to the West and Mount Starr King to the NE. The ground is quite sandy here.
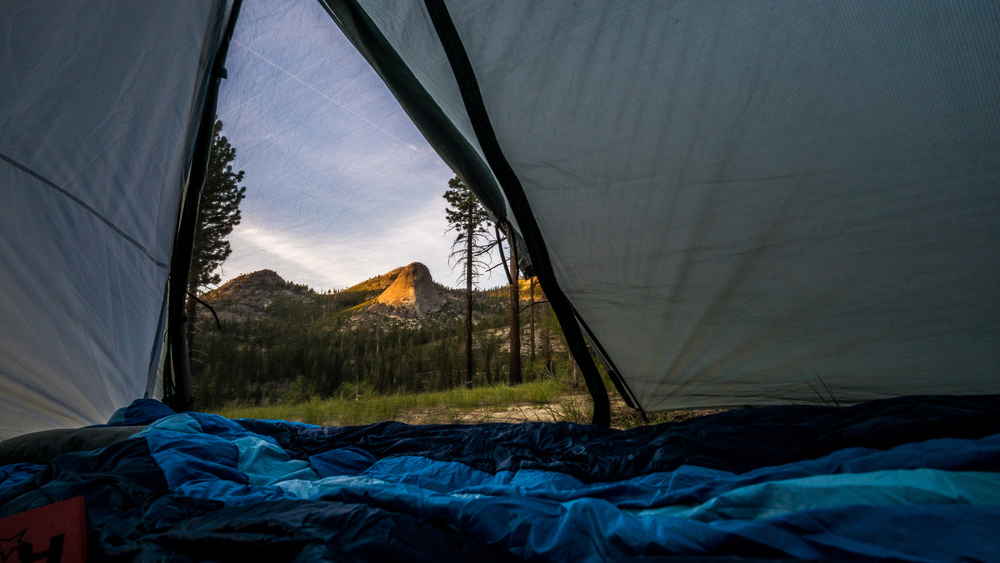
Walk a bit off the trail to the left (what we did) or the right (closer to the river) and pitch your tent here. Not too many people venture to this part of the park (I think), so you should be all by yourself at this spot. If the skies are clear you will be treated to quite a show in the night sky, as evidenced by this AMAZING time-lapse I was able to record when we did this trip (being quite the humblebrag here, I know).
Leg 3: valley between Illilouette Ridge and Mt. Starr King -> Glacier Point
Get back on the trail, at the first crossing take the trail to the left, ford the river and at the next crossing take the trail to the right. Follow this one to the end. It will merge with the Panorama trail and take you right back to Glacier Point.
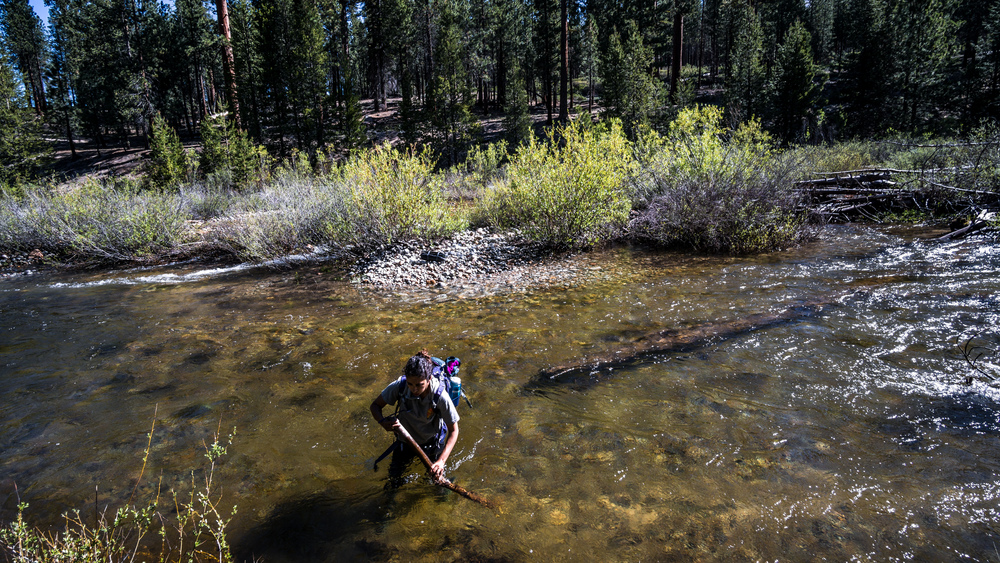
When we did this trip, in early June, the water was flowing fast and deep at the official fording point of the trail. We did not think this was safe, so headed 1/3 or 1/2 mile upstream where the river was broader and forded it there. Still the water was waist deep (and COLD) and moving swiftly, but we managed to safely cross it. If you do it in late summer or autumn, you should be fine to ford it at the designated spot.
The hike after the crossing is uphill to the finish and it will become steeper as it goes on. IF you do this in summer, expect it to be brutally hot by the time you reach Glacier Point. We went straight to the little shop they got there and got ourselves some well deserved ice creams.
Notes:
Half dome cables are only installed from Memorial Day (late May) to Columbus Day (early-mid October), so if you do this trip in winter or spring, then you can only ascend half dome with proper climbing equipment (and probably need a separate permit for that).
The data tracks below are approximate. I did not record them on my gpx watch, so retraced them using a map creation tool. They should be pretty accurate, but use with care. Since it all follows established trails, use a map and only use the location files when in doubt.
Data files (click on the links, then download whatever format you prefer from the gpsies site):
Leg 1: http://www.gpsies.com/map.do?fileId=ipfiybcwfuakamii
Half Dome ascent: http://www.gpsies.com/map.do?fileId=uneghphwfbsoluim
Leg 2: http://www.gpsies.com/map.do?fileId=kjaohyusnkcsjmad
Leg 3: http://www.gpsies.com/map.do?fileId=pxyachmcvhnyzixf
Complete route: http://www.gpsies.com/map.do?fileId=sgxgmbsfzueftato