How long?
2days, 1 night
How many miles?
27 miles / 43km
How?
Hiking + wilderness / backcountry camping
Map required, compass optional (i.e. well maintained & sign-posted trails & prominent features all around; still I would carry a compass just in case)
Maps?
National Geographic Trails Illustrated Map #268
Itinerary:
Summit Lake trailhead -> Corral Meadow -> Grassy Swale -> Horseshoe Lake -> Snag Lake -> Cinder Cone -> Twin Lakes -> Echo Lake -> Summit Lake trailhead
On top of paying your park admission fee, you will need a backcountry permit for any overnight stay in the Lassen Volcanic wilderness. These are free and there are no quotas, so you don’t have to get them in advance. Just turn up at a ranger station / visitor center (there is one at either entrance of the park on highway 89) and get yours. There is also a ranger station at Summit Lake, but, to my knowledge, they do not issue permits there. You will also need a bear canister for your food.
Leg 1: Summit Lake -> Horseshoe Lake -> Snag Lake
It’s always embarrassing when you get lost right at the start of a hike, particularly if there are still buildings and campgrounds nearby. But that’s what almost happened to me. You need to start at the Summit Lake trailhead, which is a bit north along route 89 from Summit Lake South and North campgrounds. Then the first two-thirds of a mile takes you around both campgrounds and off on the trail to Corral Meadow. The trail to Echo Lake (where you’ll come back from the next day) is impossible to miss and sign-posted. However at Summit Lake South campground there are so many unofficial tracks (both human and animal I would guess) that go off into the forest, that it is not quite clear which is the track you need to take. Anyway, I did about 200-300 meters on the wrong side of Summit Creek, then quickly noticed my mistake after consulting the map and bushwhacked my way back onto the correct trail. From that point on, route finding is easy and every trail crossing is clearly sign-posted.
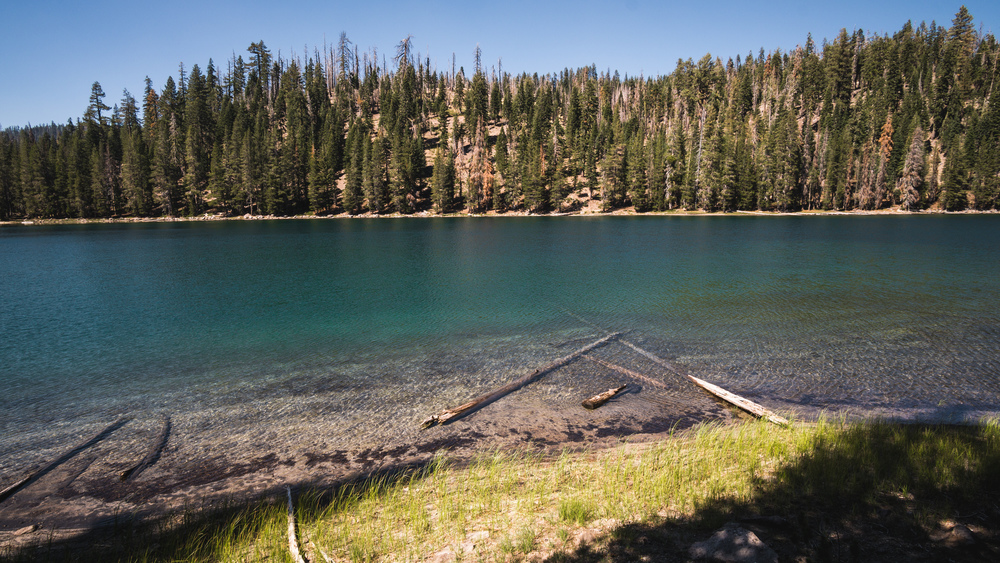
The first leg of the loop is mostly through dense forest, which occasionally opens up to reveal a meadow or a lake. There are plenty of water sources along the route, so you do not need to carry much onto the hike with you (do use a filter though).
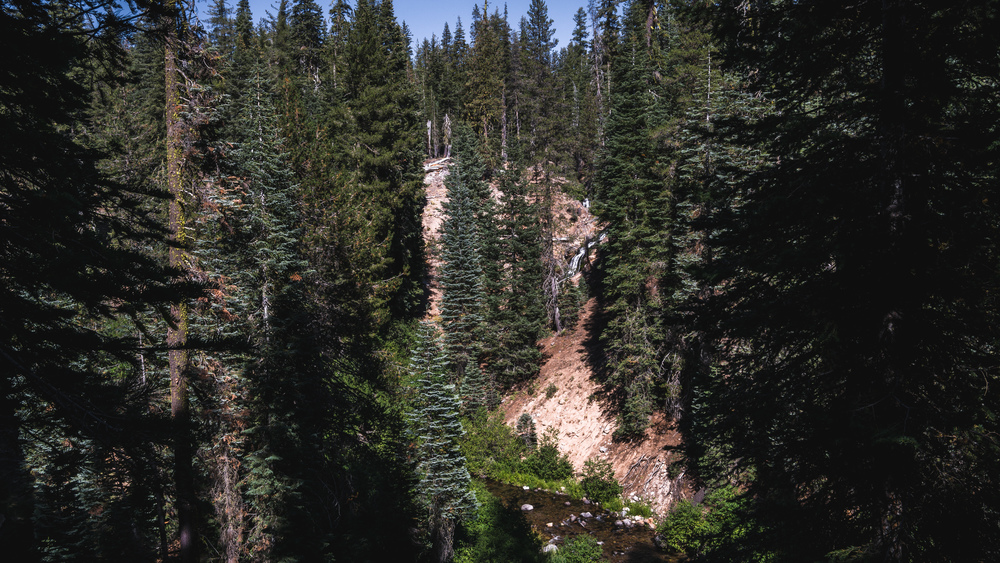
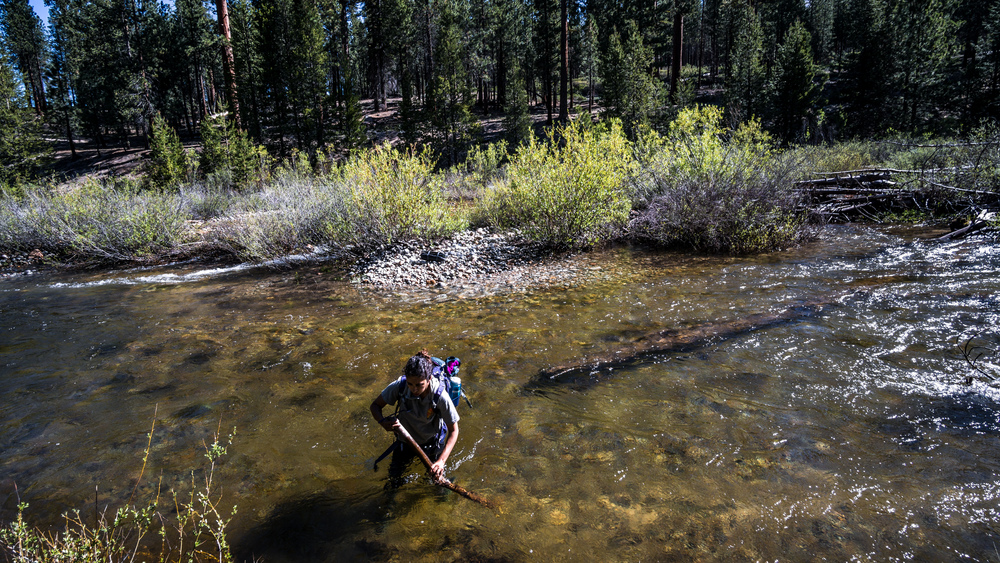
The first few miles are mostly downhill as you follow along Summit Creek. Just before you get onto the Pacific Crest Trail (PCT), look to your left, on the far side of the narrow valley that Summit Creek has carved and there should be a nice waterfall not indicated on the map. Right after the junction with the PCT, you will need to ford Summit Creek (yes you will get your feet wet, but, at least in mid-September, it is not a dangerous crossing: the water is fairly shallow and not too fast flowing) and head north. Near the trail junction should be Corral Meadow, but I did not see it, so I guess it is a bit further south on the PCT. After the creek fording there is a bit of an uphill section before you get to Grassy Swale, which is boardwalked in places. Continue along and watch out for deer, wood peckers and the occasional bird of prey. At the next junction, you need to take the much smaller right fork, sign-posted for Horseshoe Lake. Continue along the trail until you get to the Lake. If you set off in the early afternoon like me you should get here in late afternoon with the sun’s reflections in the water blinding you when you look across the water from the western shore. Here will be another crossing and you need to head north on Grassy creek Trail towards Snag Lake. When I did this trip, there were many deer in the grass along the creek, so watch out for them. There will be two more crossings, and each time you just continue straight, due north. If you don’t want to get water from the standing waters of Snag Lake, then Grassy Creek is your last chance to fill up on water.
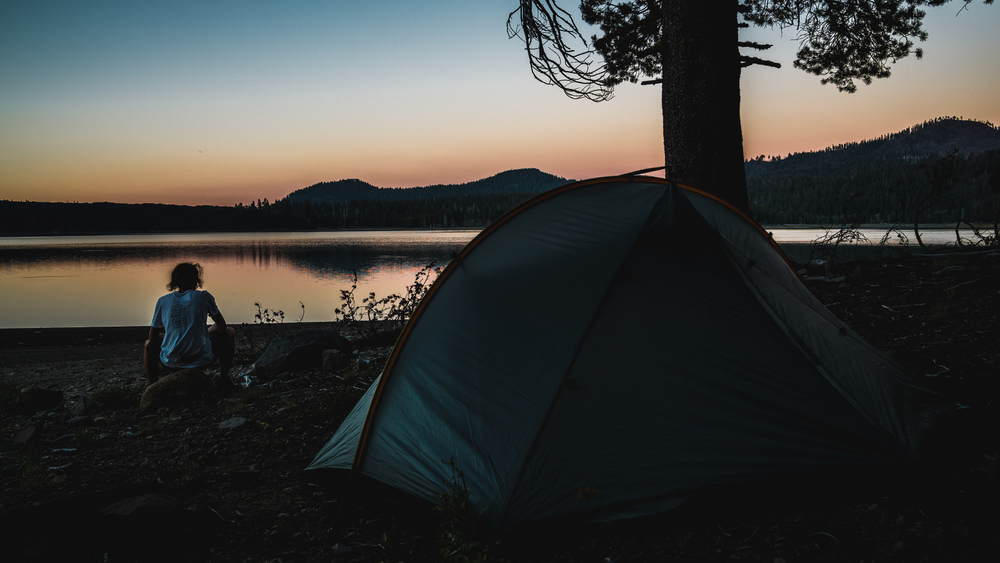
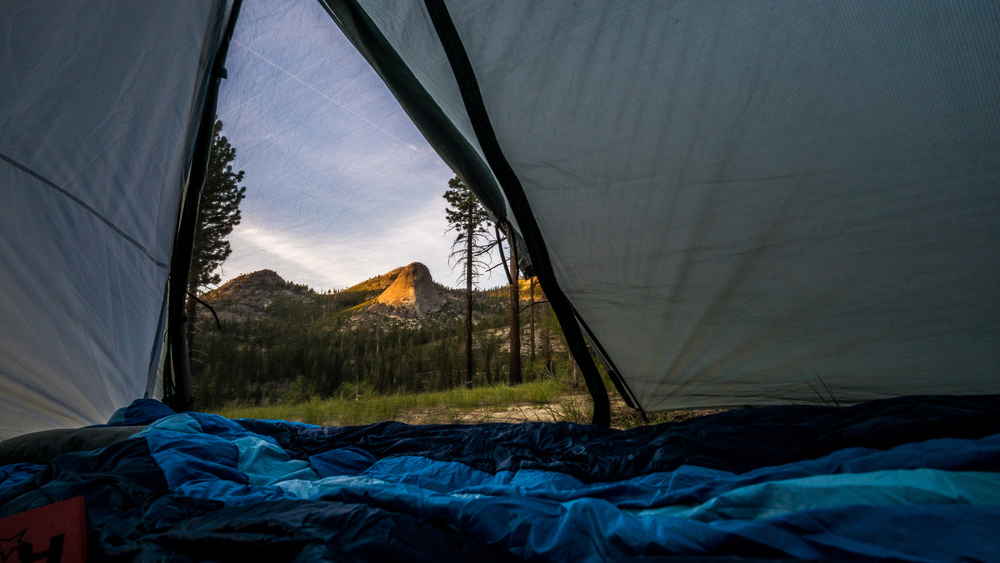
Finally you reach Snag Lake. If you are doing this on a weekend there will be other hikers camping along the lake (when I did the hike, there were 3 groups camped along the eastern edge of the lake, and the next morning I spotted two more tents on the small beach at the northeastern end), so you might have to walk a bit along the lake to find a secluded spot all for yourself. I found a beautiful one on the small peninsula at the southeastern end of the lake.
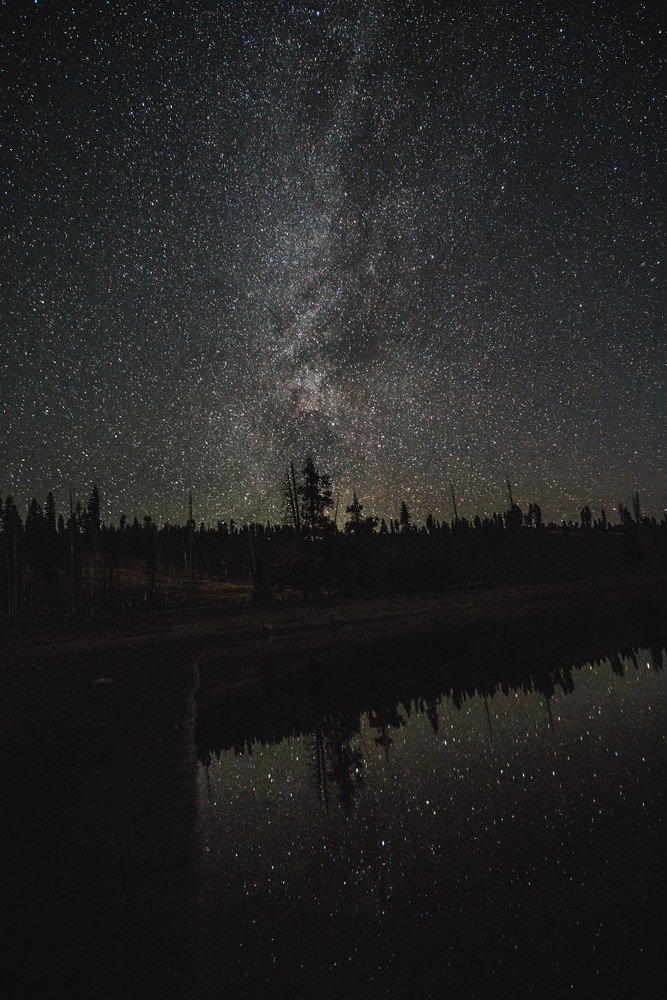
The lake is quiet and a great place to be camping to watch the stars later in the night. Before the sun sets, be sure to check what animal tracks are near your camp site, just so you don’t get surprised at night. There had been some deer tracks near the water, but not where I had pitched my tent. Still, ten minutes or so after switching off my camping light, there was a dozen deer that surrounded my tent as they walked out of the forest to the water’s edge.
Legs 2: Snag Lake -> Cinder Cone -> Summit Lake
Yesterday’s hike was nice, today’s hike will be spectacular, take my word. There will be, however, far fewer water sources, with no water between Snag Lake and Rainbow Lake, so be sure to fill your bottle at Snag Lake before setting off.
Depending where you set up camp along Snag Lake, you’ll have a 2-3 mile hike to Cinder Cone and you want to be there shortly after sunrise (the light will be best and there won’t be many, if any, people that hiked from Butte Lake campground yet), so get up early, have a quick breakfast, pack your tent and set off.
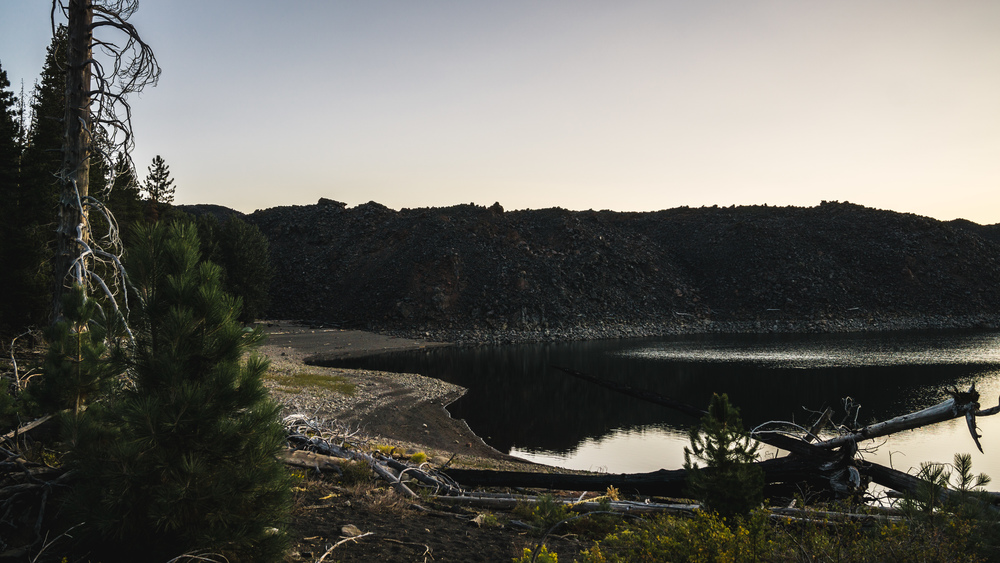
As you reach the north end of Snag Lake you get a first taste of the spectacular geological features that are to come: there is a sheer wall of black rocks, a good ten to twenty meters high, that forms the northern boundary of the lake. This is the southern end of the Fantastic Lava Beds. In fact it is a natural dam wall and the reason why Snag Lake exists. Cinder Cone, which is a, wait for it …, cinder volcano, erupted twice in the mid 17th century (hence quite recently by geological standards) and spew out ash and lava which then cooled to form what is now called the Fantastic Lava Beds. Those lava flows dammed various creeks, thereby creating Snag Lake to the south and Butte Lake to the north. In fact Snag Lake still feeds Butte Lake by water that seeps through the lava rocks. The lava beds are a truly stunning sight, and you will get a good view of them from the top of Cinder Cone (see the cover image for this post, which shows Butte Lake and the northern end of the lava beds). In fact the striking appearance of the lava beds meant that people in the 1870s initially thought that they were formed only a few decades ago. You can also clearly see the lava beds from aerial and satellite images on Google Maps / Earth or Bing Maps etc.
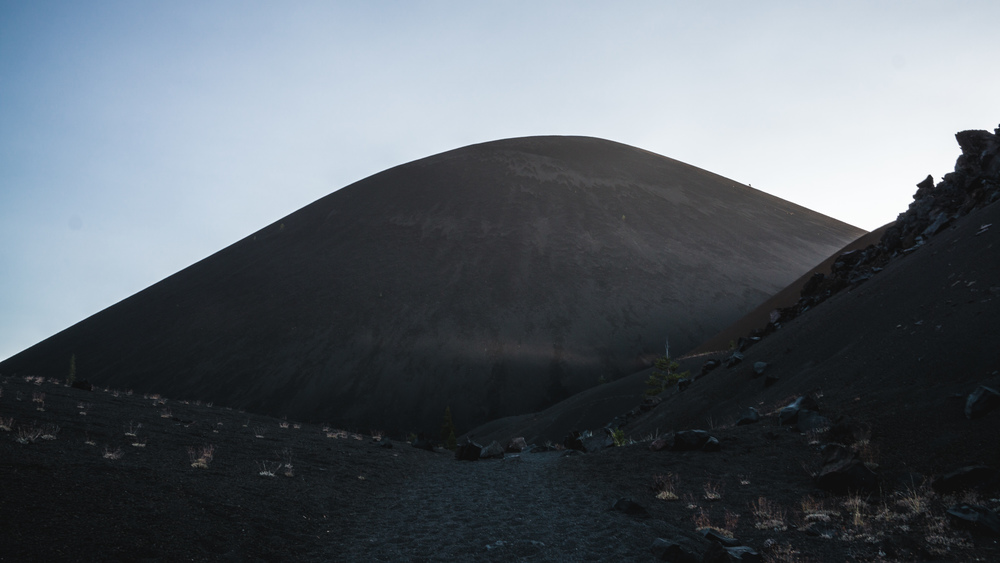
Anyway, after Snag Lake, the trail continues pretty much all along the edge of the lava beds until you get to Cinder Cone. It’s an epic sight, and with all those black and red cinders you might as well be on Mars were it not for the surrounding vegetation.
The ascent, especially with your hiking backpack, is tough. It is very steep and the ground is quite loose, so it is difficult going. The good point about going up from the southern side is that you can just stop now and again, turn around and enjoy a marvelous, incredible view: Lassen Peak in the distance and the Painted Dunes nearby.
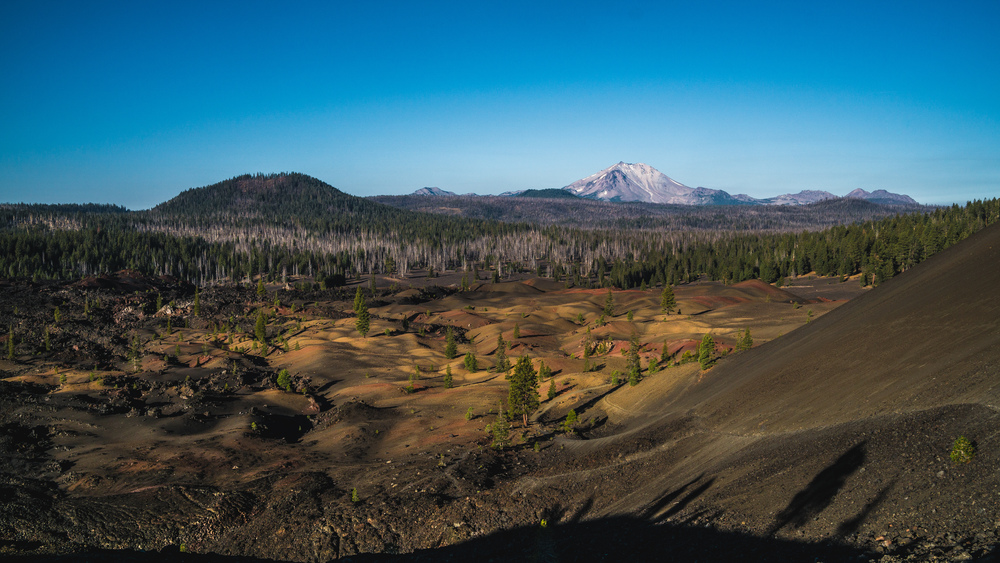
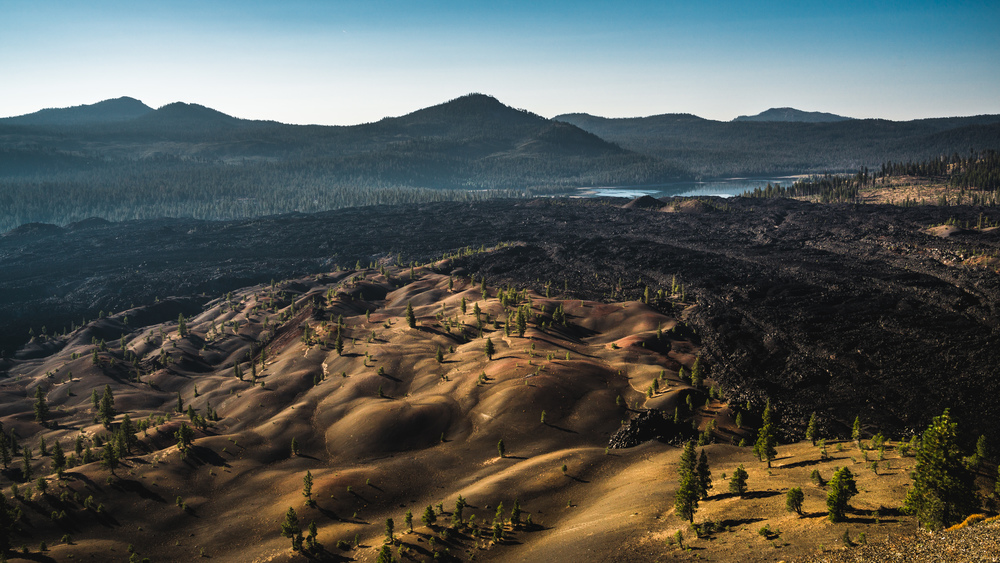
The eccentric colours of the Painted Dunes are caused by volcanic ash that oxidated as it fell on the still hot lava flows. Also if you look carefully, you can see red rocks in between the Painted Dunes and the lava flows to the south of Cinder Cone: these are the remnants of an earlier cinder cone, or scoria cone, that was destroyed by the later lava flows. In fact the Painted Dunes are sitting on lava flows from this earlier cone, with the ash of more recent flows sitting on top. The Fantastic Lava Beds, as well as the Painted Dunes, are all deposits from several eruptions of the two scoria volcanoes.
Anyway, as you struggle your way up Cinder Cone, you slowly get to appreciate the full scale of the Fantastic Lava Beds — it’s a huge area, stretching completely from Cinder Cone to Snag Lake and from the to Butte Lake and then back to Cinder Cone. Lassen Peak in the background adds even more drama to this incredible natural scenery.
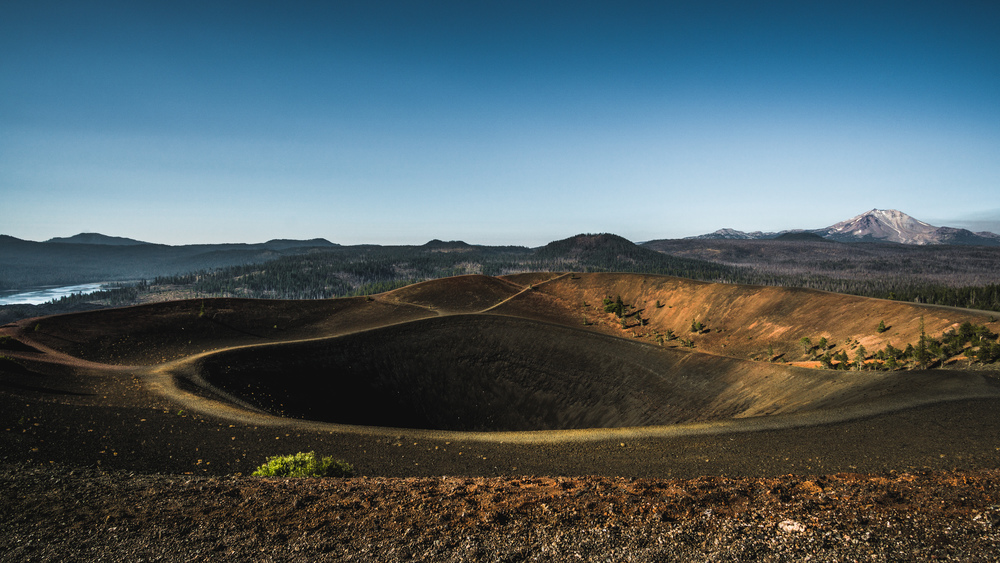
Once you are on top, you can actually walk right down into the crater (though, mind you, you have to hike back up out of there), you can walk around the inner rim, or along the outer rim from where you get dramatic views in every direction. The landscape here is so gorgeous, you just want to run around in excitement like a child, stop, take in the view, scream out in joy or awe, run around some more, stop again, scream again etc. Thankfully the air is thin here and you spent so much effort to get up here, that you don’t actually do this, and instead just walk around, murmuring ‘wow’ now and again. If the ascent hasn’t done it, the view here will take your breath away (see again the cover image for this post).
Needless to say, with such beautiful surroundings, it is a great idea to take that apple out of your bag and have a bit of a snack. Stay as long as you want at Cinder Cone — it is by far the highlight of the hike. But then, when you are done, go down the north side, then take veer almost 180 degrees back onto the bypass trail and head back down along Cinder Cone and the lava beds. Originally I had planned to fork off right onto the Nobles Emigrant Trail at the first crossing you get to, then take the PCT or the Cluster Lake Trail to get back to Summit Lake. However the ranger at the wilderness office had advised me that this area has been much ravaged by the 2012 Cluster Fire and so would not be that great to hike through. Hence I opted to only fork off to the right at the junction with the trail leading to Rainbow Lake. The trail will take you uphill for a bit and there won’t be much shade here (most trees around here are dead too), so since it is now getting to be late morning, you will get hot and it will feel to be a tougher uphill hike as it really is. Anyway, soon enough the trail goes back down again to Rainbow Lake.
From here, you just string up the lakes to get back to the trailhead: Lower Twin Lake, Upper Twin Lake, Echo Lake and finally Summit Lake. All of these lakes have clear, blue, refreshing waters, so really do take the chance and go for a quick swim in one of them (I took a dip in Lower Twin Lake) — this will cool you down (even in late summer, early autumn the water will be cold, though you will get used to it quickly) and nicely breaks up the hike for a bit. Do watch out for bears though, certainly leave no food outside, as bears tend to be active around these lakes.
After Echo Lake, you will have to do a last ascent to a pleasant plateau with good views towards Lassen Peak before you head back down to Summit Lake. If you enjoyed this hike as much, you will pretty much be the happy, smiling hiker stepping off the trail onto the parking lot at the trailhead.
Data files (click on the links, then download whatever format you prefer from the gpsies site):
Leg 1: http://www.gpsies.com/map.do?fileId=xpbkcrwutijpxeae
Leg 2: http://www.gpsies.com/map.do?fileId=qnlebscbljhfenlu
Complete route: http://www.gpsies.com/map.do?fileId=waepujmeqbshyzcc
How long?
3 days, 2 nights (really just 2 half days, 1 full day and 2 nights)
How many miles?
26 miles / 42km
How?
Hiking + wilderness / backcountry camping
Map required, compass optional (i.e. well maintained & sign-posted trails & prominent features all around; still I would carry a compass just in case)
Maps?
National Geographic Trails Illustrated Map #206 or #306 (I’d recommend #306 over #206 though)
Itinerary:
Glacier Point -> Little Yosemite Valley campground -> valley between Illilouette Ridge and Mount Starr King -> Glacier Point
Leg 1: Glacier Point -> Little Yosemite Valley
The route for this leg is incredibly simple: starting from Glacier Point follow the Panorama trail until it merges with the John Muir trail and follow this one until Little Yosemite Valley. This first leg is just over 7 miles of hiking, and mostly downhill. So you can set off in the afternoon if you want to arrive at the campground in the early evening.
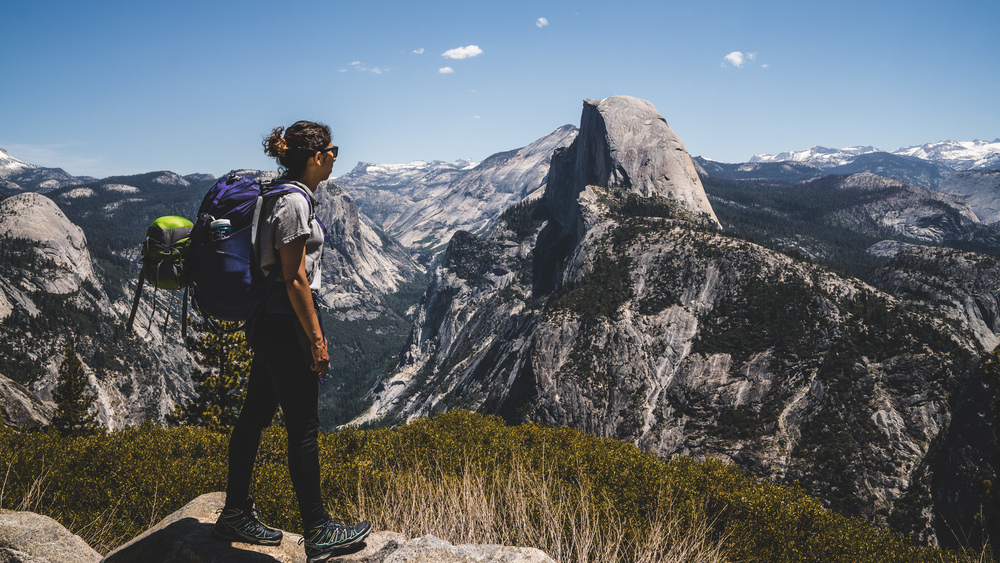
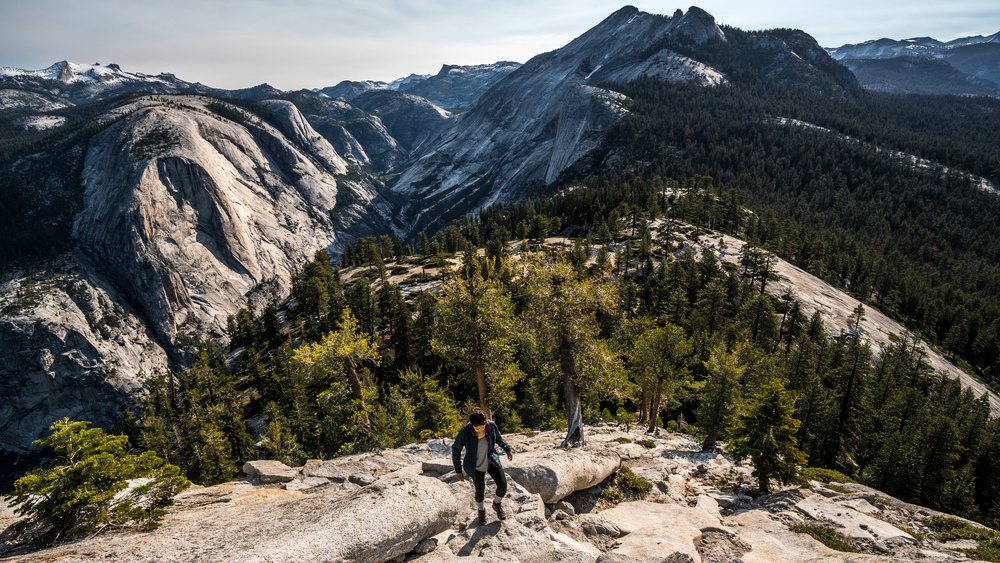
This leg is incredibly scenic. Stepping out of the parking lot, it’s just BOOM! and already you will be overwhelmed with a jaw-dropping view over Yosemite Valley and Half Dome. But it will continue: the Panorama trail has well deserved its name. You will also walk by two very beautiful water falls: Illilouette Falls, and then later, the much bigger (and popular) Nevada Falls.
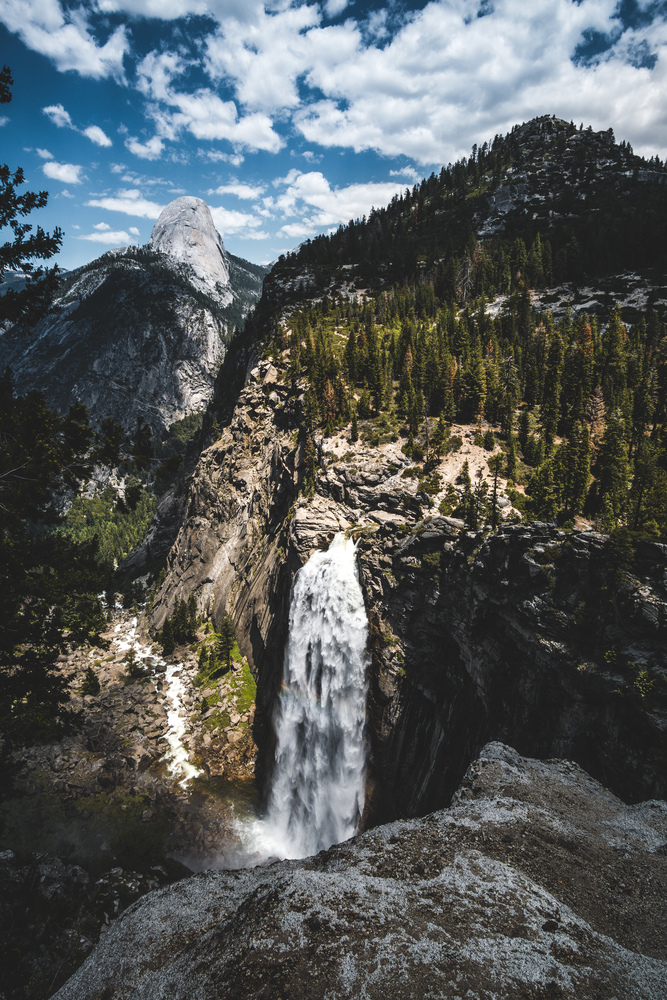
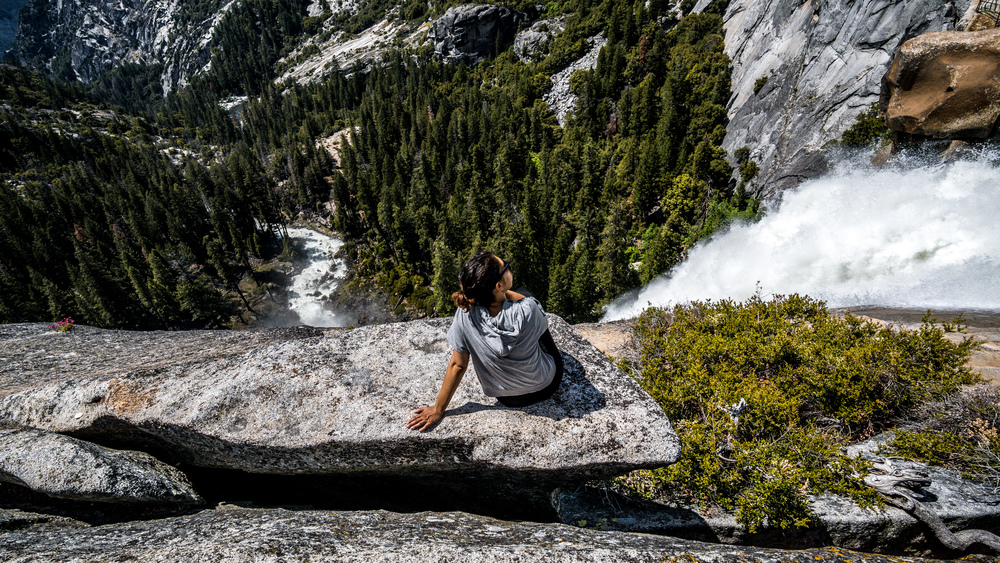
Since it’s so scenic, enjoy the views and take your time. Have a snack or, why not, a late lunch at either Illilouette Falls or Nevada Falls. Or just sit down and gaze over the valley below.
Pitch your tent at the Little Yosemite Valley campground. The whole point of pitching your tent here is so that you can leave your tent and all your heavy stuff here and only carry water and some snacks for the Half Dome ascent (that part is the real butt-kicker of this trip, so you want travel as lightly as possible on that bit) in the morning of the next day.
Half Dome ascent:
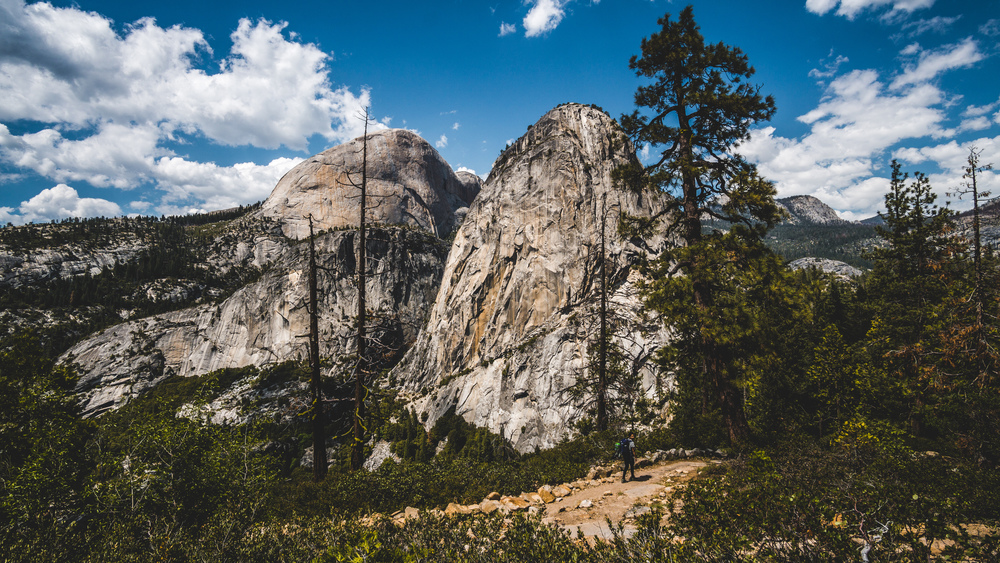
For the Half Dome ascent, simply follow the John Muir trail some more until the Half Dome ascent trail branches off. The trail will go uphill modestly at first and you will walk across a pleasant forest. Just before you get to the famous Half Dome cables, right after the sign telling you that you now really, really need a permit to continue on this trail, you will have to deal with a first, very steep section that will take you right above the tree line. The views will be worth the effort. You will be quite exposed to the elements here. In our case this was just the sun, but even at 8am it was already burning fiercely — remember you are at altitude here.
After that first serious uphill bit, you get a short respite and then you will reach the much dreaded cables. Be sure to bring gloves (though there is a good stockpile of old gloves at the foot of the cables) and shoes with solid grip. You don’t need any climbing skills to manage the cables, but it’s still not for the faint-hearted or those with serious vertigo issues. It’s quite steep and since you are at altitude you will find that you will need to catch your breath from time to time. You are also extremely exposed here (and will stay so at the top), so don’t attempt the ascent if you see a storm heading your way.
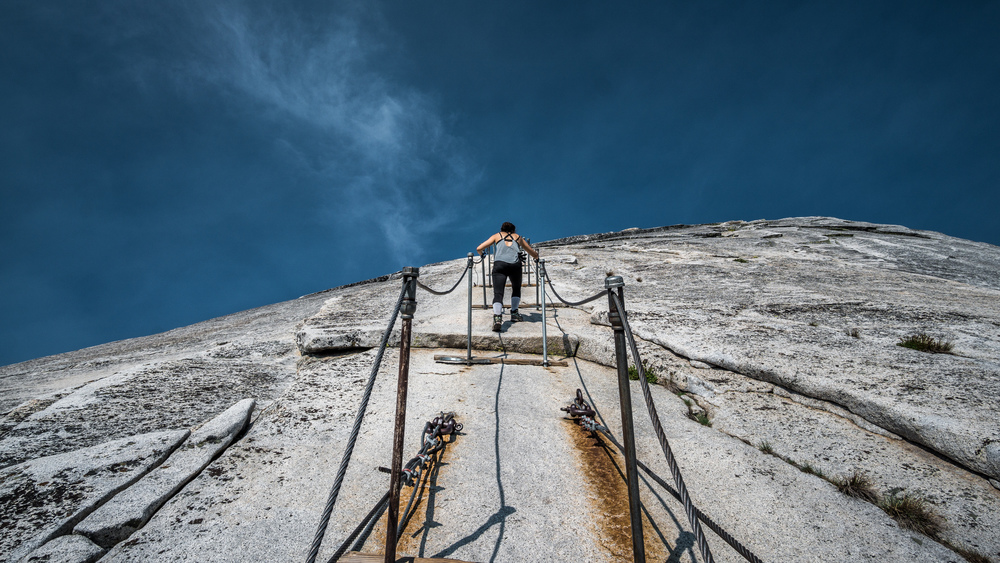
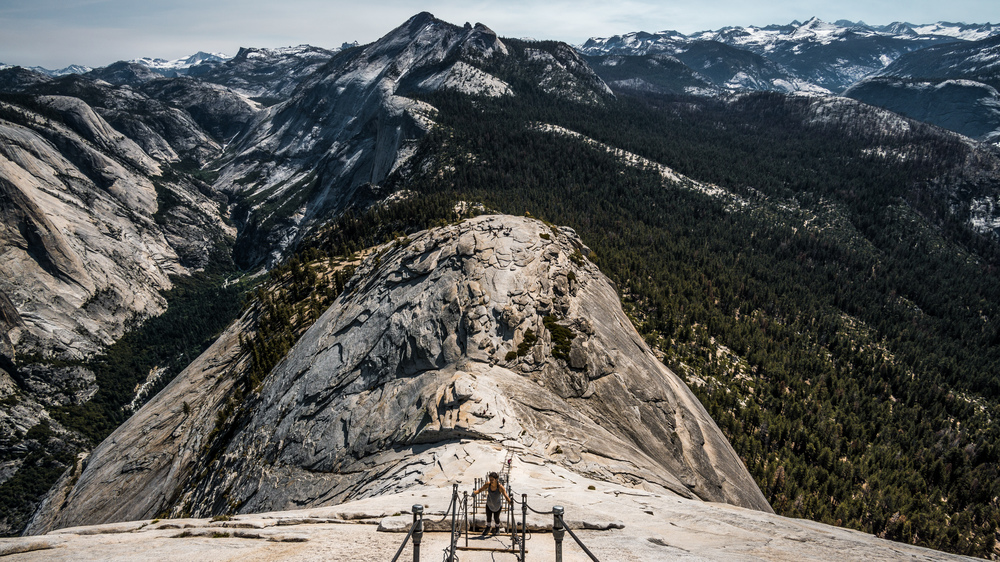
The view from the top will be well worth the effort though and just simply knock you off your feet. Enjoy it!
Once you have caught your breath and got your senses back from the stupendously amazing views, just retrace your steps back to Little Yosemite Valley. It’s all a walk in the park (well OK literally this whole trip is…) from here.
Leg 2: Little Yosemite Valley -> valley between Illilouette Ridge and Mt. Starr King
Follow the Jon Muir trail until the Panorama trail branches off, follow this one for just a short, but steep ascent through a wooded area, then take stop following the Panorama trail and instead take the trail that branches off to the left. Follow this one for one km or so, until you reach a fork in the trail, follow the left one for about 3 miles, then when you reach the next crossing at the foot of a big rock, follow the trail to the right and cross the little stream.

Follow this trail for about a mile until you reach a clearing with good views of the Illilouette Ridge to the West and Mount Starr King to the NE. The ground is quite sandy here.
Walk a bit off the trail to the left (what we did) or the right (closer to the river) and pitch your tent here. Not too many people venture to this part of the park (I think), so you should be all by yourself at this spot. If the skies are clear you will be treated to quite a show in the night sky, as evidenced by this AMAZING time-lapse I was able to record when we did this trip (being quite the humblebrag here, I know).
Leg 3: valley between Illilouette Ridge and Mt. Starr King -> Glacier Point
Get back on the trail, at the first crossing take the trail to the left, ford the river and at the next crossing take the trail to the right. Follow this one to the end. It will merge with the Panorama trail and take you right back to Glacier Point.
When we did this trip, in early June, the water was flowing fast and deep at the official fording point of the trail. We did not think this was safe, so headed 1/3 or 1/2 mile upstream where the river was broader and forded it there. Still the water was waist deep (and COLD) and moving swiftly, but we managed to safely cross it. If you do it in late summer or autumn, you should be fine to ford it at the designated spot.
The hike after the crossing is uphill to the finish and it will become steeper as it goes on. IF you do this in summer, expect it to be brutally hot by the time you reach Glacier Point. We went straight to the little shop they got there and got ourselves some well deserved ice creams.
Notes:
Half dome cables are only installed from Memorial Day (late May) to Columbus Day (early-mid October), so if you do this trip in winter or spring, then you can only ascend half dome with proper climbing equipment (and probably need a separate permit for that).
The data tracks below are approximate. I did not record them on my gpx watch, so retraced them using a map creation tool. They should be pretty accurate, but use with care. Since it all follows established trails, use a map and only use the location files when in doubt.
Data files (click on the links, then download whatever format you prefer from the gpsies site):
Leg 1: http://www.gpsies.com/map.do?fileId=ipfiybcwfuakamii
Half Dome ascent: http://www.gpsies.com/map.do?fileId=uneghphwfbsoluim
Leg 2: http://www.gpsies.com/map.do?fileId=kjaohyusnkcsjmad
Leg 3: http://www.gpsies.com/map.do?fileId=pxyachmcvhnyzixf
Complete route: http://www.gpsies.com/map.do?fileId=sgxgmbsfzueftato
How long?
6 days, 5 nights
(longer if you plan to stay a few days in San Francisco at the start or end of the trip — we’ve spent 3 nights there)
How many miles?
~845 miles / 1,360 km
How?
Driving (+ hiking in Yosemite)
Phone / GPS or road map recommended
Maps?
National Geographic Trails Illustrated Map #206 or #306 (for the hiking part)
Itinerary:
San Francisco -> Yosemite Valley -> Mono Lake / Lee Vining -> Glacier Point (Yosemite NP) -> Sebastopol / Sonoma Valley -> Bodega Bay -> Point Reyes -> Bolinas -> San Francisco
San Francisco:
We flew to San Francisco from NYC and spent the first 3 days and nights exploring this great city. Now like all great metropoles, a few days is hardly enough to scratch at the surface. Still, you can cover the most popular attractions.
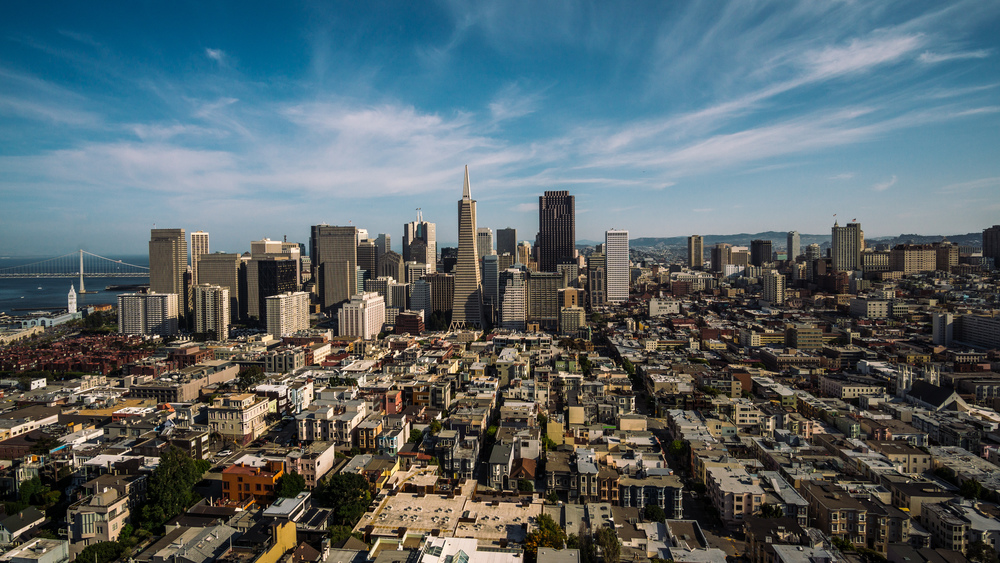
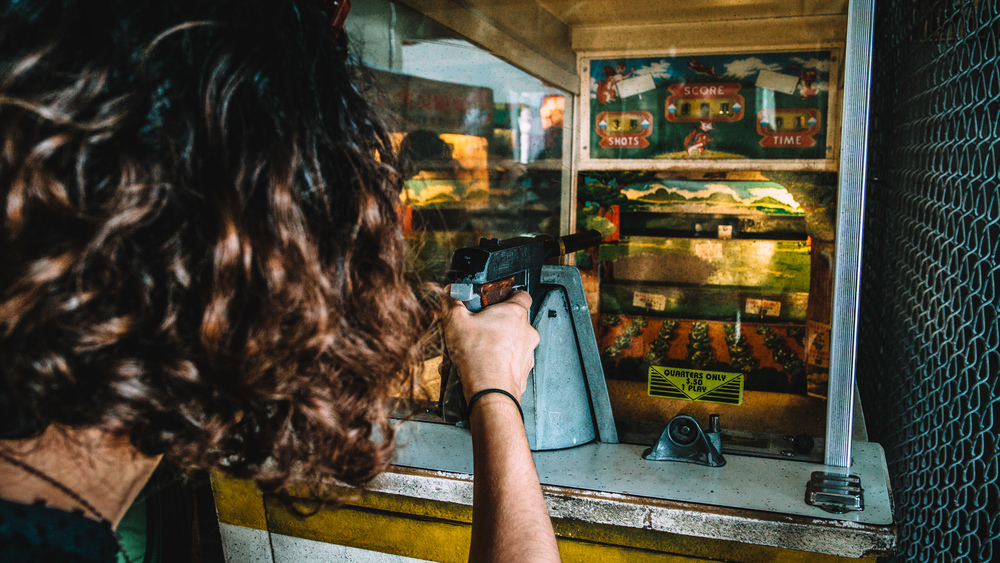
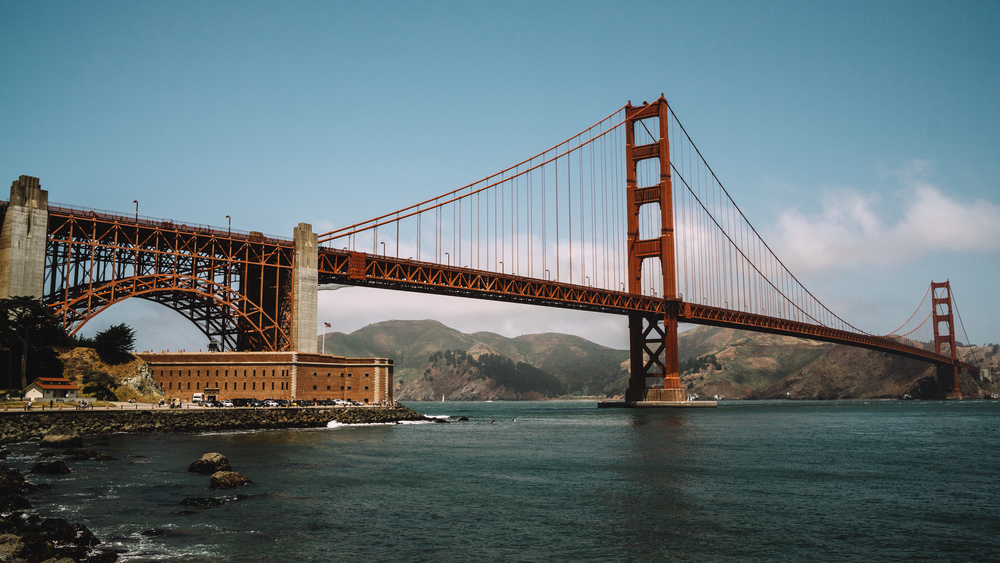
Coit Tower is probably a good place to start your exploration as you get a pretty good idea of the city’s layout. After that is is really up to you. There are the obvious tourist attractions: Golden Gate Bridge, Alcatraz, the cable cars, the Painted Ladies, the Transamerica Pyramid, the Ferry Terminal, the sea lions at Pier 39, Twitter headquarters (really?)… If you are a fan of the beat writers, there’s a museum for it, and you can follow their steps through the city. If you are a fan of Francis Ford Coppola, be sure to stop at the Cafe Zoetrope. If you are interested in LGBTQ history and/or scene, pay a visit to the Castro District. Eat some shell fish on Fisherman’s Wharf, play antique arcade games at the Musée Mécanique, stroll through Golden Gate Park and visit some of the great museums in town — your options are endless.
While quite touristy, it is a really great idea to rent a bike to explore the city, especially if you plan to cross the Golden Gate Bridge to visit the Marin Headlands. There are so many shops in town that rent bikes, so it is quite cheap and convenient. Best of all, as this road trip will see you backpacking in Yosemite National Park in a few days’ time, you can rent bikes from a place called “Essentially Free Bike Rentals”. The deal here is that you pay for the bike rental, but then get the fee as store credit in an outfitter store called “Sports Basement”. Since you probably need some camping food, gas canister for the camping stove etc, you will definitely get that money back. And it couldn’t be easier too, since the outfitter store is bang on the route you will have to cycle if you plan to ride from downtown to Golden Gate Bridge and the Marin Headlands. If you do plan on crossing the bridge, pack a pullover or jacket as there will be wind and quite likely some fog too, so you will get cold if you are only wearing shorts and a t-shirt (I speak from experience here!).
After a few days in town: escape!
Leg 1 (San Francisco -> Yosemite Valley -> Tioga Road -> Mono Lake -> Lee Vining):
When we were in town (Memorial Day weekend 2016), car rentals in town were much more expensive than at the airport, so we just took the BART train early in the morning to the airport car rental center and got our car from there. Once you got your wheels sorted, it’s time to hit the road and set course for the awesome place that are the Sierra Nevada mountains in general and Yosemite National Park in particular.
The plan for the day is easy: visit Yosemite Valley, then cross famous Tioga Road (if you are doing this trip in late May / early June: check the NPS website to make sure it has indeed opened for the season — it depends yearly on the snowfall how early the road opens) and spend sunset on the shores of otherworldly Mono Lake.
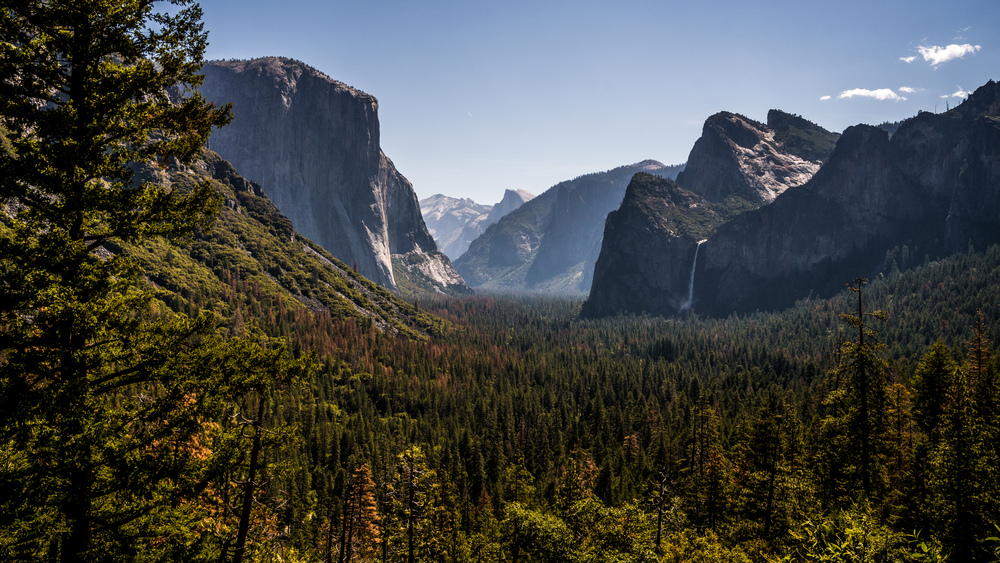
It’s a solid 4 hours of driving to get to Yosemite from San Francisco airport, but it’s a reasonably nice drive along gently rolling Californian hills. As you drive down route 120 after entering the park, you will get your first glimpse of Yosemite Valley with Half Dome at the very far end. It’s a nice view, but merely OK compared to the other views you can have in the park, so don’t go crazy yet, jumping out of your car and getting run over — be sensible!
If you are going to go for an overnight hike, don’t forget to pick up your wilderness permit from the ranger station at the park entrance. You will always be able to get permits for the night or the next few days, but if you plan to start off from some of the more popular trail heads (e.g. Happy Isles or Glacier Point) you better reserve them online in advance or they will have sold out. If you plan to include an ascent of Half Dome in your trip, then you absolutely will have to get them online, as it will be a lottery to get one at the park. The good thing about going for an overnight hike is that you can reserve the Half Dome permits to go with your wilderness permit and the reservation window for wilderness permits opens well before the day permits for Half Dome are allocated, so you will have very good chances of getting one of these coveted permits — the only condition for getting one is that your hiking route takes you reasonably close to Half Dome in the first place. Note that the cables for ascending Half Dome are only in place from late May to mid-October each year.
Soon enough you will come to a crossing with Big Oak Flat Road. Actually the road branching off to the left at this crossing is route 120 (also known as Tioga Road) whereas the straight road ahead of you is Big Oak Flat Road. Go straight and follow this road down to the valley floor. Here traffic is one-way and counter-clockwise. There will be two lanes for the car and camper van traffic and it is dearly needed as each year between May and October the place is flooded with people (75% of all visitors to the park come between these two months according to the NPS website). Be careful for other cars coming to abrupt stops when a turn gives way to an epic view of some mountain or waterfall and people jumping out of cars, their camera phones at the ready.
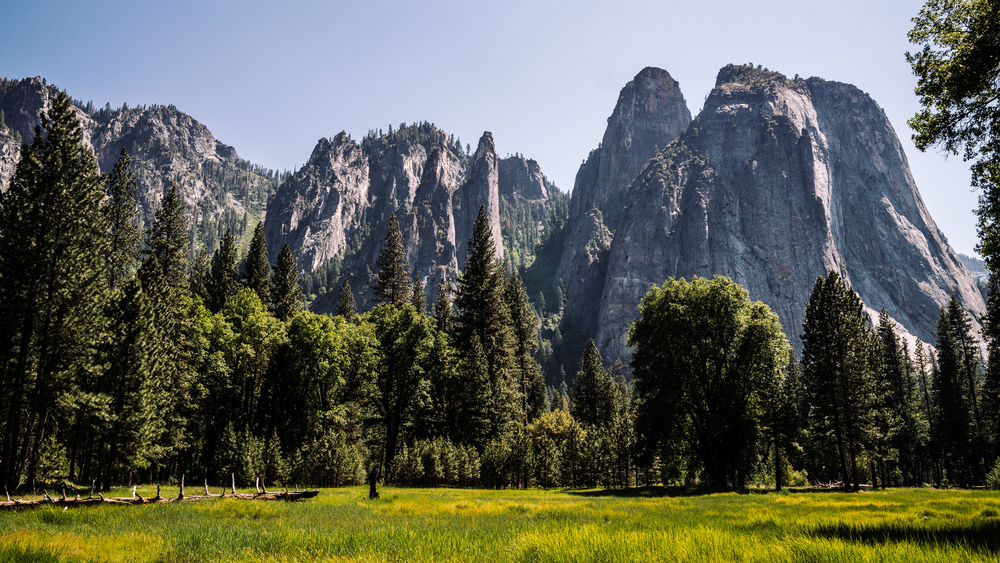
When you are in the valley, you would not believe it, but the park is huge and 95% of it is wilderness (the valley is less than 1% of total surface area). However the vast majority of its 4+ million visitors a year visit the valley only, hence why it is so crowded. That said, no matter how crowded it is, the valley is really nice and it is perfectly possible to find secluded and solitary spots on the valley floor for a nice quiet picnic with gorgeous scenery all around you.
Spend a couple of hours in the valley, have a picnic in a shady corner of the valley, have lunch at one of the park concessionaires or simply go for a short hike. If the weather and visibility are good, and you think it may be worse the next day, then before heading back to the crossing with Tioga Road, head up to Tunnel View for the classic view of Yosemite Valley that every OSX user will know quite well from their Desktop wallpaper. Otherwise, after passing Valley View, just head straight back to the Big Oak Flat Road and when you get to the crossing with route 120, take a right turn and drive up on Tioga Road. Frankly, of all the drives I have done in the US so far, Tioga Road is one of the best and most scenic drives, right up there with Beartooth Highway in the larger Yellowstone area.
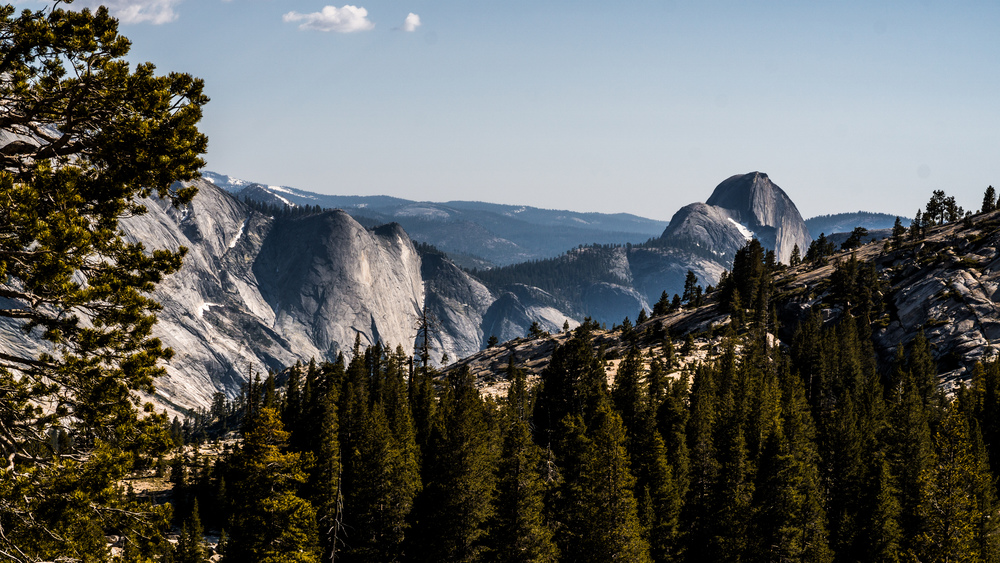
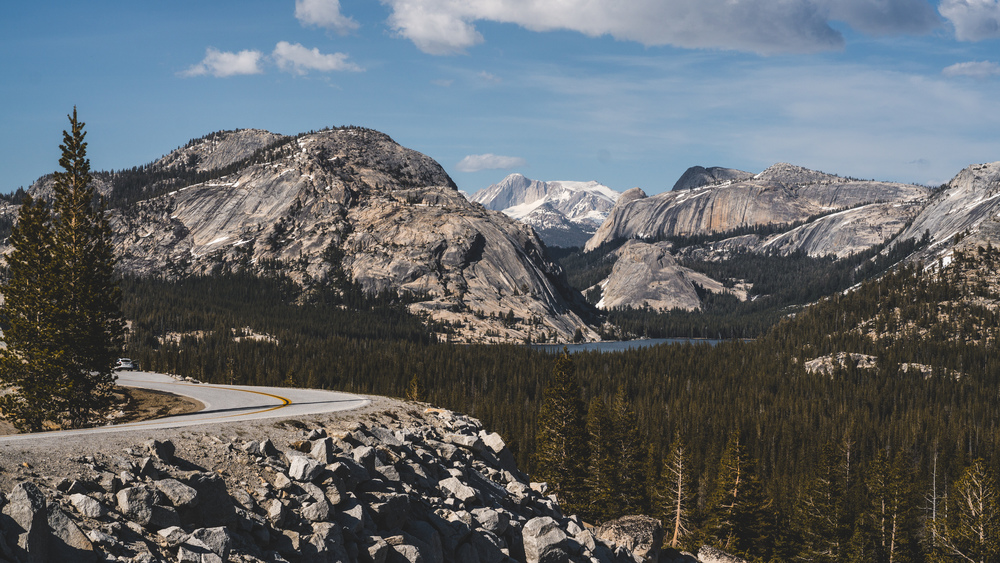
This is because Tioga road takes you up into High Sierra landscapes and over to the Eastern Sierra Nevada. The Eastern Sierra is so spectacular because the mountains rise much more dramatically on this side than they do on the western side; it’s simply one of the most beautiful sights I have every seen. The High Sierra landscape with its spectacular geology is just unbelievable. Hard to believe that these granite rocks were once just molten rock in the inner crust of the Earth, then pushed upwards by fault lines and exposed and shaped by erosion (rain, snow and glaciers) over millennia. The area around Olmsted Point, Tenaya Lake and Tuolomne Meadows is just wonderful.
Be sure to stop at Olmsted Point for some of the best views in the park and, if you have time, have a picnic here or go for a short hike. Winter lingers longer up here, so if you are visiting early in the season, be aware that there may still be snow or a lot of flooding from freshly melted snow.
Finally, continue your drive along Tioga Road until you exit the park. As you drive down from the Sierra Nevada you will see a large lake stretching out in front of you: this is Mono Lake – your final destination for the day. You want to head straight for a place called the South Tufa Area. To get there take a right turn when you get off Tioga Road / route 120 and onto route 395. Continue for some 4-5 miles, then take a left turn back onto route 120, which now is called Mono Lake Basin Road. Follow this road for another 4-5 miles, then make another left turn onto a dirt road (Test Station Road) and this will take you to a small visitor parking lot. You will need to pay for day use permit at the ticket machine, but if you’ve got the America-The-Beautiful interagency pass, this will be accepted here — just display it in your car.
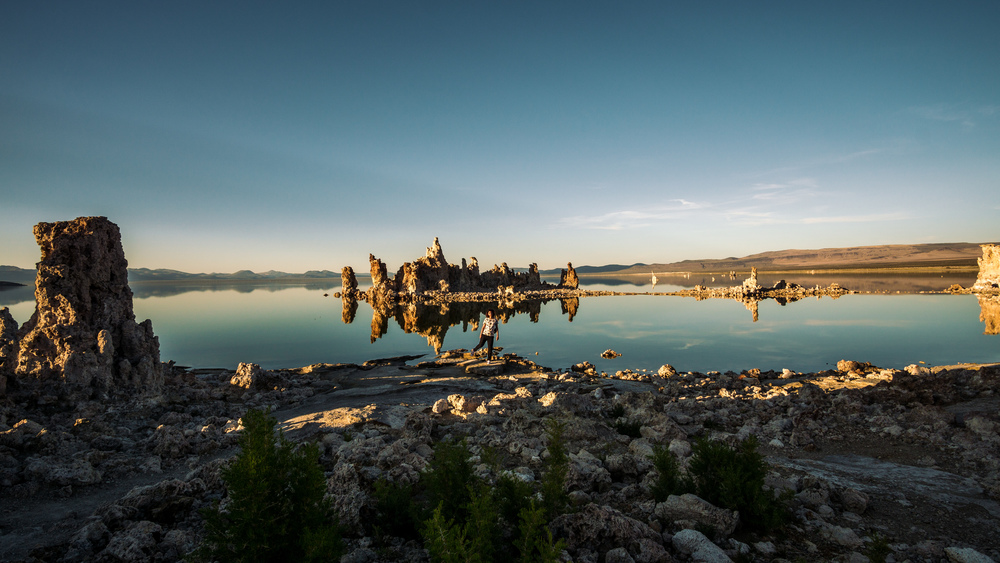
Mono Lake is a saline soda lake, which simply means that it is highly alkaline (i.e. pH > 7). Soda lakes are characterised by the relative absence of soluble magnesium or calcium (otherwise the pH would be neutral). This means that when underground, calcium-rich springs seep into Mono Lake, the calcium reacts with the carbonates of the alkaline lake water and forms limestone, which builds up as weird and beautiful columns, so-called tufas, along the water’s edge.
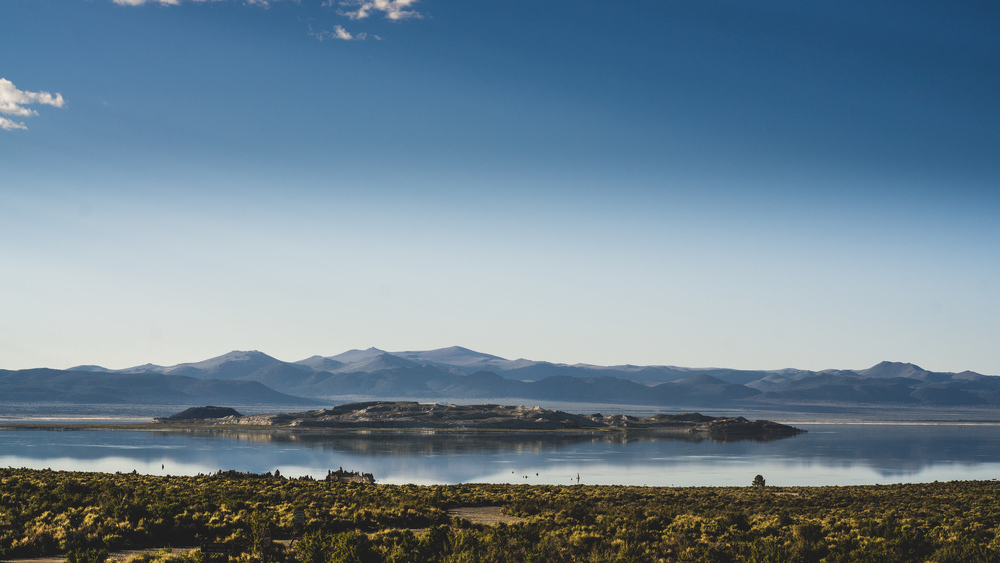
The incredible beauty of the surrounding natural scenery, together with the tufas and the calm, reflective waters account for Mono Lake’s otherworldly charm. It’s such a weird and surreal place, you really need to see it to believe it. Sunsets are spectacular here (just look at the feature image for this post!) so if you time this first part of the road trip right, you’ll be here just in time for magic hour. There are no fish in Mono Lake (the water is too salty), but there are brine shrimp here and these attract quite a lot of birds that feed on them, so if you are into birdwatching, you’ll have a good time at Mono Lake.
After the sun has set behind the mountains, head back to your car and drive to Lee Vining, just a few miles north along route 395. Its a small town, but there are a few good hotels here and you can get decent, low-key dinner here too.
Leg 2 (Lee Vining -> Tioga Road -> Tunnel View -> Glacier Point):
Get up early (or not — the schedule for the day is less packed, so if you are decently fast hiker, you can have a bit of a lie-in), get a good breakfast (again there are several decent places for this in town, e.g. El Mono Motel’s Latte Da Coffee Café) and get back in your car. Drive back up Tioga Road (and marvel again at the natural beauty along this road) and cross the park from east to west, then take a left turn onto Big Oak Flat Road and head back into Yosemite Valley. However, instead of driving all the way to the end of the valley, take a right turn now onto Wawona Road and head up to Glacier Point.
There will be several great viewpoints along the road, first of all Tunnel View, so be sure to stop and let your gaze wander. Tunnel View will be packed with people, so be patient if there is a bit of a traffic jam or if it is tricky to find a parking spot — the view is well worth it. Also watch out for people crossing the road in excitement.
Finally continue along Wawona Road, and take a left turn onto Glacier Point Road. Just before you reach Glacier Point, there will be Washburn Point to give you a little taste of the views that are to come during your backpacking trip.
Once at Glacier Point, get your backpack ready, be sure to leave all food and other smelly articles in a dated bag inside one of the bear storage boxes in the parking lot (or risk finding your car’s door torn open by a hungry bear on a midnight food binge) and set off hiking for a couple of days!
Backpacking trip in Yosemite NP (Glacier Point -> Little Yosemite Valley -> Half Dome -> Illilouette Ridge / Mount Starr King -> Glacier Point):
This is a fact: there are about 4 million (tendency rising) visitors to Yosemite National Park each year, but only some 56,000 (or about 1.4% of visitors) will actually go on an overnight hike. Considering how large the park is, unless you venture only to Little Yosemite Valley (which has a backpackers campground) you are guaranteed to find solitude, even at the peak of the summer season. So don’t miss this opportunity to get away from it all and pack your tent and hike out!
I have written up our 3-day, 2-night backpacking trip as a post of its own, so please refer to that post for this section of the road trip. I have also posted my best effort yet of capturing timelapse footage of the Milky Way rising in the night sky — just so you know what you can hope to see in the Yosemite wilderness.
Leg 3 (Glacier Point -> Sebastopol):
Three days after setting off, you will probably get back to your car for lunch time at the earliest and you will be exhausted (it’s a mercilessly uphill and exposed hike back up to Glacier Point). So take the time to freshen up a bit, changing into a new set of clothes and having a good cool drink or ice cream from the concessionaire store at Glacier Point.
This leg of the road trip will be the longest drive of the entire trip, and since you will probably be fairly tired from the 3 day backpacking trip that preceded, whoever is driving will find it the toughest too. Anybody else who has joined you for this trip will probably just happily doze off in the car.
Once you get to Sebastopol (or some other town in the Sonoma or Napa valleys), relax, take a shower and go out for a well earned dinner and go to bed early (or hit a bar and have a beer).
Leg 4 (Sonoma Valley exploration):
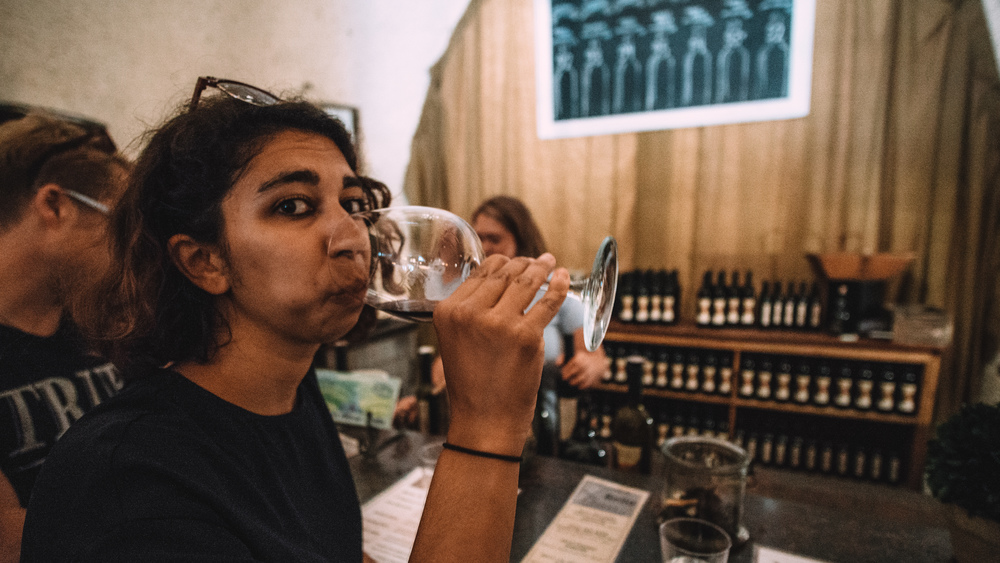
So after a couple of days of hiking and plenty of driving, take it easy the next day, get up late, then head to either Sonoma Valley or Napa Valley, rent a bike (or not, if you plan on getting stopped for a DUI) and go wine tasting! We rented bikes in Healdsburg, then cycled up West Dry Creek Road and stopped at several wineries that the bike shop had recommended to us (I don’t think they got kickbacks for this advice). If you are really serious about your wine, then you probably want to have researched this part of the trip as not all wine estates accept visitors without reservations (though in most cases all you need to do is phone the number on the sign, then come back half an hour later or so…).
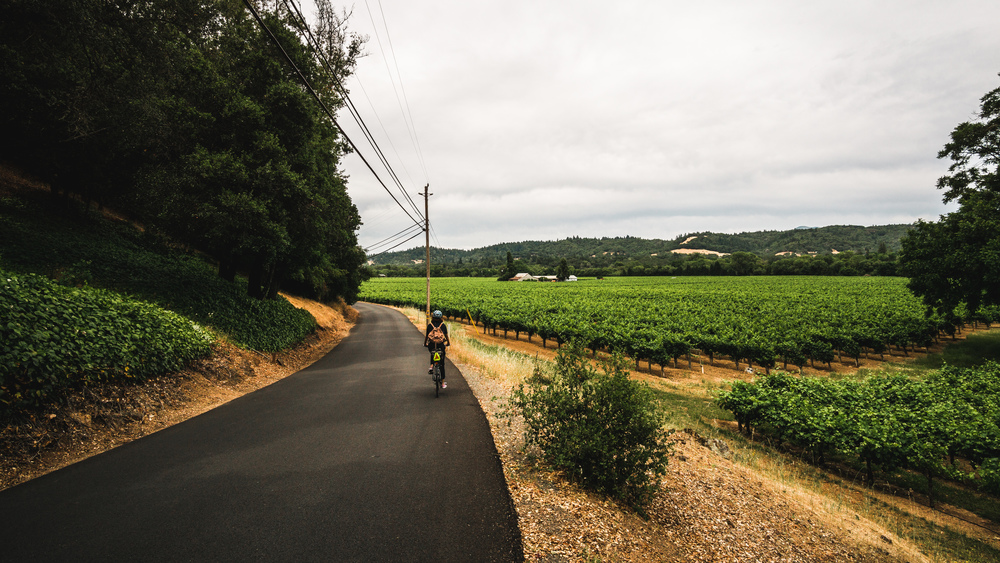
The roads were pretty quiet, with much fewer drunk drivers than I thought there would be (it was a Saturday when we did this trip). The cycling is easy, along gently rolling hills with the wine plantations right along the road.
You can have a decent lunch sandwich from the deli at the Cry Creek General Store (busy!) and enjoy a very relaxed day out on the bike here.
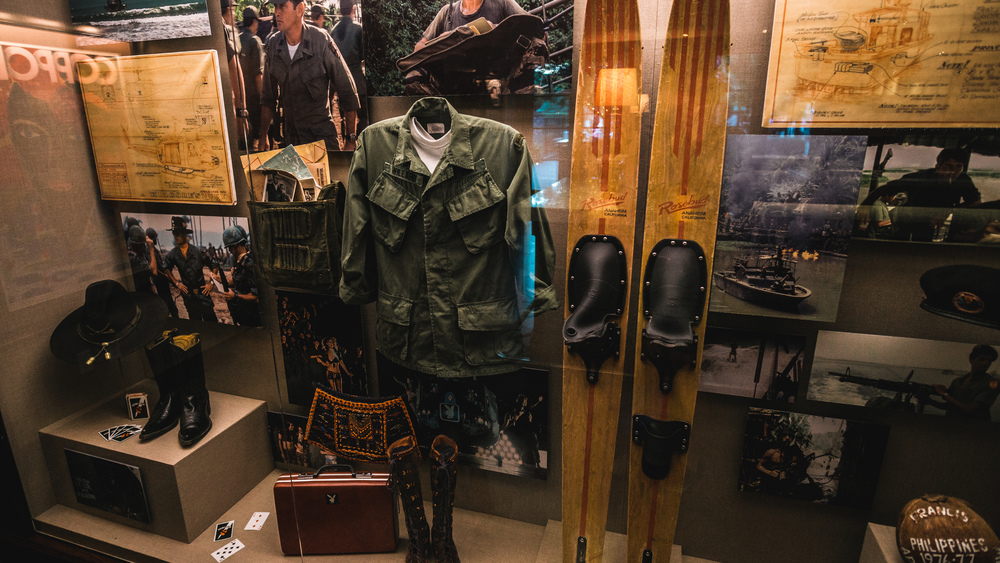
Now, if the first thing you did in San Francisco was to visit the Zoetrope building, then you probably definitely want to reserve a table for dinner at Francis Ford Coppola’s wine estate (just north of Healdsburg). It’s quite a good business he’s got here: a winery with an hotel, a pool, several bars, a restaurant and a museum. It is a pleasant corner of the world, the weather is good, you can play a game of Bocce (if you know how) and visit the museum. There is the original desk that Marlon Brando’s godfather sat at, there is the cavalry Stetson hat (or at least one of the several that were used during filming) that Robert Duvall’s napalm sniffing Kilgore wore in Apocalypse Now and plenty of other props and artifacts from Coppola’s films. There also seems to be a gift shop every five meters, but don’t let that distract you and the museum is free anyway.
The restaurant, though a bit posh and on the expensive side, is very good and I definitely recommend the roasted rack of lamb. Have a nice, relaxed evening.
Leg 5 (Sebastopol -> Bodega Bay -> Point Reyes -> Bolinas -> San Francisco):
For the final leg of the trip, get up early again: there is plenty to do. From Sebastopol (or wherever you sat up shop in the wine country) head west to the Pacific coast. Drive to Bodega Bay (again if you are a film buff, this will be right up your alley: much of Hitchcock’s The Birds was shot here and on locations nearby). If you have not yet had breakfast, have some in town and then head up to Bodega Head for a nice short walk along the cliffs and, if you are lucky (we were not), some whale sightings.
After Bodega Bay get onto Highway 1 (yes this is the famous Pacific coastal highway, but really it is the Big Sur section between San Francisco and Los Angeles that is the most spectacular) and drive south the Point Reyes National Seashore. Along the road there will be several very good seafood shacks, so be sure to stop and have a bite. If it is weekend and lunch time when you get through here, be aware that it will be quite busy.
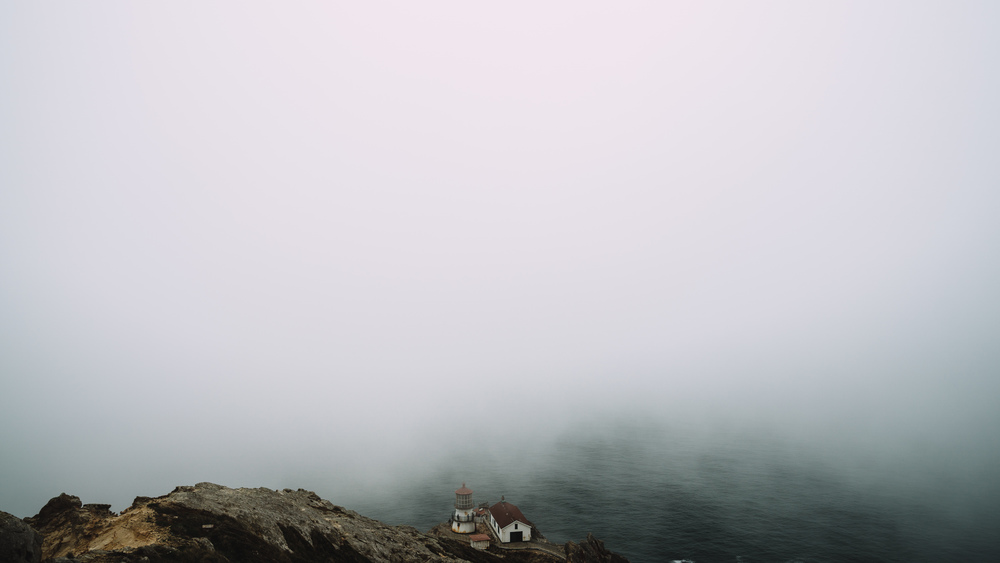
Point Reyes National Seashore has good hiking and spectacular wild, hike-in beaches to offer and there is nice lighthouse at the tip of the peninsula. This happens to be the foggiest spot in the US, so even if the sky looks clear when you are down near Tomales Bay, it may be quite a different story up at the lighthouse. There are also good spots to see sea lions and elephant seals on Point Reyes, so bring your binoculars.
Finally continue south towards San Francisco. There is a nice little seaside village that you can have an early dinner at: Bolinas. It’s a short detour off Highway 1 at the southern end of the Point Reyes peninsula, but there is no posted sign as the villagers kept stealing it. The local authorities no longer bother to put another one up and so the town has acquired a bit of a reputation as a reclusive community. However when we visited, the local folk were very friendly and there is even a small town museum, which presumably is still catering to tourists.
After your visit to Bolinas, keep going south. If you are still good in time, you can stop to visit Mt. Tamalpais (aka Mt. Tam). Otherwise continue south and cross the Golden Gate Bridge (you will have to pay for the tolls, but you get the bill in the mail as it is totally automated), then continue to San Francisco airport (or head into town if you are planning to add a few days here).
Final notes:
This was one of the best road trips I’ve done in the US so far, so I would not change much. It’s got a good balance of city trip, outdoor adventure and spoiling yourself / wine tasting. As with all trips, feel free to change where you stay for the nights, where or how long you hike out into the wilderness etc etc etc. If you have a few extra days at your disposal, I would add visits to Kings Canyon and Sequoia National Parks and maybe a detour south of San Francisco to Moss Landing (to see sea otters), Monterey and Big Sur.
Data files (click on the link, then download whatever format you prefer from the gpsies website):
Leg 1 (San Francisco, Yosemite Valley, Tioga Road, Mono Lake, Lee Vining): http://www.gpsies.com/map.do?fileId=gmjxwsxhlgwgahzg
Leg 2 (Lee Vining, Tioga Road, Glacier Point): http://www.gpsies.com/map.do?fileId=spckqiuwbglfiban
Leg 3 (Glacier Point, Sebastopol): http://www.gpsies.com/map.do?fileId=bifzusgwdbdhvikh
Leg 4 (Sonoma Valley exploration): http://www.gpsies.com/map.do?fileId=jupcojbdbrhcrese
Leg 5 (Sebastopol, Bodega Bay, Point Reyes, Bolinas, San Francisco): http://www.gpsies.com/map.do?fileId=kbtjdbzwjecamwuq
Complete Route: http://www.gpsies.com/map.do?fileId=ntngjbosehuibugd
How long?
2 days, 1 night (though to be fair you have to spend a first half night driving up from Las Vegas…)
How many miles?
540 miles / 870 km (of which ~18 miles are hiking not driving)
How?
Road trip + short wilderness backpacking trip
Map required for driving optional for hiking, compass optional (i.e. you can clearly see where you have to hike to in Panamint Valley)
Maps?
National Geographic Trails Illustrated Map #221
Itinerary:
Las Vegas -> Dante’s View -> Zabriskie Point -> Badwater Basin -> Artist’s Palette -> Panamint Valley -> Father Crowley Point -> Owens Lake -> Rhyolite -> Las Vegas
Leg 1: Las Vegas -> Dante’s View -> Zabrisikie Point -> Badwater Basin -> Artist’s Palette -> Panamint Valley
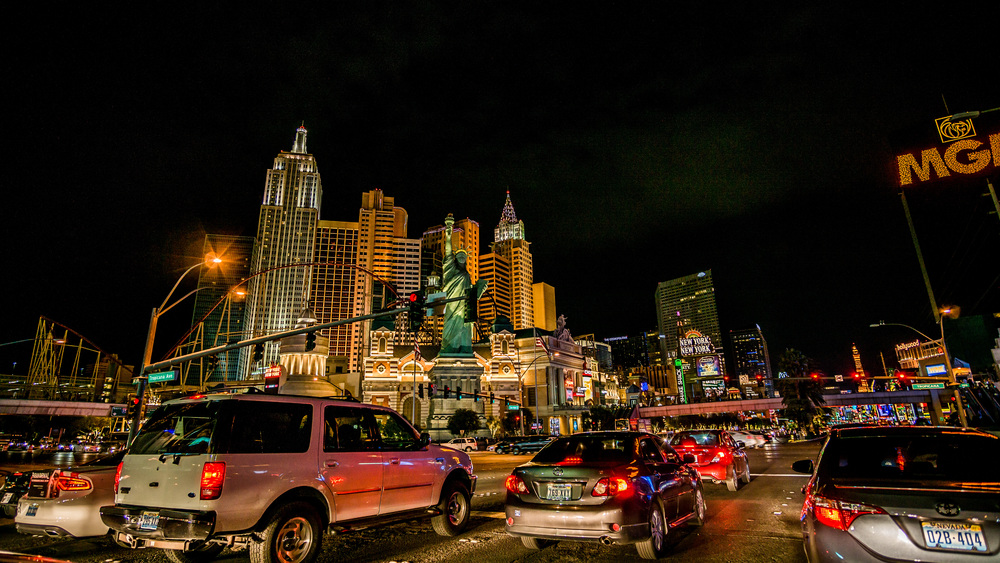
You want to go to Death Valley to seek solitude? Well, the best airport to get there is Las Vegas, so you’ll have first to escape from the weird concentration of human life and folly that is Las Vegas. Now, I had never been to Sin City, so I was looking forward to seeing all those kitschy hotels-cum-casinos that I only knew from films. Once you got your rental car, you can either speed out of Las Vegas on interstate 15 or you drive leisurely (even at night there seems to be a lot of traffic) along the Vegas Strip before heading onto route 95. I had arrived at 11pm and did not plan to be in Death Valley before 5 or 6am, so I had plenty of time and did the latter.
Now if you arrive like me at 11pm or midnight, you have plenty of time to drive up to Death Valley. I caught a bit of sleep on the flight over from NYC, but still, your internal clock will be a bit upset and you will get tired behind the wheel. So you can either drive to a motel along the way or, if you are a cheapskate like me, you can head to the Amargosa Valley rest area at the junction of routes 95 and 373. From Las Vegas it will take you about an hour and a half or so to drive up to here and it will be just over an hour from here to Dante’s View, where you want to be for sunrise. So you will be able to take a nap for a couple of hours in your car (or motel if you went with that option). Hell, at the rest area there’s even a weird Alien / Area 51 store which runs some kind of a truckers’ brothel on the side. The truckers that came out of there looked like you can spend a good few hours in there too! Anyway I also stopped on the way up from Vegas at a superstore to buy a few gallons of water and some food for the entire trip, so you should also calculate some time to do that.
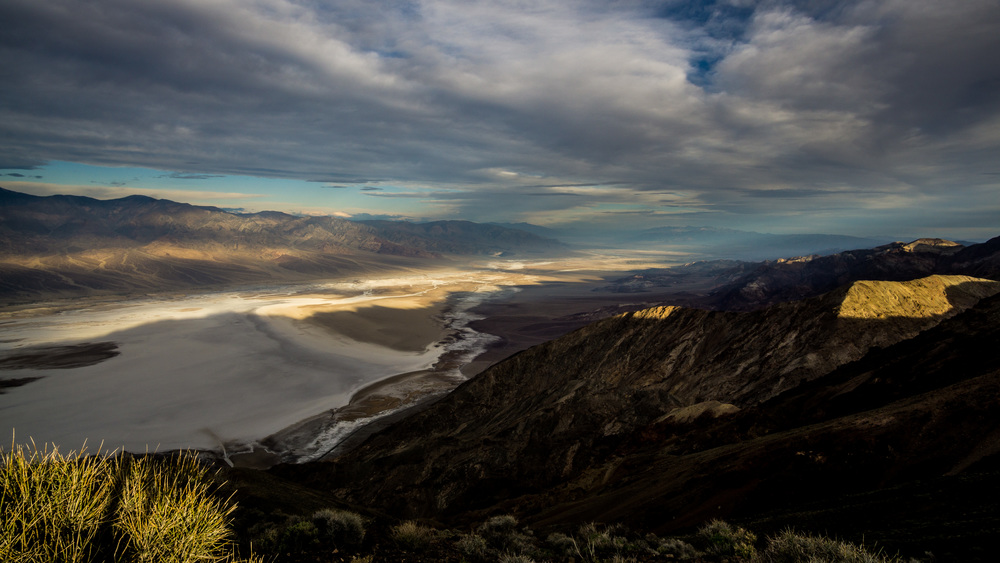
Now, depending on what time of the year you do this trip, you want to leave between 4 and 5am from the Amargosa Valley rest area so as to arrive on top of Dante’s View for sunrise or shortly thereafter. If you don’t have an America The Beautiful multi agency pass, don’t forget to stop at the park entrance to pay your fee at the machine. Dante’s View is the best place to start your trip in Death Valley: you get a full (on clear days) overview of the entire valley from north to south. Badwater Basin lies pretty much straight ahead at your feet and you can clearly see the expanse of the salt flats. Telescope Peak (the highest point in the park) is just opposite across the valley. As the sun rises, the valley slowly catches its rays and lights up. You can hike for a bit along the ridge — a great way to stretch your legs after the drive up here.
Once you filled up on the georgeous view, get back in the car and take the short drive down the mountain and to Zabriskie Point. If you’ve seen Antonioni’s film you probably want to strip naked and make love with someone, anyone, but it’s not a great idea: you’ll probably get arrested. Zabriskie Point is probably THE most iconic scenery of Death Valley. Most people will just walk up the viewpoint from the car park and snap a few pictures (like the feature image of this post), but I highly recommend you take a short hike (or do the full loop; about 6-7 miles) in the badlands. You’ll get up close to Manly Peak and be quite on your own. Considering how much other stuff I wanted to cram into the day, I only did a short 2 miles loop rather than the full hike.
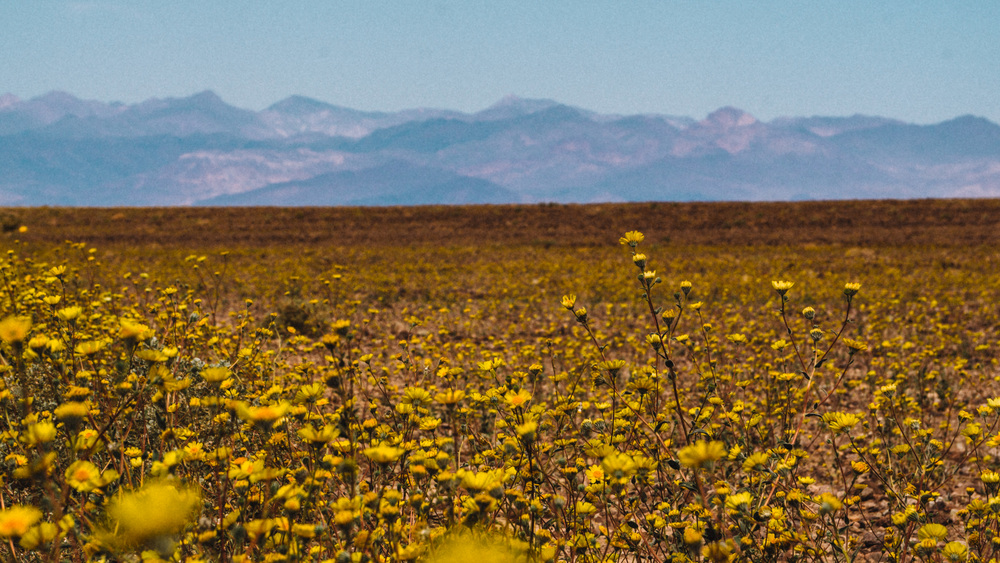
Next up: drive to Badwater Basin, passing through Furnace Creek, where you can get some food, drinks or gas if you are in for any of these. At Furnace Creek, take a left turn onto Badwater Road and from here it’s a magnificent drive down to Badwater Basin. If you do this in late winter and there was a lot of rain in the weeks / months prior, you can get lucky and witness a superbloom: the valley just turns yellow with wild flowers. This was the case in March 2016 and it was stunning!
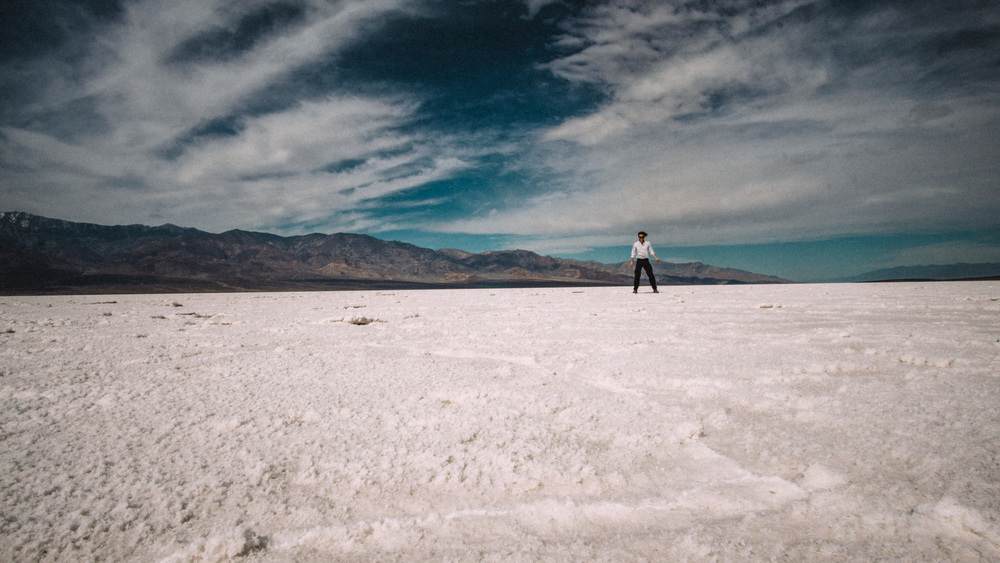
When you get to Badwater Basin, you will probably struggle a bit to find a parking spot (I just parked a bit further down the road), but do get out of your car and walk out onto the salt flats — you will feel as if on a different planet. If you do this trip in summer, do not attempt this without sunscreen, sunglasses, a hat and plenty of water or you’ll be in trouble in no time. Even in early March it was pretty hot out here and blindingly bright as the salt reflects most of the sunlight.
When you have had enough, walk back to your car, and drive back in direction of Furnace Creek. However before you get all the way up there, be sure to take a right turn signposted for Artist’s Palette. It a nice drive through rolling badlands, and mid-way through you get to the namesake badlands with all their splendid colours. You can take a short walk / hike here too if you are still good in time.
After this, drive back up to the junction with route 190 at Furnace Creek. Go left now, driving north past Furnace Creek, then west through Stovepipe Wells. Backcountry permits are optional in Death Valley and you can backpack pretty much anywhere (though no camping on the lower Death Valley floor), but it is a very good idea to get one in case of emergency (the rangers will know where you planned to go). You can get this at either the visitor center at Furnace Creek or the ranger station at Stovepipe Wells.
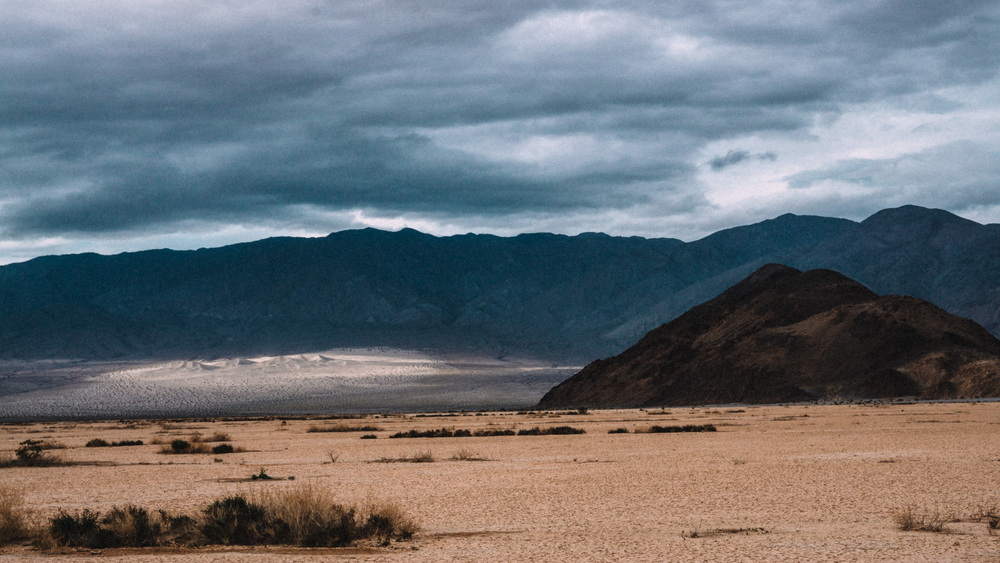
Continue along route 190, crossing the Panamint range into Panamint Valley. In the valley there will be a road going left / south to Trona and beyond. Before this, a little under 2 miles up the road, is a small dirt road going off to your right. Take this road. If you want a longer hike (what I did), then just park your car on the side of this dirt road and set off for the Dunes at the end of the valley (7-8 miles one-way). If you want a shorter hike, then continue the dirt road until its end, and from there it’s a shorter 3 mile hike to the dunes.
Overnight hike: Panamint Dunes
My original plan had been to drive up to Ubuhebe Crater, then take the long dirt road to the Racetrack and spend the night there. However there were several reasons why I did not do this: i) it is a long drive up there and a longer drive on the dirt road down to the Racetrack, ii) you cannot camp next to the road anywhere and you should camp on a small campground south of the Racetrack (or you need to park you car along the road and hike out for at least a mile), iii) I was on my own in a small economy car, so if I had gotten more than one puncture along the dirt road or stuck in loose sand (a real risk from what I’ve read) I would have been in serious trouble. So if there are a few of you, you have a high-clearance 4×4 car and you have a bit more time at your disposal, then I would still urge you to do this: the sliding rocks of the Racetrack are another key Death Valley sight.
My back up plan was to hike to the Panamint Dunes: an easy hike: flat and impossible to get lost as you see where you need to go all the way. That said, it’s not the most exciting hike, since the scenery never really changes. You are also quite exposed to the elements, so if the sun is fierce or there is a sandstorm in Panamint Valley — don’t do it. Panamint Valley is also a training area for the local airforce bases, so if you are seeking solitude, the noise of jets flying overhead might not be what you are looking for. That said, watching their crazy weaponised ballet in the sky is pretty spectacular in itself.
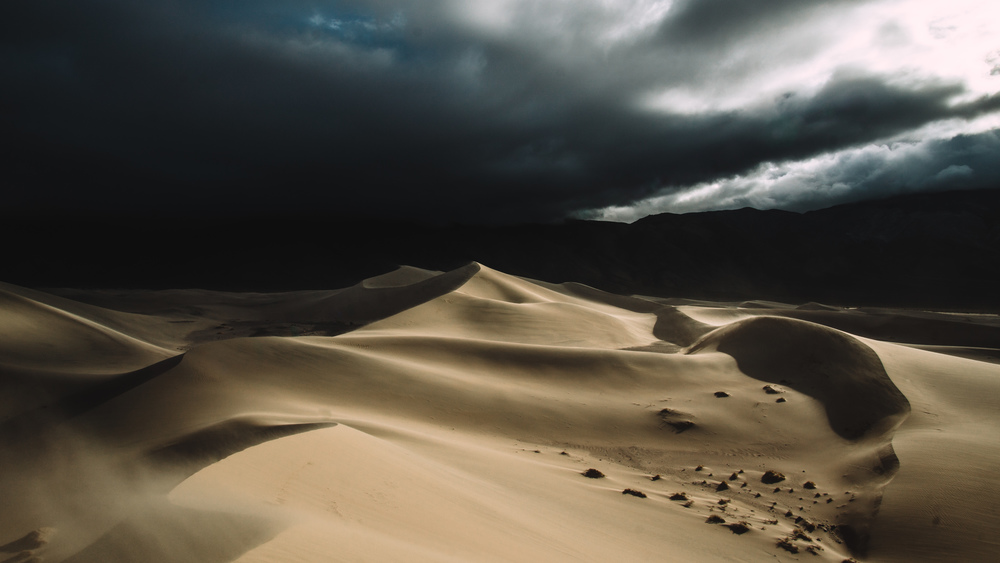
Now I have to admit, camping at the foot of the Panamint Dunes was not the brightest idea I’ve ever had. It was quite windy (I think it is always windy in Panamint Valley), and even though I pitched my tent somewhat sheltered by a big bush, I did not spend a quiet night and feared constantly that my tent would be blown away. Also the sand gets blown up to the norther end of the valley (that’s why the dunes are there in the first place!) and it will get blown under your tent’s raincover and through your mosquito net. In fact the mosquito net will filter the sand so that all your stuff (including yourself) gets covered in very fine sand.
The upshot was, that in the morning I was up early, and had the Panamint Dunes all to myself. There were a few storm clouds from the windy night that were just beginning to disperse and when the sunlight hit the dunes, it was just magical.
I packed up my tent and stuff before setting out into the dunes and I left my backpack near a bush so that I would not have to carry all that stuff up onto the dunes. If you do this, take good note of your surroundings as finding you backpack later can be much harder than you think.
Once you have had enough running up and down the dunes (they are really high, so be aware of this if you’ve got vertigo), get your backpack and hike back out the way you came.
Leg 2: Panamint Valley -> Father Crowley Point -> Owens Lake -> Rhyolite -> Las Vegas
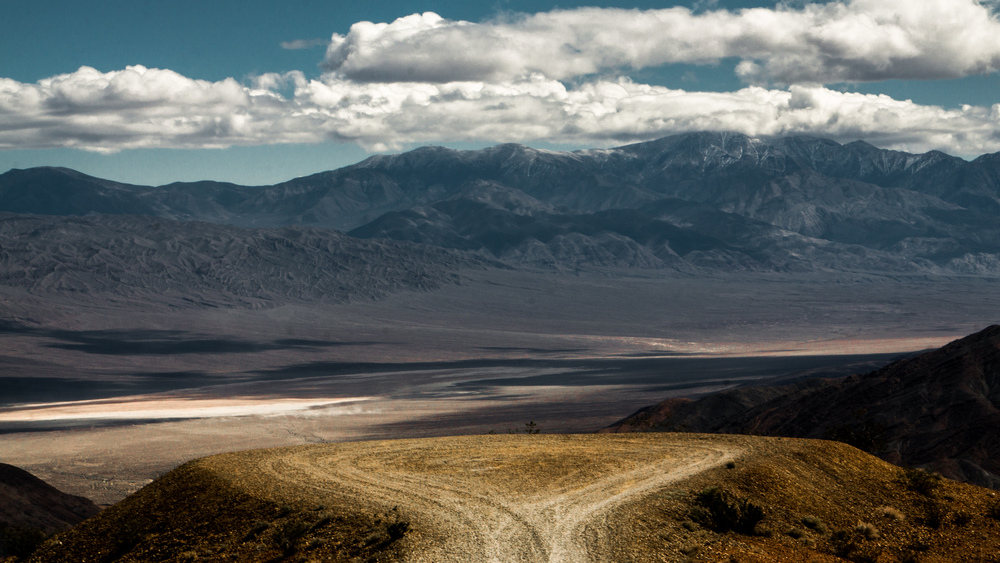
OK so day 2 in the desert. You will probably spend most of the morning in the dunes and hiking back to the car (unless you did the short option). You will also need to get back to Vegas for your flight back in the evening. So not that much time left, but still plenty enough to see a few things. First off, overlooking the valley you just spent the night in is Father Crawley Point. To get there, simply continue along route 190 which snakes uphill out of the valley. The first exit on your right, sign-posted Father Crowley Point, is the one you want to take. You can either leave your car at the main parking lot, or drive the final mile on the dirt track. I hiked, but it’s up to you. The turn-around point of the dirt road makes for quite a fine view over Panamint Valley with good views over the valley floor and Telescope Peak on the far end.
After this, get back into your car and continue along 190. You will reach a plateau and, if you have never seen them before, watch out for the Joshua trees on either side of the road. As you continue along 190, get ready to be blown away by the sight of the eastern Sierra Nevada as the road bends downhill into Owens Valley. If you are like me, you will have to stop several times along the road, get out of the car and just scream in excitement at this sight.
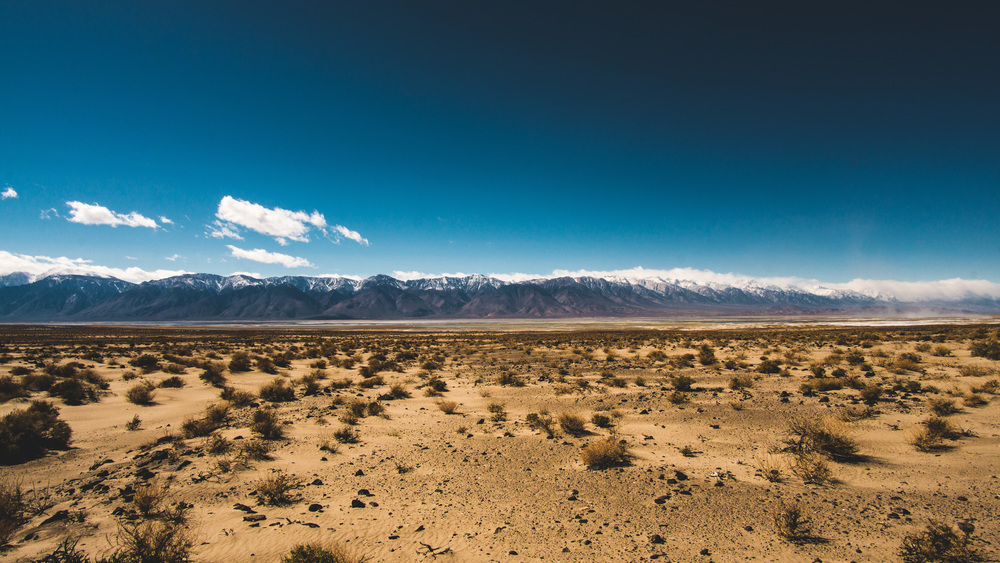
Finally, as the road reaches the valley you will come to a junction: route 190 veers left / southeast to Olancha whereas straight ahead (northeast) starts route 136. At this junction is a handy little parking lot, where you can park your car and walk a bit towards Owens Lake. There is also an informative panel with a bit of history about Owens Lake. Now this is a mostly dry lake, but there is still some water. The reason is simple: you are standing in front of the single biggest source of dust pollution in California and the state decided it was a good idea to divert some water here to keep the worst of it at bay. Owens Lake used to hold much more water in the past but fell victim to the Californians thirst for water and much of the river feeding it was diverted into the Los Angeles Aqueduct. Flanked by the glorious Sierra Nevada mountains, the place does not look that bad, but sure enough when the wind picks up you can see the sand flying around. In fact you can see it being kicked up on the picture above. It’s a lovely spot for a picnic and the road down to Olancha is pure American road trip scenery, so enjoy the view.
Finally get back into your car and head back towards Death Valley: after all you need to get back to Las Vegas. You can take the longer way and after you go past the Mesquite Sand Dunes, take a left, and then immediately a right to get onto the Daylight Pass Road. It is a glorious exit from Death Valley, so do stop at the top for a farewell view over the valley.
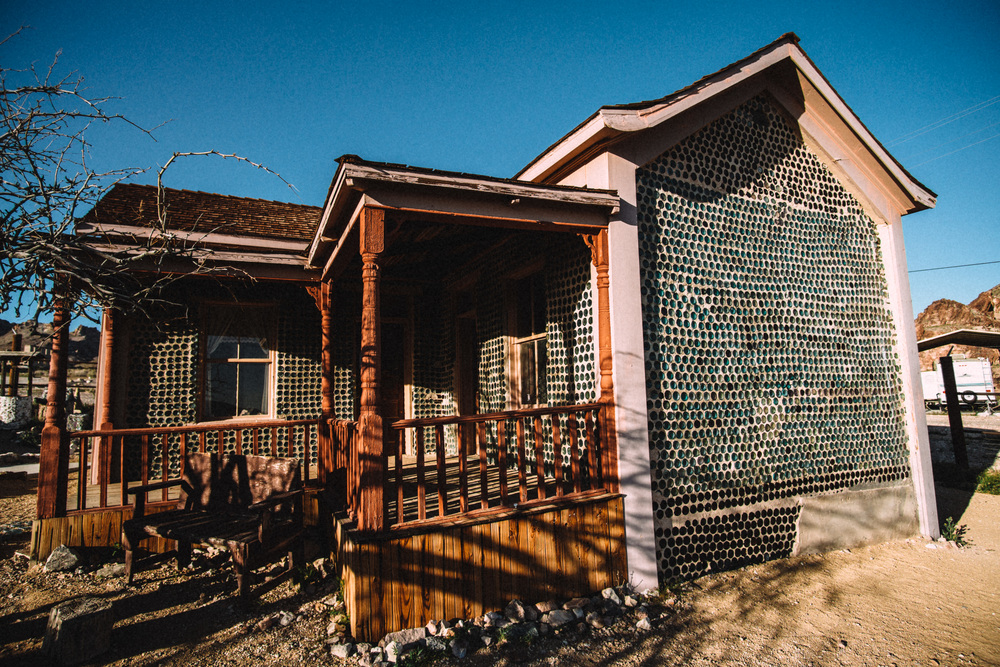
Continue all the way to Rhyolite, Nevada. This is a ghost town now. It was founded as recently as 1905 after a gold rush exploded in the area. The population reached about 5,000 at its peak, but by 1920 the town had been abandoned — the local mine had been hopelessly operating at a loss and in fact closed in 1911. Most of the buildings are in ruins now, but some like the bottle house have been restored. It is a charming little place and it does not take too long to explore it.
Finally, head back to Vegas. If you need food or gas, Beatty, NV, is nearby so do stop there. Sunset will be in full swing as you drive down Amargosa Valley towards Las Vegas. It is an awesome sight, so enjoy the drive.

All in all this is a great, power-charged trip. Probably best to do it on a long weekend or even over 4 days. This gives you more time to explore other areas of this desert park. For overnight hikes, there are plenty of options. I decided for convenience on the simple hike to Panamint Dunes, but if dunes and sand are not your thing, you can easily plan a more exciting route for that bit.
Data files (click on the links, then download whatever format you prefer from the gpsies site):
Leg 1: http://www.gpsies.com/map.do?fileId=znfeagoqcnradnah
Overnight hike: http://www.gpsies.com/map.do?fileId=yephwbvssvxmlqes
Leg 2: http://www.gpsies.com/map.do?fileId=ctmseslrvqkwvnjh
Complete Trip (road + hiking routes together): http://www.gpsies.com/map.do?fileId=hauyjffkbzirvxnm
]]>