How long?
2 days, 1 night
How many miles?
32 miles / 52 km
How?
Hiking + wilderness / backcountry camping
Map required, compass optional (i.e. well maintained & sign-posted trail — anyway you just have to follow the river)
Maps?
National Geographic Trails Illustrated Map #216
Itinerary:
Graves Creek trailhead -> Enchanted Valley -> Graves Creek trailhead
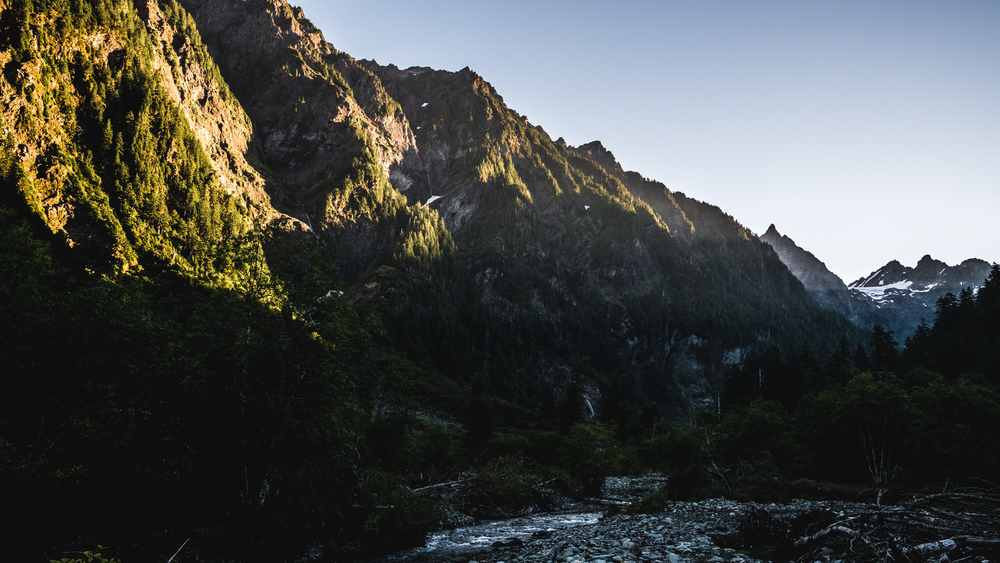
The route couldn’t be easier: from Lake Quinault, follow the South Shore Road until it becomes a dirt road and changes name to Graves Creek Road, then follow this to the end. Park your car, and follow the east fork of the Quinault river for ~15-16 miles until you get to a large-ish valley: you’ve arrived in Enchanted Valley. There is only one trail crossing, 200 yards beyond the official trailhead, where you need to take the trail to the right and that’s it — you just follow the main trail for the rest of it. You hardly need a map for this hike. You will need a backcountry permit from a ranger station, but you can get that in Quinault on your way to the trailhead. Permits are not limited for Enchanted Valley, so you will be guaranteed to get one.
Graves Creek road has been washed out for some time now it seems and is likely to remain so for some time more. The river bed moved and claimed a short section of the road and is perilously close to the road in other parts. This now means that the trail head is essentially 2.5 miles earlier down the road, with an improvised side-of-the-road parking area and makeshift turn-around point. Graves Creek campground is now essentially a backcountry / wilderness campground and the ranger station at Graves Creek looked unmanned at the time of my visit. That said, it’s a flat 2.5 miles and pleasant enough: you have good views over the Quinault river and there are beautiful patches of moss-covered old-growth forest along the trail / dirt road.
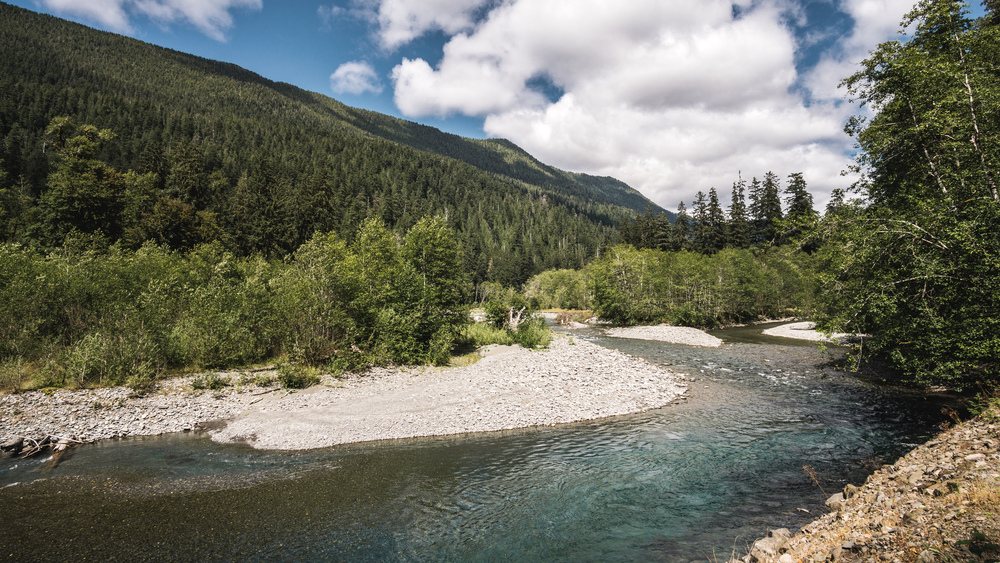
After 2 miles you will come past the Graves Creek campground and then the ranger station. The official trailhead is another half mile (maybe a little less) up the road. You cross a bridge and you are off for a 13.5 miles hike through prime Olympic rain forest.
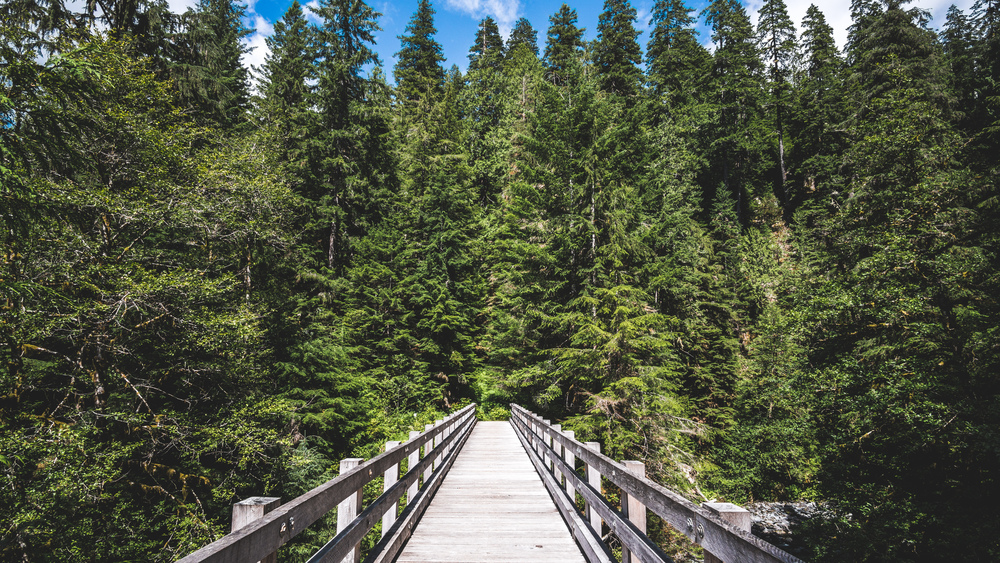
There is not so much to say about the hike itself. It’s a straightforward affair, and to be fair, a bit repetitive after a while. You pretty much stay in the dense woodwork except for a few clearings as you get close to the river bank. When I did the hike (July 2016), ranger crews had cleared the trail up to the O’Neil camp site. For the second half of the trail to Enchanted Valley you then had to climb over fallen trees now and again, the longest bit involving crossing the Quinault river twice over fallen tree trunks. That said, I quite liked that as it added a bit of fun to the hike (the ranger at Port Angeles where I got my permit told me I would have to ford the river, but thanks to the tree trunks this was not necessary). You will hike past 3 other wilderness camp sites: Pony Bridge, Pyrites Creek and O’Neil Creek — so if you do not wish to push all the way to valley, you can set up camp there too (or split the trip into 2-3 nights…).
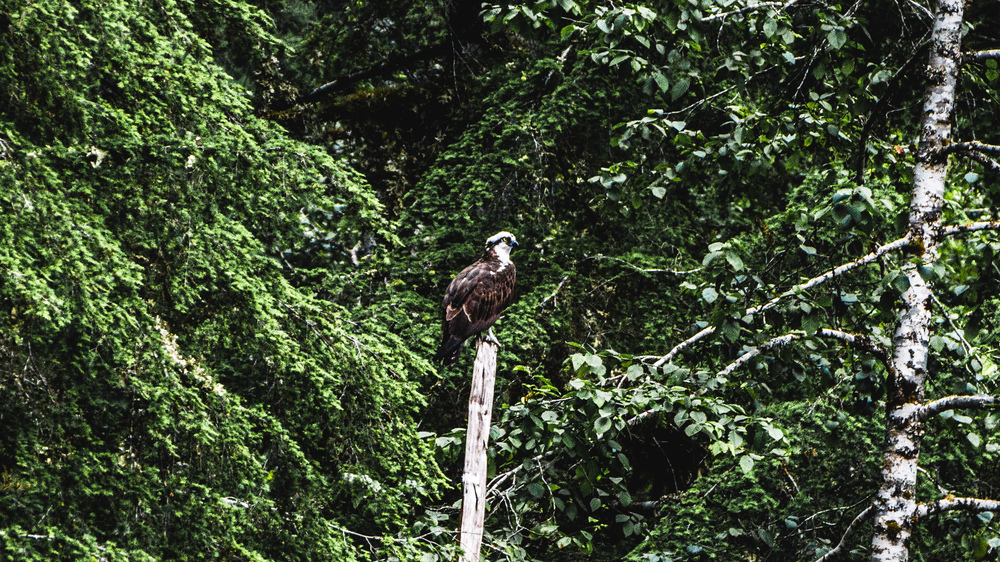
In spring this trail, and Enchanted Valley in particular, are great for bear spotting (so the ranger said) but less so in Summer. And sure enough, I did not come across any bear. There was however an osprey very actively hunting in the valley when I got there and it was quite a sight to see it soaring across the valley floor.
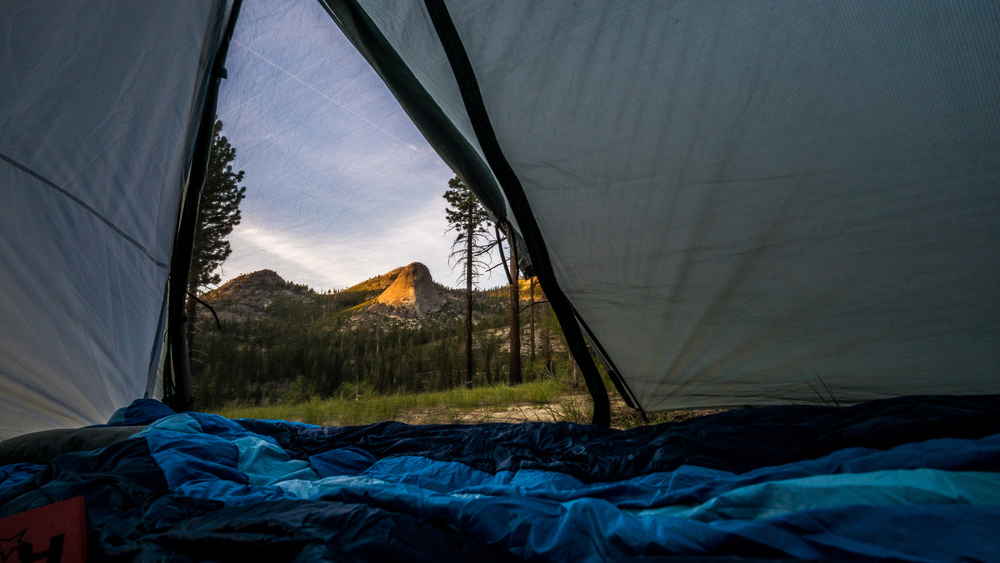
Once you are in the valley, you can pretty much pitch your tent where you want, though you really should pitch it on a previously disturbed / used camp site. I was actually surprised by how many people there were in the valley (it is a long-ish hike after all, with much less spectacular scenery than the beach or mountain hikes in Olympic NP, and the weather, overcast & grey, wasn’t so great either). Most seem to stick fairly close to the old ranger chalet, but the valley is spacious and you should be able to find a nice secluded spot out of the way of the other hikers. There are 2 pit toilets in the valley, which is nice as you do not have to do any digging and don’t have to carry out your used toilet paper. The ranger chalet is quite picturesque, and when I arrived in the evening the clouds were hugging the mountain ride opposite.
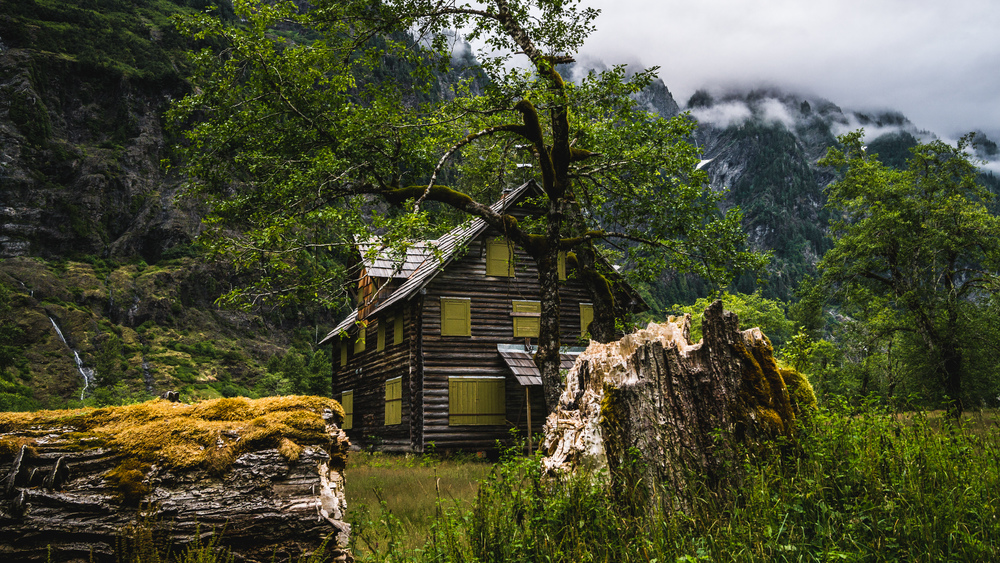
The skies cleared over night and sunrise in the valley was beautiful and spectacular. There was quite a lot of morning dew, so I had to pack up my tent wet and then dry it in the car / at home.
After a good hearty breakfast, pack you stuff and then just hike back to Graves Creek road the way you came in. Not so exciting, but if you want to make a looping hike here, it will be quite a bit longer and you’d have to plan spending 2-3 nights out in the wilderness. But it can definitely be done, but since I was only here for a weekend, it was not an option for me.
What would I do differently now that I’ve done this
I had decided against camping out on one of the beaches since I read that in summer the bugs will be fierce there at dusk and dawn and also since I read that Shi-Shi beach on a summer weekend can see as much as 100-150 people camping out there. I also decided against one of the hikes in the mountains (e.g. the hike up to the Upper Royal Basin is supposed to be amazing) as I had been out to Yosemite NP not so long ago and figured it would be similar to that, so wanted a bit of a changed of scenery. That left only the third of Olympic’s 3 ecosystems: the rain forest. Enchanted Valley seemed perfect: much of the rain forest and probably much fewer crowds than you’d get at Hoh Forest. That said this is probably not the best one-night backpacking trip you can do. The rain forest is really, really nice (just look at the cover image for this post!) but 15 miles is a lot of it, so you have enough of it after a while. The Enchanted Valley is also really, really beautiful, but still not sure if it is worth hiking several hours for (one-way took me 5h, and I was going at a decent pace!). One big reason for me to do this hike was the chance to see bears, but alas this was not meant to be. If all of this sounds quite negative, then that’s only relative. It is a really great hike with great scenery, but compared to the scenery you can get in other parts of Olympic NP it’s probably not the most scenic and spectacular.
Data files (click on the link, then download whatever format you prefer from the gpsies website):
One-way (just hike the same route back the next day): http://www.gpsies.com/map.do?fileId=ptjxwfotlnmqsaql
]]>How long?
3 days, 2 nights (really just 2 half days, 1 full day and 2 nights)
How many miles?
26 miles / 42km
How?
Hiking + wilderness / backcountry camping
Map required, compass optional (i.e. well maintained & sign-posted trails & prominent features all around; still I would carry a compass just in case)
Maps?
National Geographic Trails Illustrated Map #206 or #306 (I’d recommend #306 over #206 though)
Itinerary:
Glacier Point -> Little Yosemite Valley campground -> valley between Illilouette Ridge and Mount Starr King -> Glacier Point
Leg 1: Glacier Point -> Little Yosemite Valley
The route for this leg is incredibly simple: starting from Glacier Point follow the Panorama trail until it merges with the John Muir trail and follow this one until Little Yosemite Valley. This first leg is just over 7 miles of hiking, and mostly downhill. So you can set off in the afternoon if you want to arrive at the campground in the early evening.
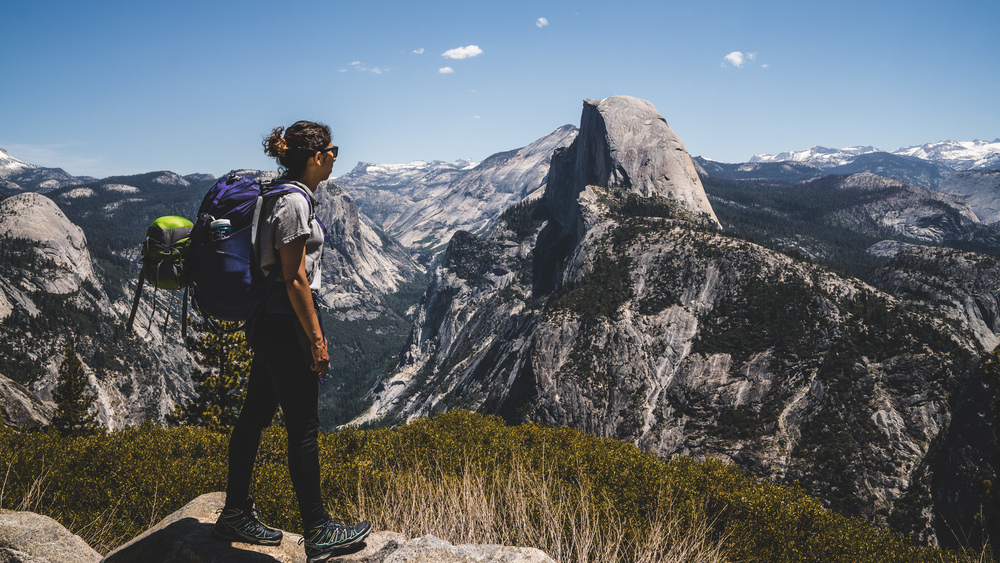
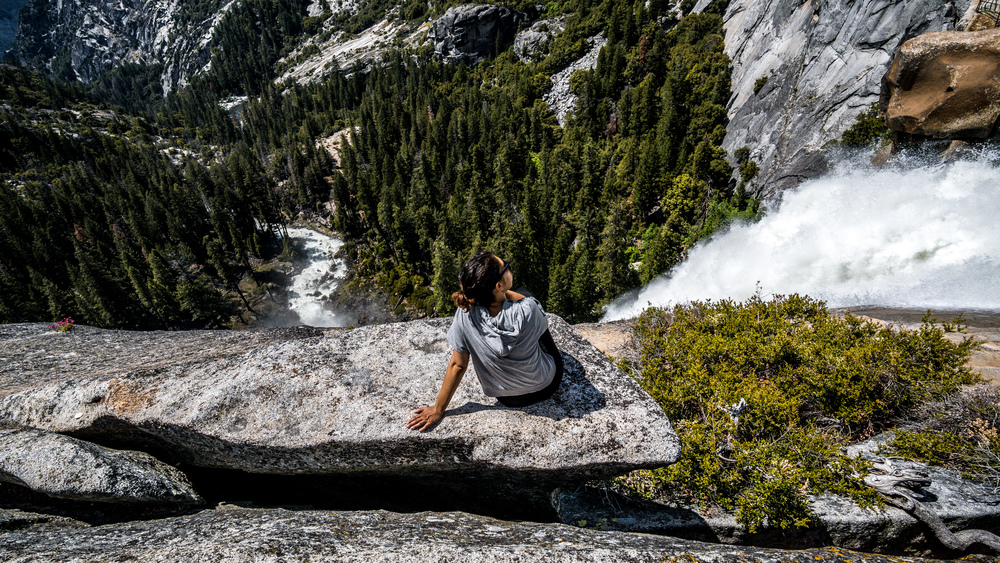
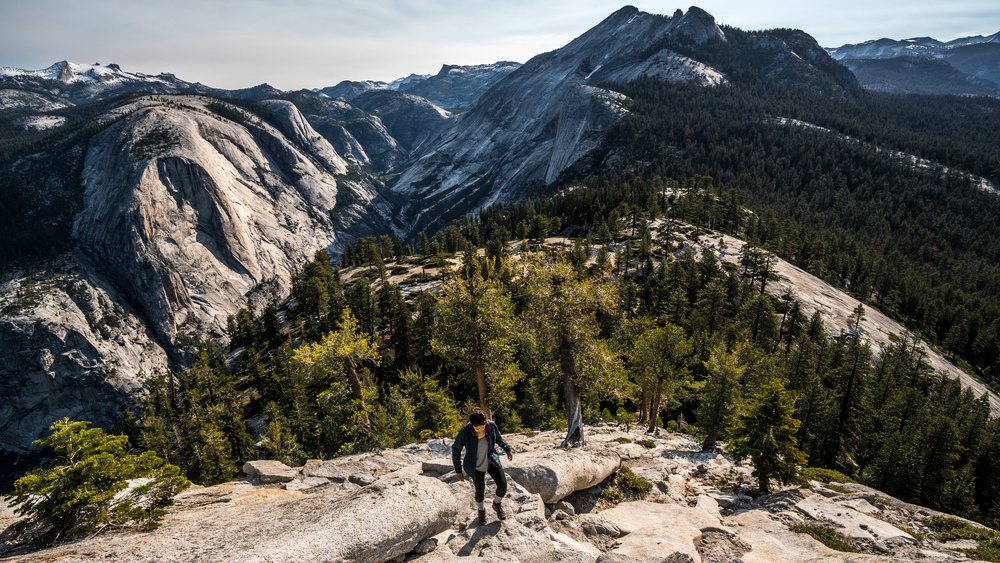
This leg is incredibly scenic. Stepping out of the parking lot, it’s just BOOM! and already you will be overwhelmed with a jaw-dropping view over Yosemite Valley and Half Dome. But it will continue: the Panorama trail has well deserved its name. You will also walk by two very beautiful water falls: Illilouette Falls, and then later, the much bigger (and popular) Nevada Falls.
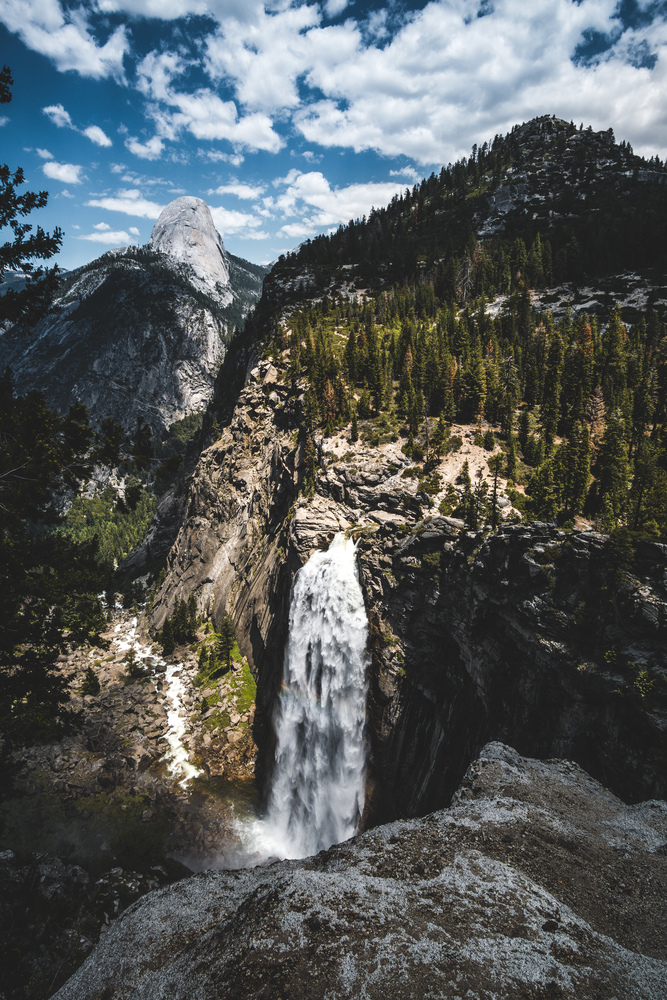
Since it’s so scenic, enjoy the views and take your time. Have a snack or, why not, a late lunch at either Illilouette Falls or Nevada Falls. Or just sit down and gaze over the valley below.
Pitch your tent at the Little Yosemite Valley campground. The whole point of pitching your tent here is so that you can leave your tent and all your heavy stuff here and only carry water and some snacks for the Half Dome ascent (that part is the real butt-kicker of this trip, so you want travel as lightly as possible on that bit) in the morning of the next day.
Half Dome ascent:
For the Half Dome ascent, simply follow the John Muir trail some more until the Half Dome ascent trail branches off. The trail will go uphill modestly at first and you will walk across a pleasant forest. Just before you get to the famous Half Dome cables, right after the sign telling you that you now really, really need a permit to continue on this trail, you will have to deal with a first, very steep section that will take you right above the tree line. The views will be worth the effort. You will be quite exposed to the elements here. In our case this was just the sun, but even at 8am it was already burning fiercely — remember you are at altitude here.
After that first serious uphill bit, you get a short respite and then you will reach the much dreaded cables. Be sure to bring gloves (though there is a good stockpile of old gloves at the foot of the cables) and shoes with solid grip. You don’t need any climbing skills to manage the cables, but it’s still not for the faint-hearted or those with serious vertigo issues. It’s quite steep and since you are at altitude you will find that you will need to catch your breath from time to time. You are also extremely exposed here (and will stay so at the top), so don’t attempt the ascent if you see a storm heading your way.
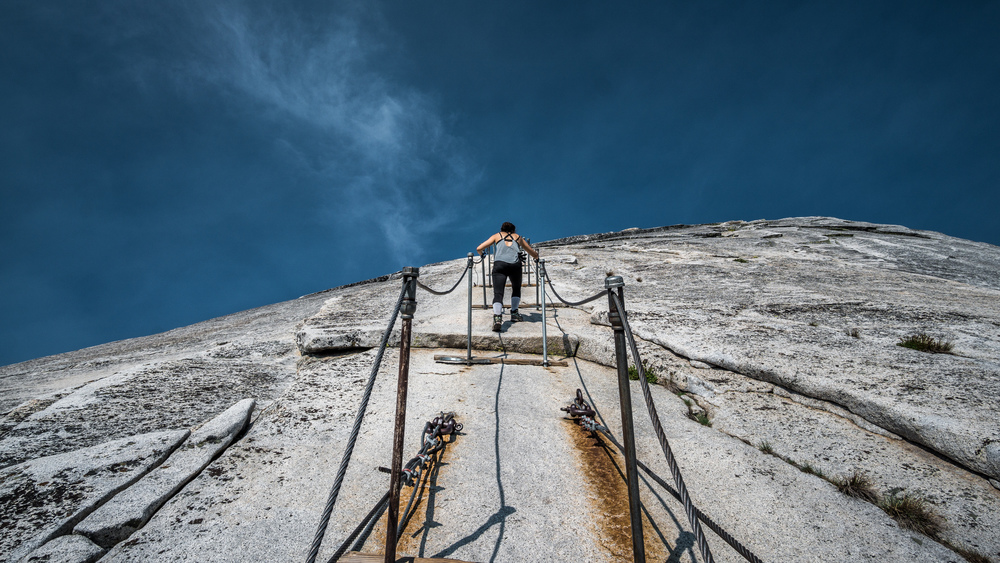
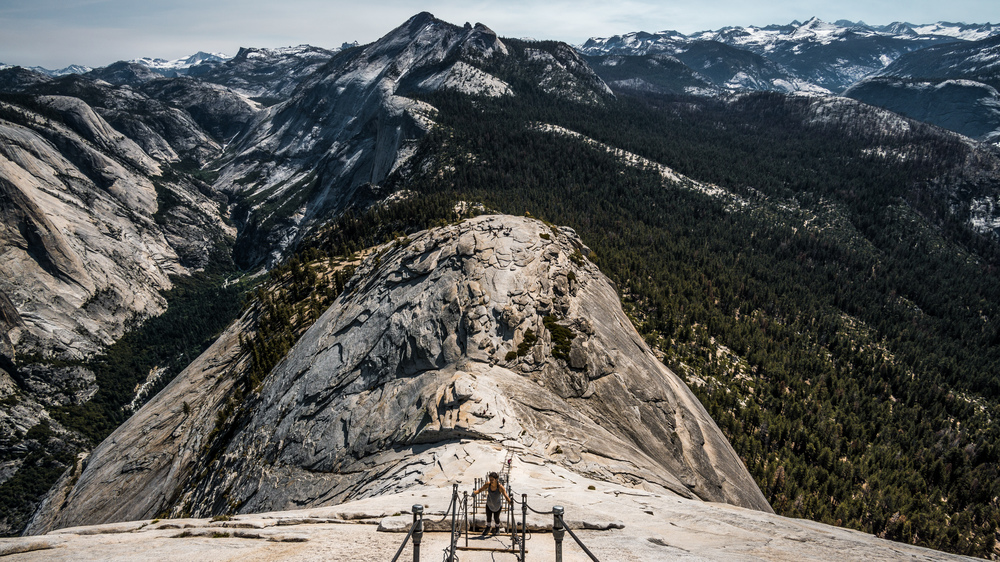
The view from the top will be well worth the effort though and just simply knock you off your feet. Enjoy it!
Once you have caught your breath and got your senses back from the stupendously amazing views, just retrace your steps back to Little Yosemite Valley. It’s all a walk in the park (well OK literally this whole trip is…) from here.
Leg 2: Little Yosemite Valley -> valley between Illilouette Ridge and Mt. Starr King
Follow the Jon Muir trail until the Panorama trail branches off, follow this one for just a short, but steep ascent through a wooded area, then take stop following the Panorama trail and instead take the trail that branches off to the left. Follow this one for one km or so, until you reach a fork in the trail, follow the left one for about 3 miles, then when you reach the next crossing at the foot of a big rock, follow the trail to the right and cross the little stream.

Follow this trail for about a mile until you reach a clearing with good views of the Illilouette Ridge to the West and Mount Starr King to the NE. The ground is quite sandy here.
Walk a bit off the trail to the left (what we did) or the right (closer to the river) and pitch your tent here. Not too many people venture to this part of the park (I think), so you should be all by yourself at this spot. If the skies are clear you will be treated to quite a show in the night sky, as evidenced by this AMAZING time-lapse I was able to record when we did this trip (being quite the humblebrag here, I know).
Leg 3: valley between Illilouette Ridge and Mt. Starr King -> Glacier Point
Get back on the trail, at the first crossing take the trail to the left, ford the river and at the next crossing take the trail to the right. Follow this one to the end. It will merge with the Panorama trail and take you right back to Glacier Point.
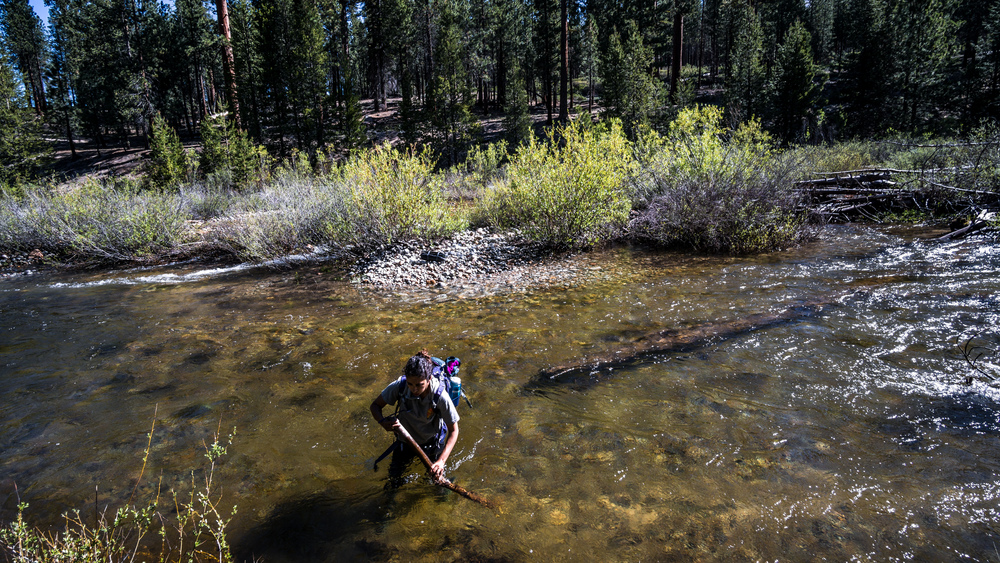
When we did this trip, in early June, the water was flowing fast and deep at the official fording point of the trail. We did not think this was safe, so headed 1/3 or 1/2 mile upstream where the river was broader and forded it there. Still the water was waist deep (and COLD) and moving swiftly, but we managed to safely cross it. If you do it in late summer or autumn, you should be fine to ford it at the designated spot.
The hike after the crossing is uphill to the finish and it will become steeper as it goes on. IF you do this in summer, expect it to be brutally hot by the time you reach Glacier Point. We went straight to the little shop they got there and got ourselves some well deserved ice creams.
Notes:
Half dome cables are only installed from Memorial Day (late May) to Columbus Day (early-mid October), so if you do this trip in winter or spring, then you can only ascend half dome with proper climbing equipment (and probably need a separate permit for that).
The data tracks below are approximate. I did not record them on my gpx watch, so retraced them using a map creation tool. They should be pretty accurate, but use with care. Since it all follows established trails, use a map and only use the location files when in doubt.
Data files (click on the links, then download whatever format you prefer from the gpsies site):
Leg 1: http://www.gpsies.com/map.do?fileId=ipfiybcwfuakamii
Half Dome ascent: http://www.gpsies.com/map.do?fileId=uneghphwfbsoluim
Leg 2: http://www.gpsies.com/map.do?fileId=kjaohyusnkcsjmad
Leg 3: http://www.gpsies.com/map.do?fileId=pxyachmcvhnyzixf
Complete route: http://www.gpsies.com/map.do?fileId=sgxgmbsfzueftato
How long?
2days, 1 night
How many miles?
17 miles / 27.61km
How?
Hiking + wilderness / backcountry camping
Map required, compass optional, unless you plan to bushwhack back to the start (trails are. well maintained & sign-posted; still I would carry a compass just in case)
Maps?
National Geographic Trails Illustrated Map #229 or #317 (I’d recommend #317 over #229 though)
Itinerary:
Newfound Gap -> Mount Le Conte -> Newfound Gap
Leg1: Newfound Gap -> Mount Le Conte
The route is reasonably straightforward: start from Newfound Gap and take the Appalachian Trail until the Boulevard Trail branches off, then follow the latter until you reach the Mount Le Conte shelter where you’ll spend the night. The the next morning, follow the Alum Cave trail down. When you hit the highway (route 441), you can either hike the road back up to Newfound Gap, hitchhike or try to bushwhack it back. I originally intended to do the latter, but the vegetation was too dense. Also conditions were very poorly (fog) with visibility less than 10-15 meters, so I did not want to risk getting lost. So I hitchhiked back up, which worked quite well thanks to a trio of kind Floridian backpackers.
If you do this hike as an overnight, be sure to reserve a backcountry permit from the Great Smoky Mountains NPS webpage. You have to select the Mount Le Conte shelter — there’s only 12 spots and on weekend, even in winter they will go fast. You can book the permits up to 30 days in advance and print them off at home; no need to collect them in person from the backcountry permit office in the park.
I arrived at Newfound Gap at around 1pm and it started raining just as I had got my stuff ready and was about to set off. However the clouds overhead were mostly scattered, even if densely so, and so I decided to wait that shower out — no need to be soaked right from the start. And fair enough, 10 minutes later it had stopped again. So I set off. Another 10 minutes later it was pouring down again — doh! Luckily I brought a wide rimmed hat and was wearing a quite water resistant coat and equally water repellent hiking pants. Also most of my clothes were synthetic and quick to dry, so no need to worry too much. Also I had spare clothes and my backpack is actually completely water proof — you can actually immerse it underwater. In the end it was not too bad: there were several showers as I hiked to Charlies Bunion (where it rained hard and was windy as hell) and then back to the Boulevard Trail. But once on the Boulevard Trail it stayed mostly dry, though foggy and overcast. In the evening the skies finally cleared a bit and I had great, lonely, views from the Cliff Tops overlook.
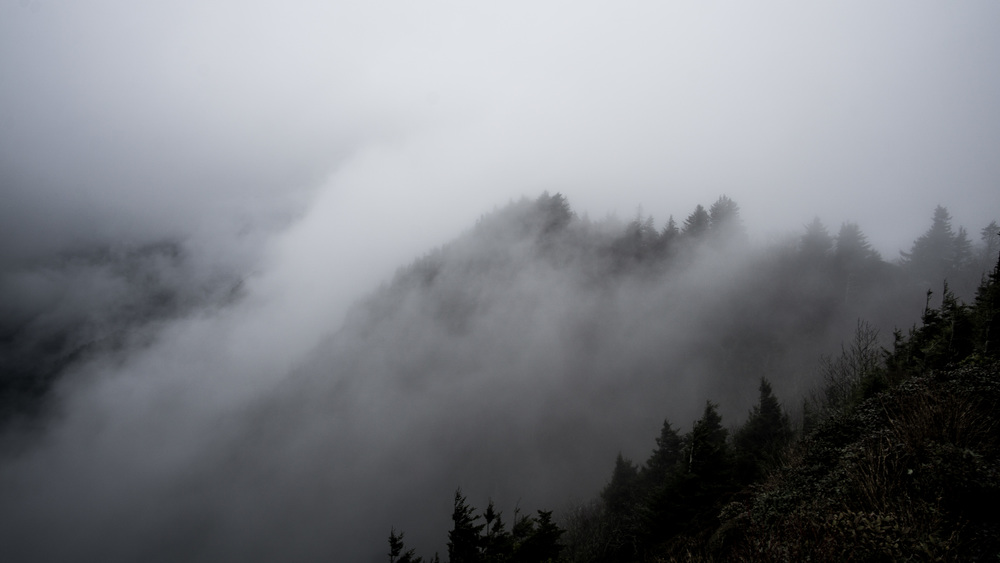
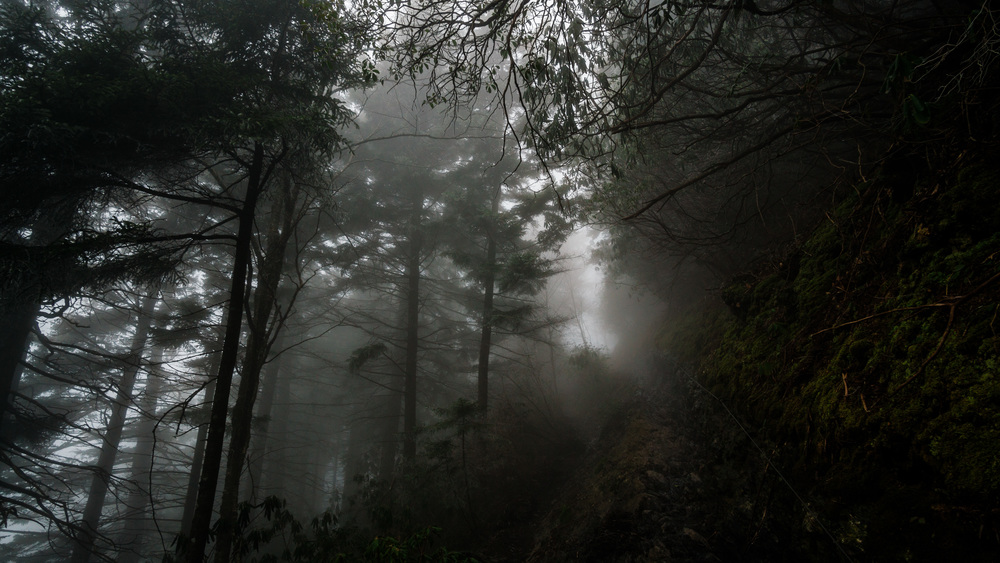
The upside of the iffy weather: hardly anybody on the trails, even though it was a Saturday. The rain and clouds actually let you appreciate that you are truly in a temperate rain forest. At times you will walk in dense fog and when it lifts, you get treated to a wild view of fog hanging in valleys and hugging densely forested mountains.
So you start the hike on the famous Appalachian Trail. In the Smokies, the Appalachian Trails runs pretty much along the state border between North Carolina and Tennessee so you can have all kinds of fun walking with one leg in one state and the other in the other state. If you really just want to get up to Mount Le Conte as quickly as possible, just continue until the Boulevard Trail branches off the Appalachian Trail. However, you can also hike a mile or so further along the Appalachian Trail to Charlies Bunion. This is a rocky outcrop with some very fine views apparently. As I got there it was quite foggy, it rained hard and the wind was howling fiercely. Still the fog lifted now and then to reveal a wild sea of fog rushing through a long valley with steep mountains rising on either side.
So I did not stay too long at Charlies Bunion, but still, I was glad I came here — the trail otherwise stays mainly well within the trees, whereas here it had opened up and you can appreciate expansive views (even in the conditions that I had to deal with). From here you then trace your steps back for a mile or so and then hit the Boulevard Trail. You then just have to follow this one all the way to Mount Le Conte.
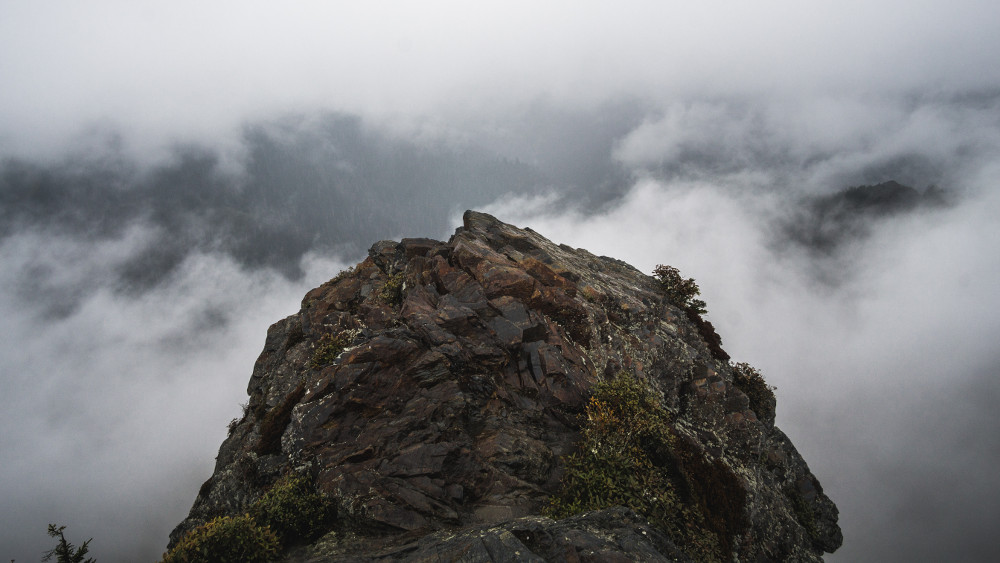
After the final climb, there will be a short trail branching off to the left to Myrtle Point — go there! It’s a fine view over the hills you just hiked through! The clouds had cleared by now and the view was fine indeed.
Now just head back to the Boulevard Trail and continue until a short while later you will come past the shelter. It’s just a lean-to, so it’s open on one side, but someone had hung a tarp along the open wall, which was quite a nice protection from the elements. Before you set up shop for the night though, just hang you backpack on the bear cable, then head, without all that heavy weight on your shoulders, up to Cliff Tops. If the weather is fine, this is a simply spectacular view. The cover image for this post shows me gazing over the Smokies from here. I stayed here until sunset, which was really quite spectacular, then headed back to the shelter for dinner and to get ready for the night.
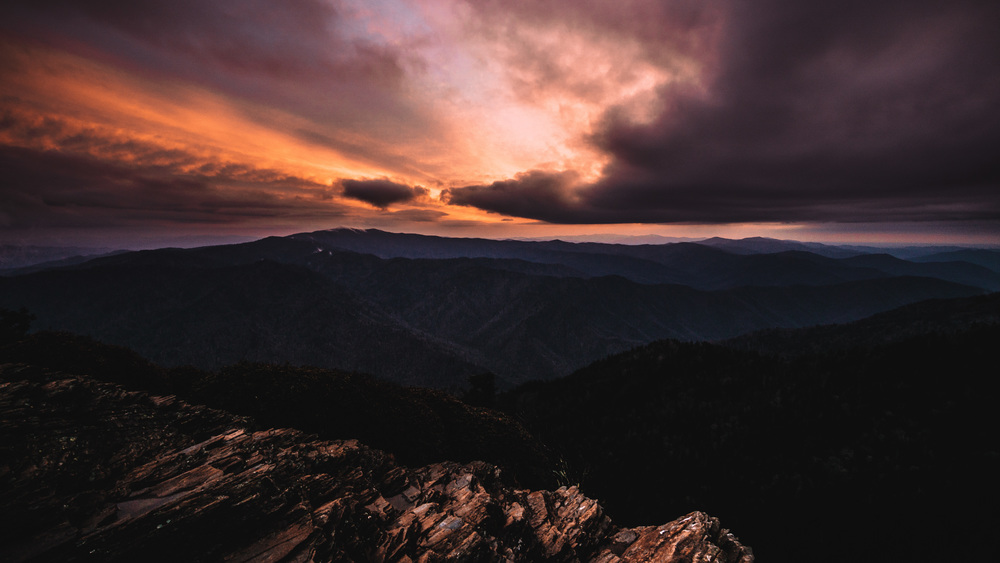
All 12 spots at the shelter had been reserved for the night, but I was the only one who had bother to come out in this weather. It was going to be an eerie night all alone on top of Mount Le Conte. The fog rolled back in during the night, and there was some large-ish animal (a bear? unlikely as it was still winter, really, but possible… — I certainly did not fancy to go outside and check!) that busied itself with some task behind the shelter.

You are at ~6,500 feet here, and in March that means it gets really cold. So hopefully you brought some warm & dry layers and a warm sleeping bag. I had hung my rain soaked hat outside and in the morning it was frozen solid, as was the water in my bottle. It was a pleasantly lonely, calm, foggy and eerie morning.
Leg 2: Mount Le Conte -> Newfound Gap
It would stay foggy all the way down to Highway 441. The hike back down is easy: just follow the Boulevard Trail until the Alum Cave Trail branches off, just past the Mount Le Conte Lodge (still closed in March; otherwise you might be able to get some warm food and drink over there), then hike the 5 miles downhill.
Once at the trailhead, I quickly saw that the vegetation was too dense on the other side of the road, to bushwhack my way back up to Newfound Gap. I also had enough of walking in dense fog, so I just hitchhiked back up. The 5th or so car stopped, and some kind backpackers from Florida took me up to Newfound Gap. Inf atc they had permits for Mount Le Conte for the coming night, so I gave them an update on the trail and shelter conditions.
Once back up at Newfound Gap, the clouds and fog finally cleared and a crisp, spectacular, wintry landscape was revealed. The fog had frozen in the trees and the view was simply a marvel to behold.

Data files (click on the link, then download whatever format you prefer from the gpsies website):
Leg 1: http://www.gpsies.com/map.do?fileId=honcqxyugucmsoyw
Leg 2: http://www.gpsies.com/map.do?fileId=mcjsmnjjjkzlhlbe
Complete route: http://www.gpsies.com/map.do?fileId=qoeyfbdnscxvpyzz
How long?
2 days, 1 night (really just two half days, and a night)
How many miles?
10.5 miles / 17km
How?
Hiking + wilderness camping
Map & compass required
Maps?
National Geographic Trails Illustrated maps 311 or 210
Itinerary:
Squaw Canyon trailhead / campground -> Squaw Canyon -> Elephant Canyon -> Squaw Canyon trailhead / campground
To get to the Needles District, you have to drive some 70-75 miles south from Moab. There are a few optional stops along the road, such as the Hole N” The Rock (on route 191) or the Newspaper Rock (an route 211). Note that petrol stations are few and far between so your best bet is to fuel up in Moab before setting off.
Leg 1: Squaw Flat trailhead to Squaw Canyon 1 (SQ1) camp site
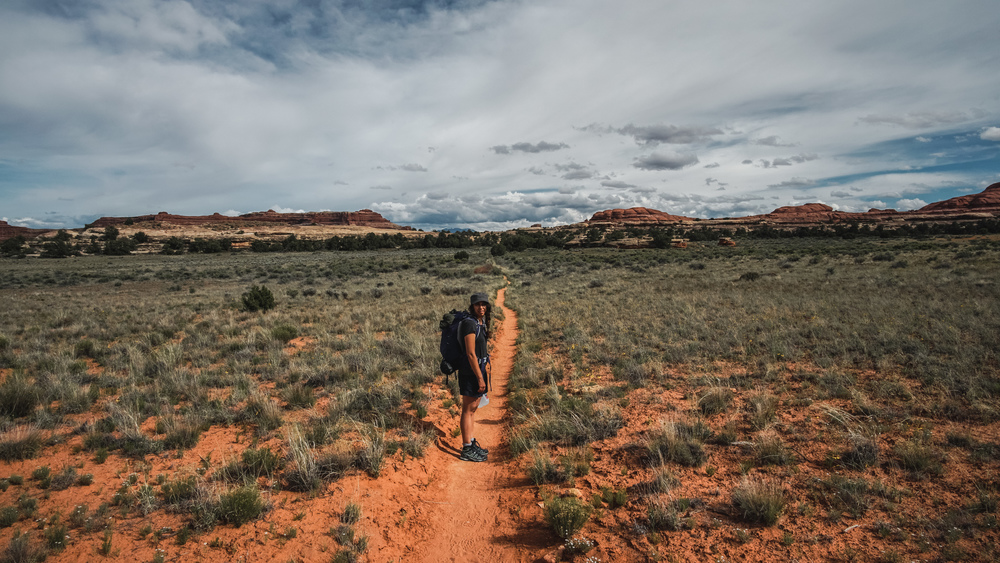
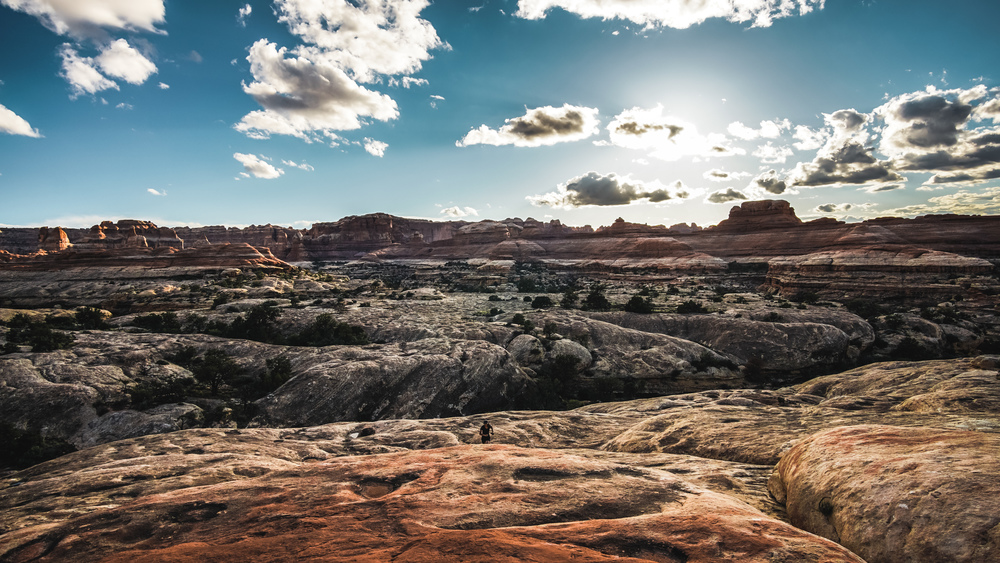
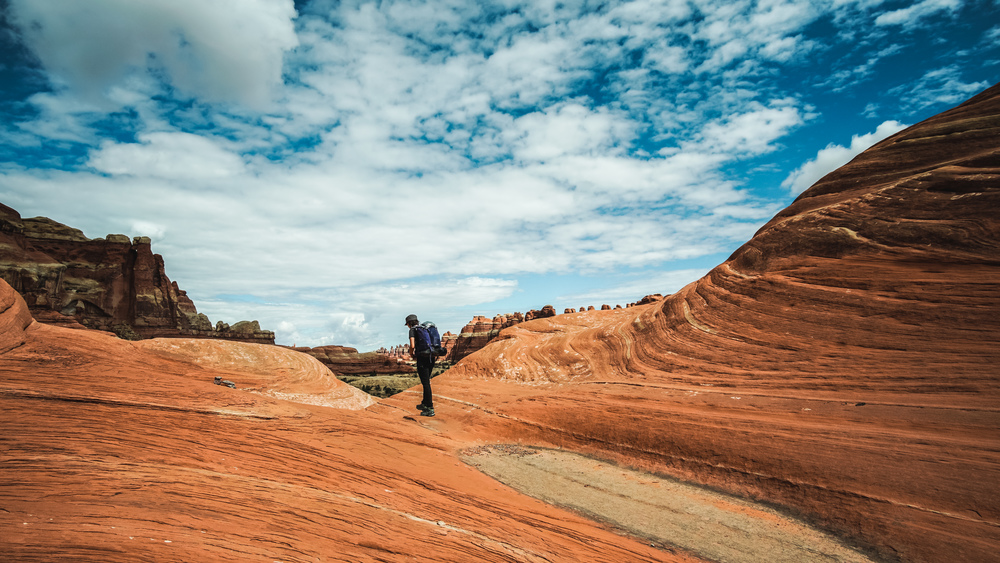
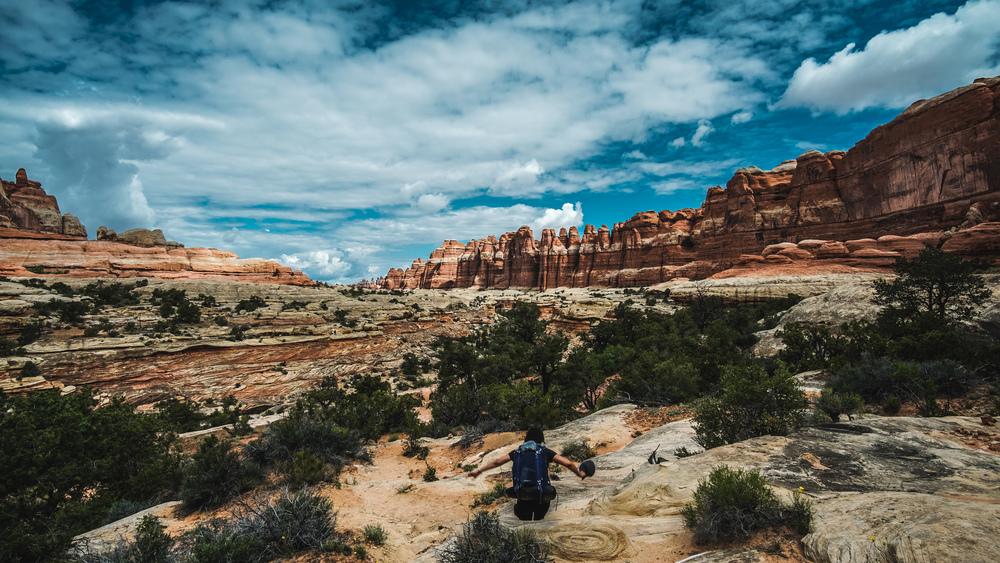
When you had out from the Squaw Flat trailhead, there are many trails you can choose, and you can combine them in any way you feel up to. The trails are well marked (where there’s vegetation it’s difficult to go wrong, see the picture below, on the slickrock there are cairns to mark the trail and at every junction there will be a signpost to guide you) and easy to follow. Every time you cross from one canyon into the other, you will have to go over (or through at one point) the canyon wall, so the trip is a bit on the strenuous side. Also, in summer it gets super hot here, so be prepared and carry enough water (there is some water out there, but it’s limited and definitely will need to be treated) and sunscreen.
The route is straightforward enough: from Squaw Flat campground, follow the Peekaboo Trail, then take a right to head into Squaw Canyon. From Squaw Canyon, continue all the way until you reach the junction to head into Elephant Canyon (involves climbing a ladder up and another one down). When you get out of Elephant Canyon, head east back to Squaw Flat Canyon.
A backcountry permit is required and you can reserve yours online well in advance of your trip or pick one up at the visitor center on the day.
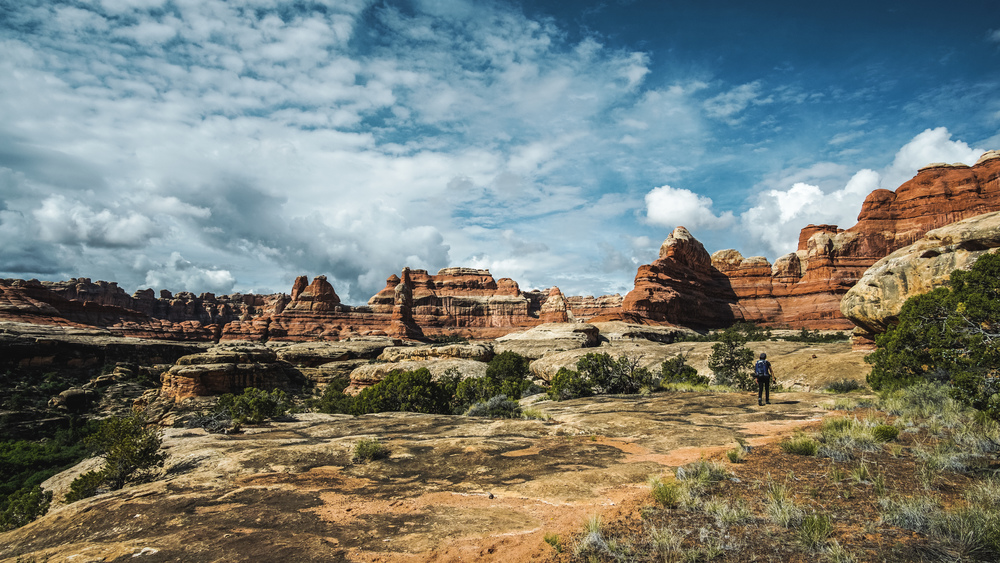
We set out quite late in the afternoon (we spent the morning and early afternoon in Arches NP and it is a bit of a drive down from there), so we only hiked a moderate 2 miles to our backcountry camp site (in Squaw Canyon, SQ1). But, the scenery in this part of the world is such that after hardly more than half a mile of hiking, you will found yourself in a wild, prehistoric-looking landscape. I probably spend the whole trip with my jaw dropped – it’s maddeningly stunning out there.
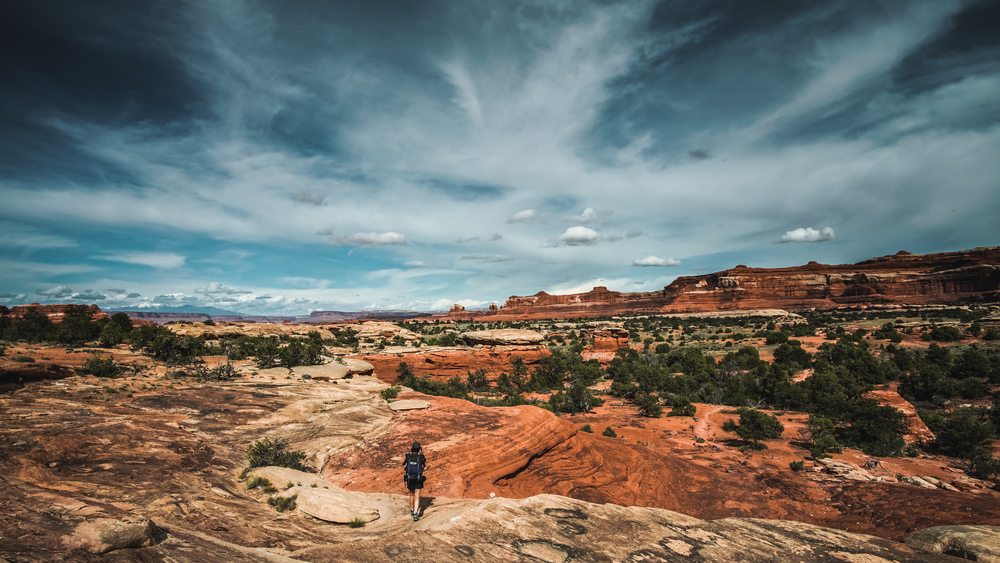
We pitched our tent, left our backpacks and then, there still being plenty of sunshine left for the day, we explored the area a bit. So without heavy bags, we hiked a bit further into Squaw Canyon, then headed up over into Lost Canyon. You will head up a narrow passage between two rock walls, but when you look back, you get glimpses of the great view you can get by scrambling up a bit the canyon wall on your left (east).
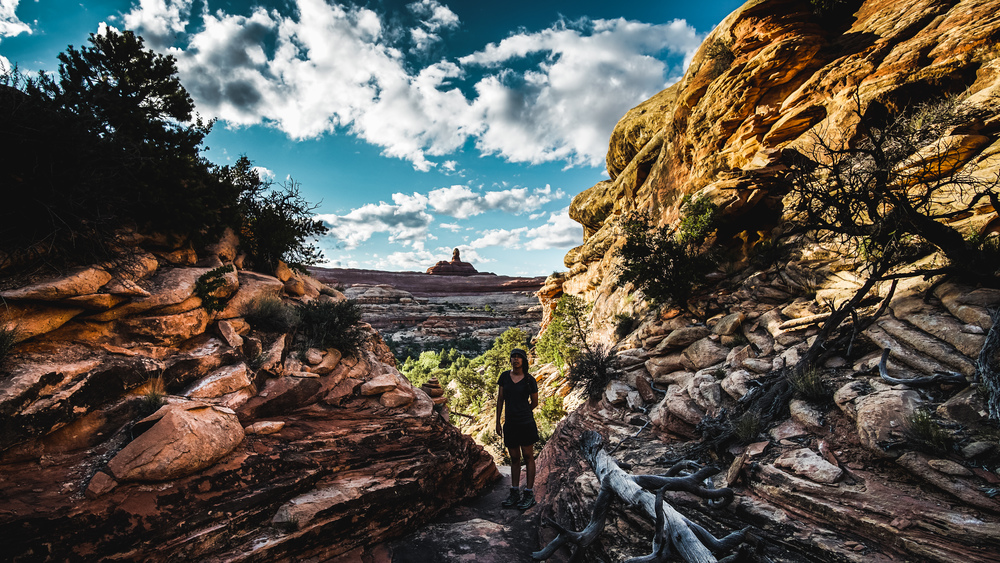
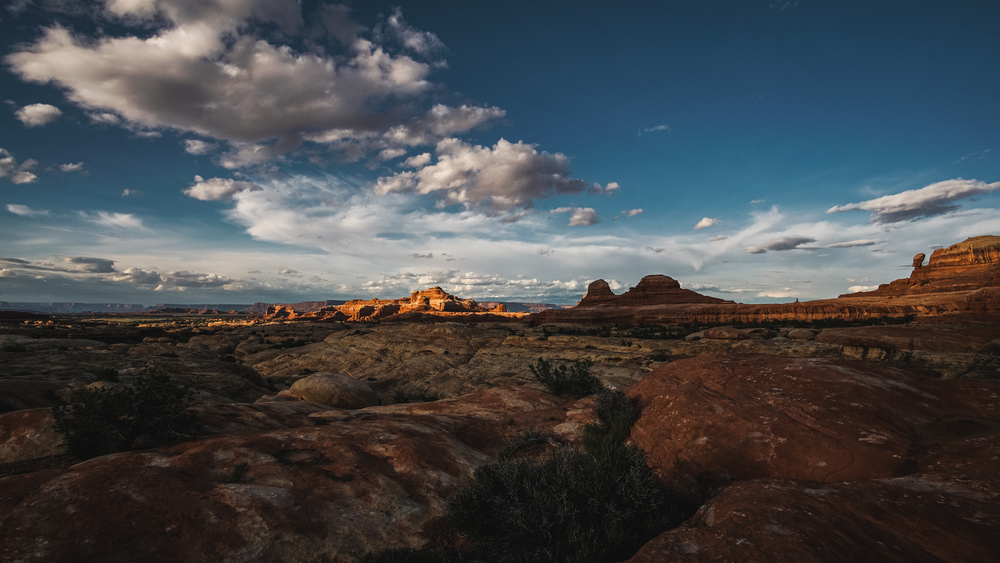
So, the sun starting to set, we headed up the canyon wall and enjoyed an amazing view. This is a general rule: every time we were on a canyon wall, the views were simply stunning.
Needless to say, the sunset was spectacular. We just sat down and enjoyed the show.
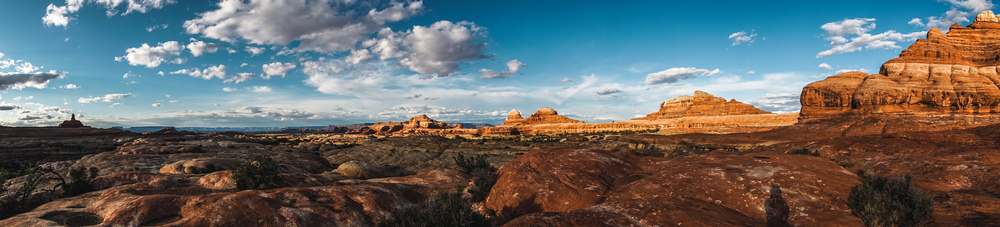
It is a scenery straight from a Western, the view and red rocks seemingly endless. Soon enough though the sunlight started to fade, so we headed back to our camp for the night.
What surprised us a bit was the difference in temperature once the sun has set. In fact you are at altitude and so it will cool down quite a bit at night. When we did this trip (late May 2015) the temperature hit the low 40s or high 30s during the night. In fact we had only brought our summer sleeping bags, so we spend a bit of a chilly night. To make up for it though was the night sky.
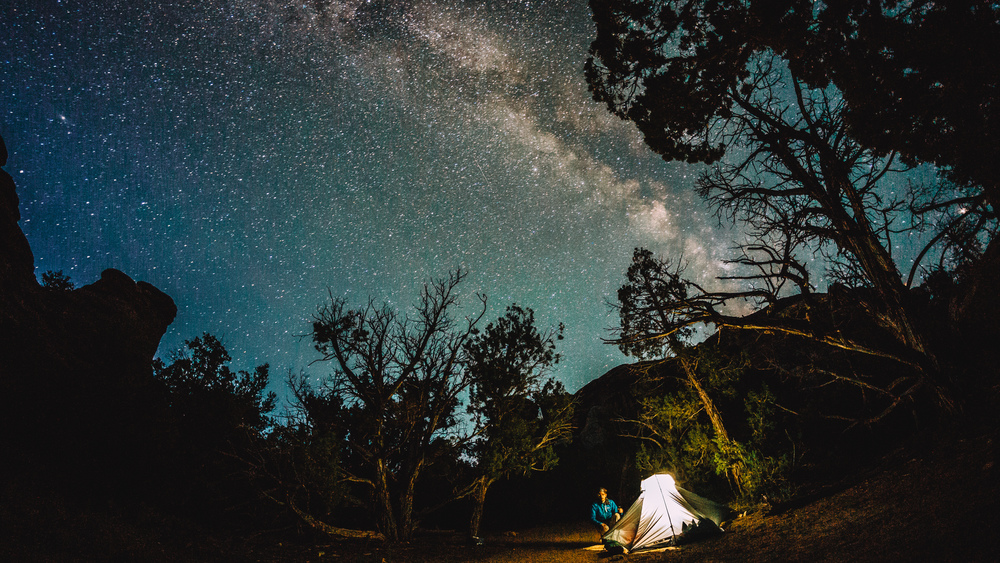
I had recently bought a “serious” photo camera, and had read several tutorials (I suggest you check out www.lonelyspeck.com — you will find all the tips you need to get started) on how to capture the Milky Way. So you can imagine that I was itching to try my luck. So I set my alarm for 3am and when I woke, the sky was so dark (the moon had set quite early in the night), it was easy enough for a total beginner like me to get a good shot. The moment I saw the Milky Way peeking back at me from the camera screen was so sweet. I went back to bed happy.
Leg 2: Squaw Canyon to Squaw Flat trailhead via Elephant Canyon
In the morning I got up early and went for a short run. For this, I headed back up the Squaw Canyon, then took a right onto the Peekaboo Trail, heading towards Lost Canyon (the other end than the one from which we watched the sunset). Here too, you have to scramble up onto the canyon wall, and the view is equally stunning.
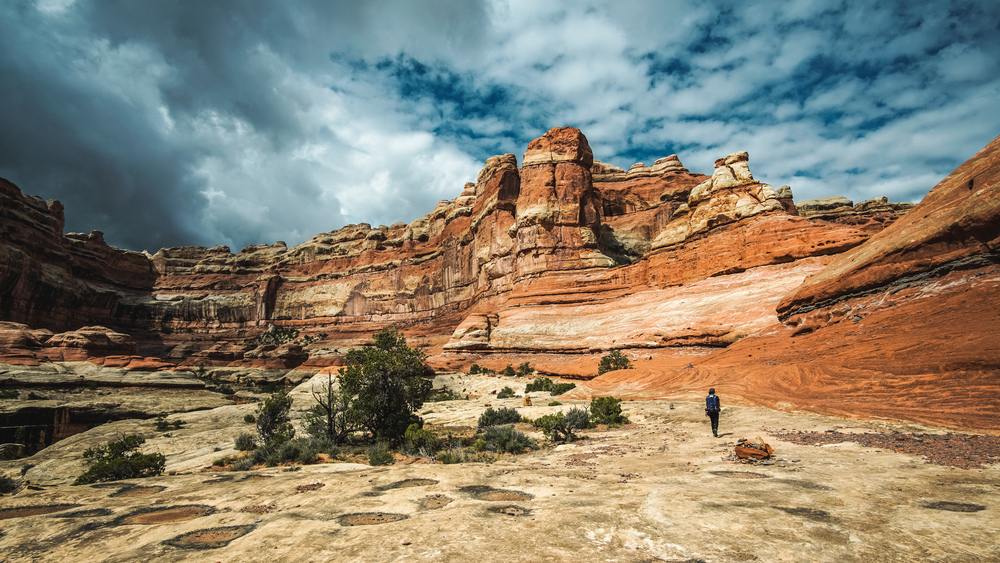
After a good breakfast, we packed up the tent and the rest of our stuff and headed further down Squaw Canyon. We pressed on past the Lost Canyon junction. After a half mile or so, the trail takes you up to a ledge, mid-way up the canyon wall. You then continue along this ledge for the next mile and a half or so. This section, until you climb a ladder to get into Elephant Canyon is the most scenic along the route: it is truly jawdroppingly beautiful. I couldn’t really contain my emotions and walked around wide-eyed and smiling like a kid in a toy or sweet shop.
A third into this beautiful stretch of the route, at the junction with Big Spring Canyon, you have to squeeze through a tight tunnel to continue along Squaw Canyon. We actually had to take our backpacks off to be able to squeeze through. When there are two of you, it is easy enough to pass the backpacks through, but this could be a bit more awkward if you are on your own.
You then continue walking right below sheer cliffs on your left until you reach a ladder that takes you up to a gap in the canyon wall, and after that there is another ladder down into Elephant Canyon.
You will walk right down into a wash and more or less follow this one for the next two miles. At some point you reach the junction with the Druid Arch Trail. For this route you just continue north, but if you are up for a 4 mile return detour to Druid Arch, then head left / south. We decided to skip that detour and headed straight north.
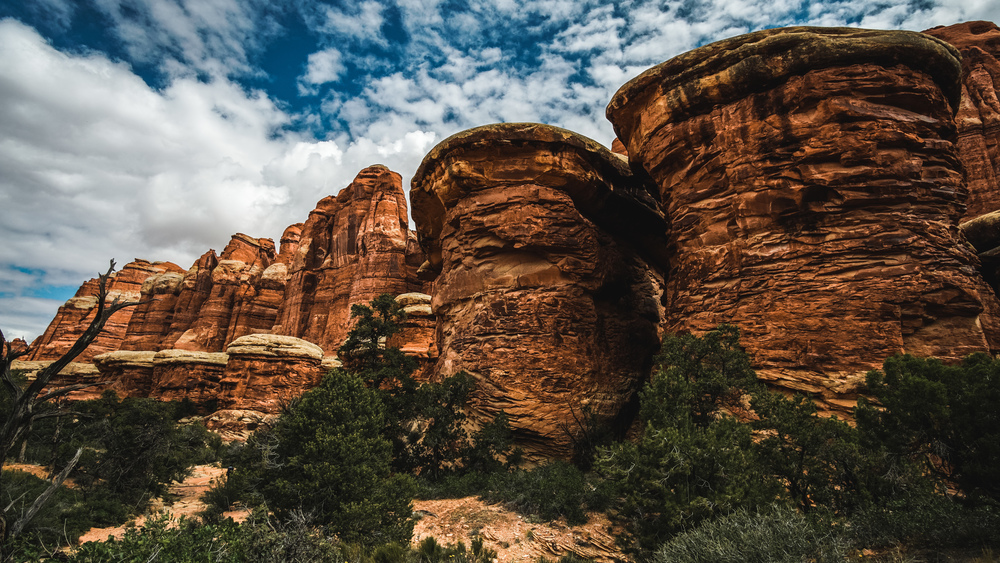
In Elephant Canyon you can truly appreciate where the Needles District got its name from: there’s rock spires (aka needles) stretching along the eastern canyon wall. In fact there’s plenty of weird rock shapes in Elephant Canyon and it is a really nice section of the route.
When you reach the next trail junction, head left / east: it’s about 4 miles back to the Squaw Flat trailhead. After an uphill half mile there will be a junction with the Chesler Park Trail, just press on straight ahead. As you head back to the trailhead, you are leaving the most impressive scenery behind, but it’s still a pleasant walk, if a bit strenuous at times.
So in summary this is a short-ish overnight backpacking trip, but it’s incredibly beautiful and reasonably strenuous. It is also a very quiet part of the Canyonlands National Park (we only came across people near the Squaw Flat trailhead and in Elephant Canyon on the Druid Arch Trail), so perfect for solitude seekers.
Data files (click on the links, then download whatever format you prefer from the gpsies site):
Complete route: http://www.gpsies.com/map.do?fileId=zaiwzoordnggadss
NB: I did not use a GPS watch when I did this trip. So I mapped the route from the trail information on Open Street Map — so best to use the GPS data as indication only and follow the route description, your map and trail markers.
]]>