How long?
3 days, 2 or 3 nights
How many miles?
880 miles / 1415 km
How?
Road trip
Maps?
Satnav / phone for driving or New Mexico road map
Itinerary:
Albuquerque Airport-> Santa Fe (with day trip to Kasha-Katuwe Tent Rocks NM) -> Chimayó -> Taos -> Rio Grande Gorge Bridge -> Roswell -> White Sands NM -> Albuquerque Airport
Leg 1 Albuquerque Airport -> Santa Fe:
Basically you need to start somewhere and most likely it will be Albuquerque Airport, so that’s why I started from here. I took a Friday evening flight from New York City to get here, so arrived quite late (11pm-ish) and therefore the first leg is super short: pick up your car from one of the rental companies at the airport and drive up to Santa Fe where you’ll be based for the first 2 nights. Compared to some of the other weekend trips I’ve done, this is a luxury: you actually get to sleep on this trip.
Leg 2 Santa Fe -> Kasha-Katuwe Tent Rocks National Monument -> Santa Fe:
Next day, get up, have a decent breakfast in Santa Fe, then get into your car and head northwest for about an hour and a half to Kasha-Katuwe Tent Rocks National Monument. Kasha-Katuwe means white cliffs in the Keresan language of the local Native American population and so the park’s name describes the place rather well: the main attraction is a lollipop loop hike (the loop is at the start not the end) through white cliffs whose sides have been shaped into weird conical formations that look a bit like tents (though to be honest some of them are a bit more rounded at the top and look more like penises – but look for yourself below). This national monument is not managed by the National Park Service, but the Bureau of Land Management (BLM) instead. There is a small fee ($5 I believe) to be paid to enter the park, but, should you have one, your usual “America the Beautiful” NPS park access badge will be accepted.
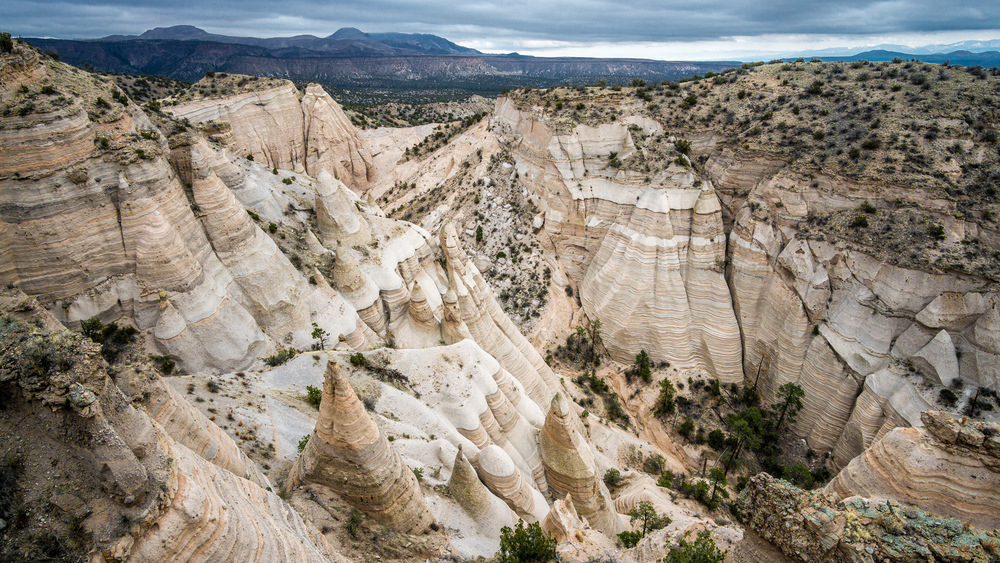
The hike is short, though somewhat strenuous at the far end as it takes you right to the top of the cliffs . The pay-off is an expansive view of the surrounding landscape. As you hike back out to the car, you can take a detour past a small cave. The road also continues from the parking lot to another parking area with further scenic views and another hiking opportunity.
After this we drove back for a late lunch in Santa Fe. The scenery along the road is great, so enjoy it. If you want you can also visit nearby Los Alamos to find out all about the Manhattan Project, but since it is still an active research facility, what you can actually visit is rather limited.
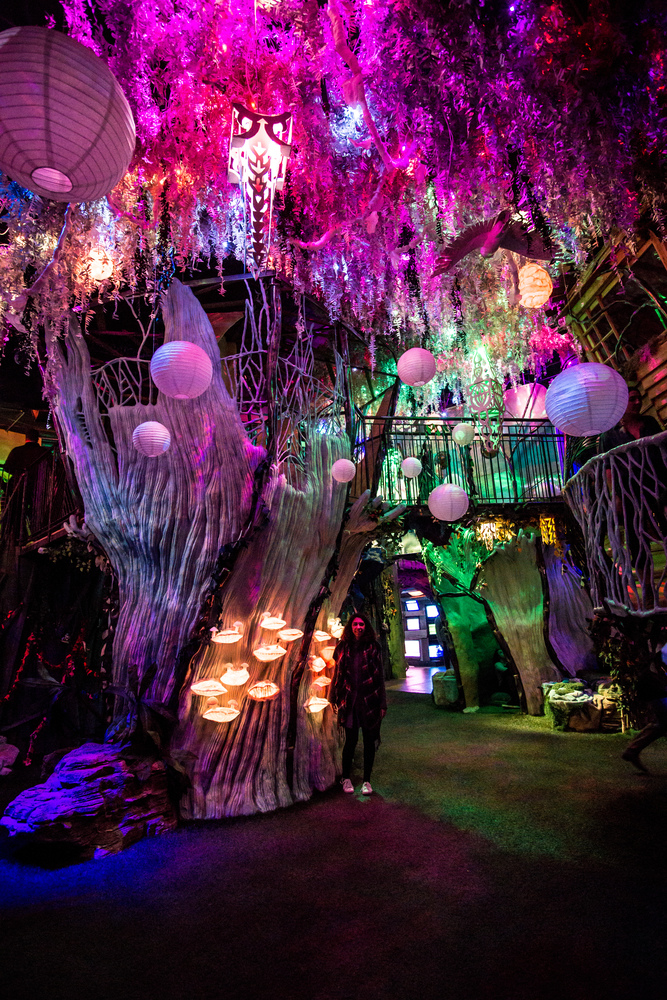
Back in Santa Fe, there’s plenty of things you can do: visit the New Mexico Museum of Art, the Georgia O’Keeffe Museum, walk around the Plaza and the Palace of the Governors, catch a flick at the Jean Cocteau Cinema, shop, eat drink etc. A stand-out to our time in Santa Fe was Meow Wolf. Meow Wolf is an arts complex run by the eponymous art collective. The art complex is a former bowling area and was leased by the author George R. R. Martin (with additonal funding from the city of Santa Fe and from a crowdsourcing campaign) for the Meow wolf collective. The main attraction is the “house of Eternal Returns”. It can be described, I guess, as an immersive, exploratory storytelling art project. Basically you pay, you enter and then have to navigate your way around a strange alternate world full of weirdness. Something has clearly happened here and there are clues left in the various rooms which you can use to piece the mystery together, or not. It’s up to you. If you do want to get the full story, plan to spend a solid 5-6 hours at the place, otherwise just enjoy the weirdness. The place also doubles up as a nightclub with various live acts on some nights.
Leg 3 Santa Fe -> Chimayó -> Taos Pueblo -> Rio Grande Gorge Bridge -> Roswell:
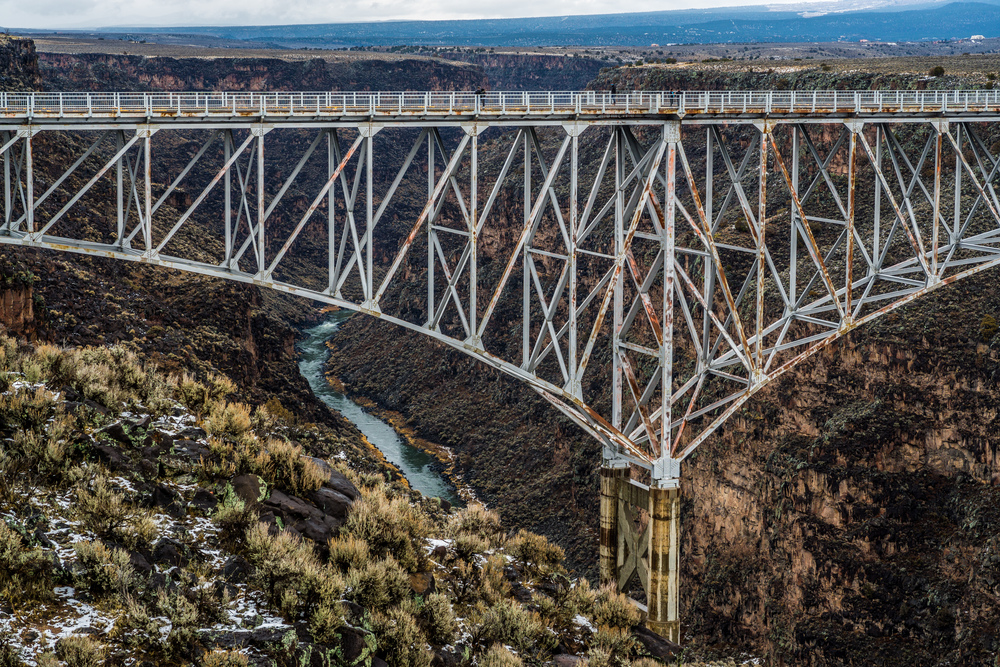
After a second night in Santa Fe, it’s time to leave. The plan for the second full day was to drive up to Chimayó, visit the Sanctuario there, have lunch at the Rancho de Chimayó, then keep driving north to Taos, visit the pueblo there, then head back down south, all the way to Roswell. In the end our plan was slightly altered by the pueblo having been closed on that day, so we visited the nearby Rio Grande Gorge Bridge, which pueblo or not, you should anyway try to visit – it’s an impressive bridge to behold and it spans across a deep, narrow canyon. In any case, you will spend the better part of the day driving – it’s a road trip alright.
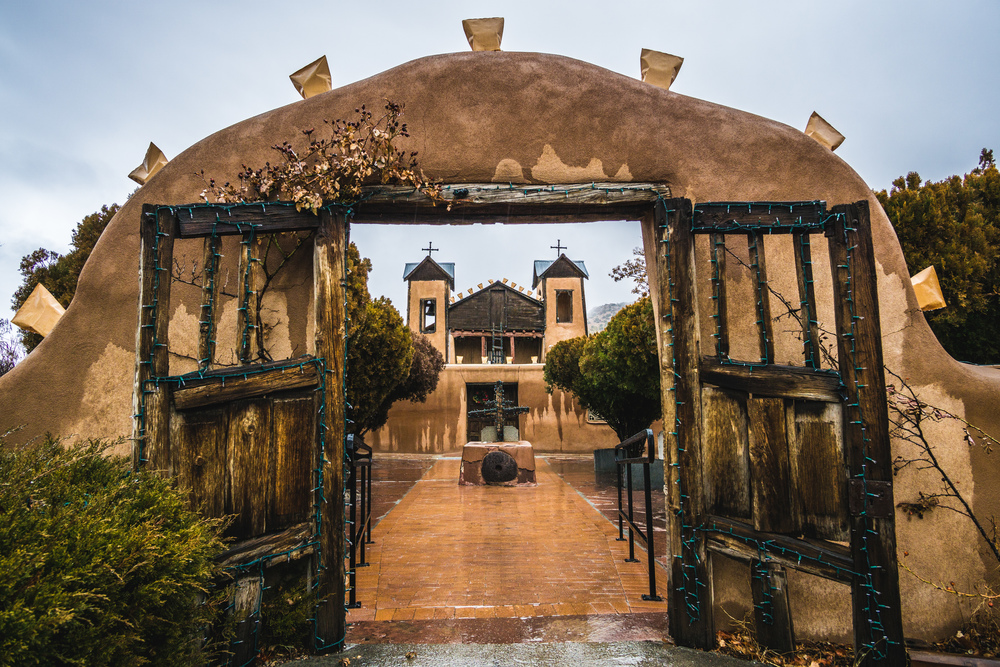
The first stop is in Chimayó then. When we visited there were low clouds that day and we actually drove through fog and snow to get there. The place only opens at 9am and we were there early. Due to the weather the church site was pretty much empty and we had the place to ourselves. It’s a pilgrimage site due to there being holy mud / dirt inside the Sanctuario. There is also a chapel next door for expectant mothers. People bring gifts: a lot of crutches inside the church and pairs of baby shoes in the chapel. Inside the church is also a memorial for servicemen and police officers killed in the line of duty. It’s a beautiful place, even in the rain.
In the town of Chimayó is also one of the best restaurants for traditional New Mexican food in the entire state (according to the tourist guide we had with us): the Rancho de Chimayó. It turned out later that the restaurant is run by the aunt of one of the guys at my NYC running club. The food is positively delicious, so if you stayed in the Sanctuario until lunch time, be sure to visit the restaurant. We actually didn’t stay all that long at the Sanctuario, but on our way back from Taos, we stopped in Chimayó again for a late lunch there.
After Chimayó, continue north and head up to Taos. Taos is a weird little place, effectively three towns strung together along the main road: Ranchos de Taos, Taos and Taos Pueblo. Taos Pueblo is one of the oldest continually inhabited communities in the US and it is also a designated UNESCO World Heritage Site. However, even if you can tour it, the place is primarily a community of a Native American tribe of Puebloan people and very much lived in. This also means that on some religious days or if there is an unexpected death in the community, the pueblo will be closed for visitors. This was the case when we visited, so unfortunately we could not visit Taos Pueblo.
To make up for it we visited the rather small and fairly random Governor Bent House and Museum. Charles Bent was the governor of then New Mexico Territory and suffered a rather horrible death by scalping and arrows. Following the American victory at the end of the Mexican-American war, many inhabitants of New Mexico were dissatisfied with the new American rulers. Tensions boiled over and following a local conspiracy a posse of local Puebloan Native Americans and Mexicans turned up at Charles Bent’s house in Taos. Despite trying to calm down the revolt, Bent was shot by multiple arrows and scalped in front of his family. While he was out front talking to the insurgents, trying to buy time, his family was frantically digging a hole through one of the house’s walls to escape. Bent died of his injuries, but his family remained unharmed and managed to escape (though not through the hole they tried to dig). You can find out all about this horrible murder at the museum and you can see both the hole in the wall and the spoon with which it was dug. All other exhibits at the museum are totally unconnected to Charles Bent and are fairly random in nature (there is a stuffed eight-legged lamb for example).
Don’t spend too much time in the museum, but head out of town towards the Rio Grande Gorge Bridge National Monument. It’s a great feat of engineering and with the stunning, narrow canyon (aka the Gorge) that the Rio Grande has carved at this place, it’s an impressive sight to behold. The steel bridge is in bad need of a good paint job, but that just adds to the charm of this bridge. If you are good with time, there is also a hiking trail along the canyon that starts from the parking lot.
Finally it’s time for the long drive to Roswell. It will take you some 4 1/2 to 5 hours to get there, so don’t leave too late. As I mentioned above, we drove via Chimayó to have lunch at the Rancho de Chimayó restaurant, but you can take a slightly more direct route through the mountains to Roswell.
Note that Taos is fairly high up in altitude (there’s ski resorts nearby), so if you are doing this trip in winter as we did, be sure to keep track of the weather as roads may close in heavy snowfall (which was also one reason why we did not drive through the mountains).
Leg 4: Roswell -> White Sands National Monument -> Albuquerque Airport:
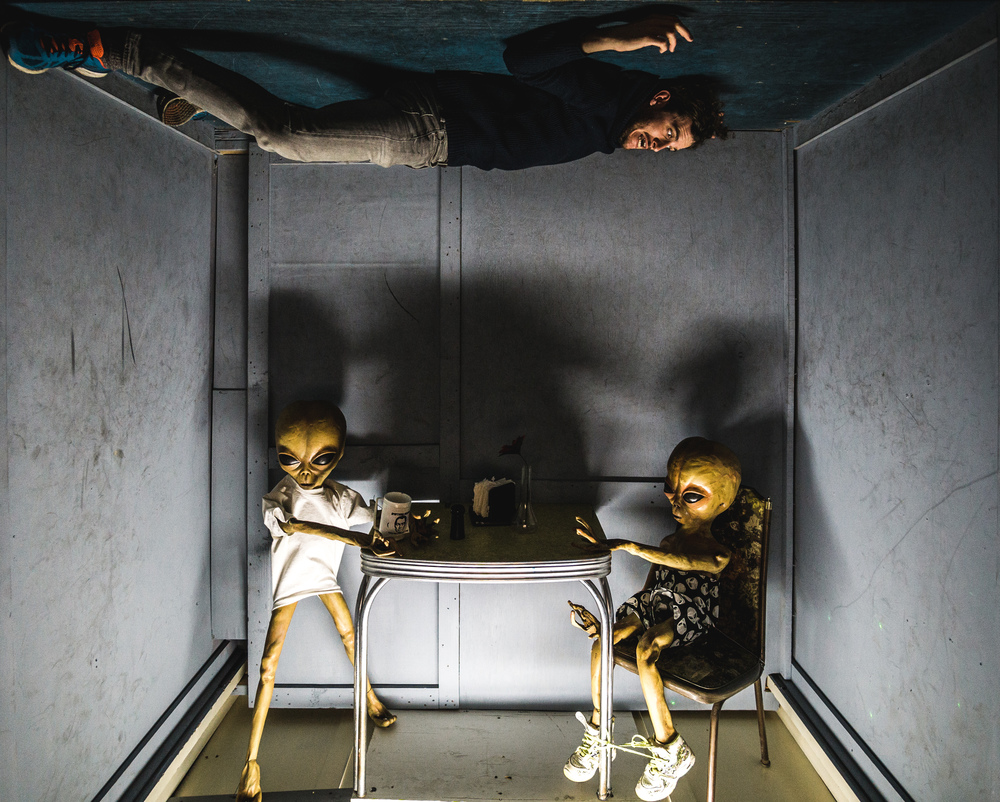
Now Roswell is one of those names you have heard countless times, even if you are, like me, not American. It’s a myth of a place and so your expectations are high when you get there. Some advice: manage your expectations. Above all else Roswell is a ranching town. That’s the business most folk in town pursue and the whole alien thing is only a minor side to the city. Yes there are countless little green men in people’s front yards, on car dealers’ signs and even the local Arby’s and Walmart have subscribed to the theme. Aliens are welcomed by almost every business in town. However, if you expect that there is an Alien Restaurant, Alien Hotel, Alien Whatever – you will be sorely disappointed. What is there is the International UFO Museum & Research Center, which is approximately 90% serious about the alien crash landing in Roswell (and other places in the world) and then there are plenty of alien-themed gift shops along the main road. And that’s really all there is. It’s not a pretty town and there are only a limited number of touristy things to do.
However, this does not mean that you cannot have fun. The UFO museum is in fact rather informative, up to a point at least, even though it seemingly accepts some of the conspiracy theories about the alleged alien crash rather uncritically. To be fair though, they ask that you keep an open mind and they also have a few panels about UFO hoaxes and how difficult, if not impossible, it is to separate truth (if there is any) from fiction (there sure is plenty of that). More fun however can be had at one of the souvenir shops next door.
The shop is called Alien Zone and inside there is a small section called Area 51 which basically consists of a series of deliberately bad and quite creative photo sets that you can (ab)use. You do have to pay a small entrance fee ($5 or $6 if I remember well). Anyway: easily the best $5 you will spend in town.
You won’t need more than 1-2 hours at most to do the UFO museum and the Alien Zone Area 51. Have breakfast before these (they only open at 9am and 10am respectively; I can recommend the Cowboy Cafe – good, honest food and plates are large – it will keep you filled for the day), then head out of town and go west towards Alamogordo and White Sands National Monument.
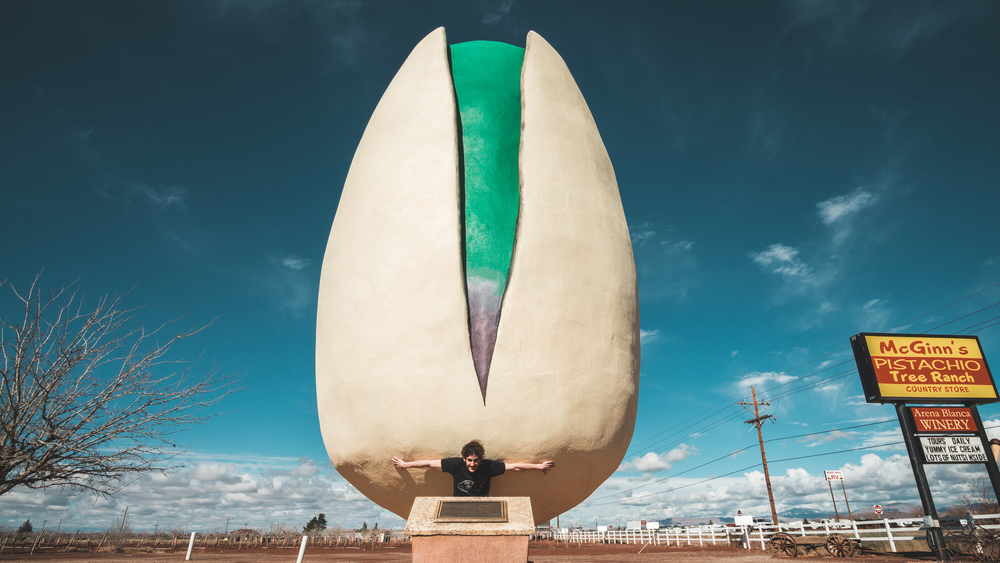
The driving is spectacular at moments, and as you come down the Mescalero Reservation mountains on route 70, you will see White Sands NM in the distance – a stunning sight. However before you get there, you need to go through Alamogordo and this will take you past the world’s largest pistachio nut just outside of town. It’s a sight to behold for sure and at the shop next door you can buy some really good roasted pistachio nuts in all kinds of flavours (go for the green chile and lime). You can even read about the time the world’s largest potato (from Idaho of course) visited the giant pistachio.
Anyway, head on into Alamogordo and get a quick lunch (we stopped at the White Sands Bistro), then continue to the park – this is the reason you came here. Be aware that there is an active missile range right next to White Sands NM and during firing practice they will close route 70 which can affect your plans, so be sure to check on the park’s website before visiting if any closures are planned.
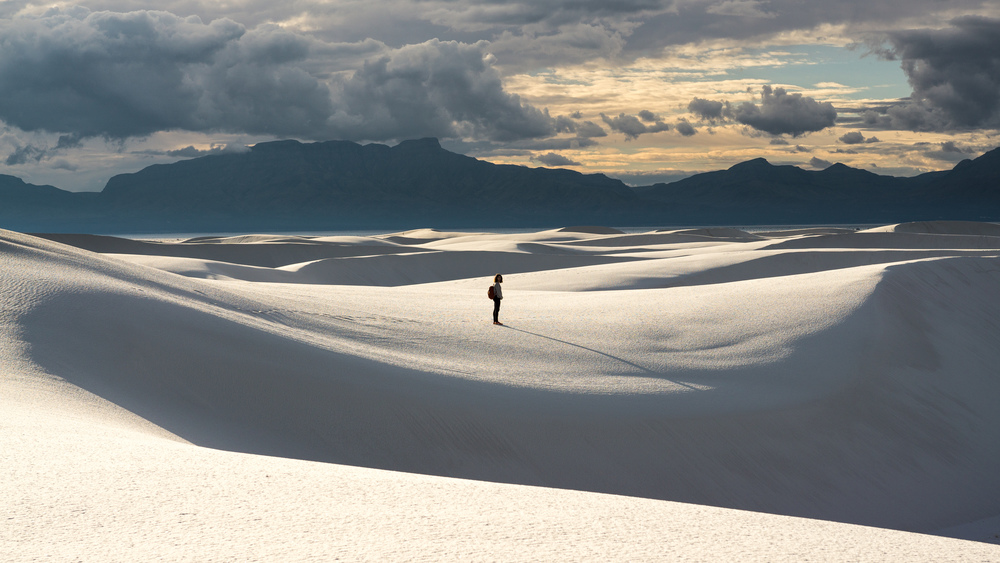
The name pretty much says it all: it’s a giant pit of white, gypsum sand, with rolling dunes of white sand as far as the eye can see. There’s plenty of wildlife as in any desert if you know where to look and what to look for. The park is fairly small, but if you visit on a hot day, don’t let that fool you: it’s easy to loose yourself in the dunes if you stray off the marked trails and people come to harm here every year because they lost their way and were ill prepared. Anyway, you probably want to head up to the Alkali Flat trailhead and stroll off into the sand dunes. The trail is marked with red posts that stick out of the sand, which you can see fairly well even from a distance. The trail is about 5 miles long and circular. You will probably be tempted (we sure were) to go off trail and head into the interior where there are no tracks and where you will feel all alone – do it, but be sure to carry enough water and some binoculars to help you spot the trail markers if you are unsure how to get back onto the trail.
White Sands NM, while small, is a stunning, extremely beautiful park, so take your time and enjoy it. If you’ve got the time, there’s a limited number of camping spots, so feel free to spend a night here. It’s a popular spot for stargazing (the park closes at night, you will be locked in until the next morning, so if you want to watch the stars here, you will have to get a permit to camp).
After White Sands, it’s time to head back up to Albuquerque and catch your overnight flight back (assuming you head back to the East Coast). You can spend a worse weekend for sure!
Notes:
There’s much much more you can do in New Mexico than the above: there are hot springs, there are skying areas, there’s Los Alamos, there’s a bunch of other national monuments and national historic sites and there’s Albuquerque which we didn’t visit at all, except to fly in and out. So you can easily scale this up to a full week. Further, if you have the time, you could even head southeast into Texas and visit Big Bend NP or west into Arizona to Petrified Forest NP and/or Saguaro NP or even Grand Canyon NP. Also if you are into the Atomic Age and/or roadside Americana, you probably want to spend more time along (the former) route 66.
Data files (click on the links, then download whatever format you prefer from the gpsies site):
Leg 1: http://www.gpsies.com/map.do?fileId=nkkuctiktlnchetl
Leg 2: http://www.gpsies.com/map.do?fileId=zkdbjjiyuopzpchb
Leg 3: http://www.gpsies.com/map.do?fileId=xtrsvsppedxxzwzc
Leg 4: http://www.gpsies.com/map.do?fileId=cgcniwjrhvnxmuoy
Complete route: http://www.gpsies.com/map.do?fileId=kfhyxawxqzfhqaji
How long?
2 days, 1 night
How many miles?
540 miles / 870 km (without the overnight hike; that one is ~15 miles one-way)
How?
Road trip + wilderness / backcountry camping
Map required, compass optional (i.e. well maintained & sign-posted trail — anyway you just have to follow the river)
Maps?
Satnav / phone for driving or Washington / Seattle / Olympic Peninsula road map
National Geographic Trails Illustrated Map #216 (for hiking and driving on the Olympic Peninsula)
Itinerary:
Seattle Airport-> Seattle (optional) -> Hurricane Ridge -> Ruby Beach -> Graves Creek trailhead -> Kalaloch -> Seattle Airport
Leg 1 (Seattle Airport-> Seattle (optional) -> Hurricane Ridge -> Ruby Beach -> Graves Creek trailhead):
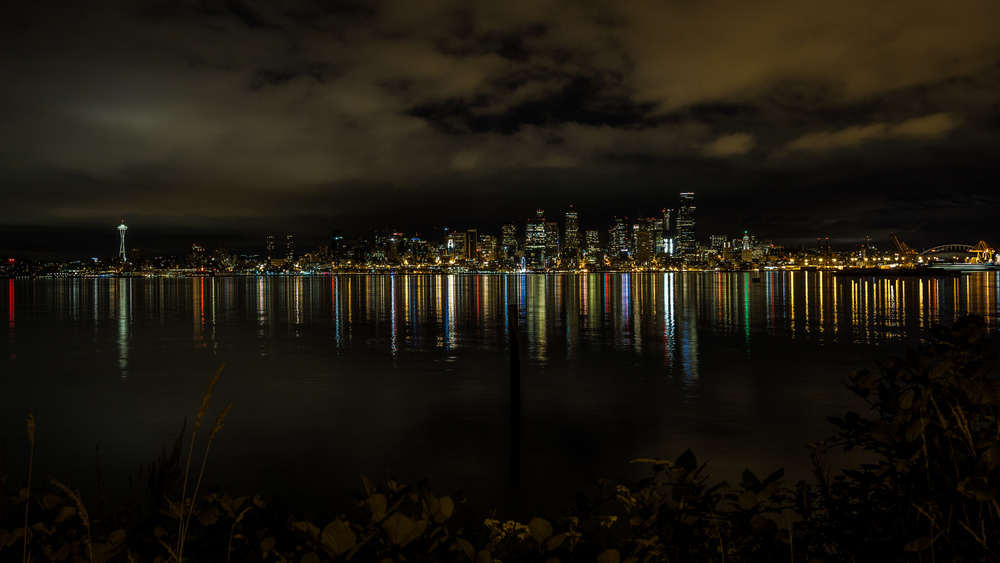
My flight was scheduled to land at SEA at midnight, but we came in about an hour late. My plan had been to take a short drive north from the airport and cruise through Seattle at night. The drive from the airport to Hurricane Ridge takes about 3 hours and I wanted to be there in time for sunrise, which was at around 5.30am (late July). The drive up to Seattle is about 20-30min. So while there was still plenty of time to drive up, there was not much time / point to actually drive leisurely through Seattle, so I just drove to Harbor Avenue in West Seattle and enjoyed the skyline, with the iconic Space Needle (built for the 1962 World Fair), from there. Now if you’ve already been to Seattle or don’t care much about cities, then skip this detour and head straight fir the Olympic Peninsula — you will be able to catch one or two hours’ sleep in your car after you arrive. I had slept on the flight over from NYC and while my body clock complained just a bit, this was enough to keep me going and so I happily went for the detour to Seattle.
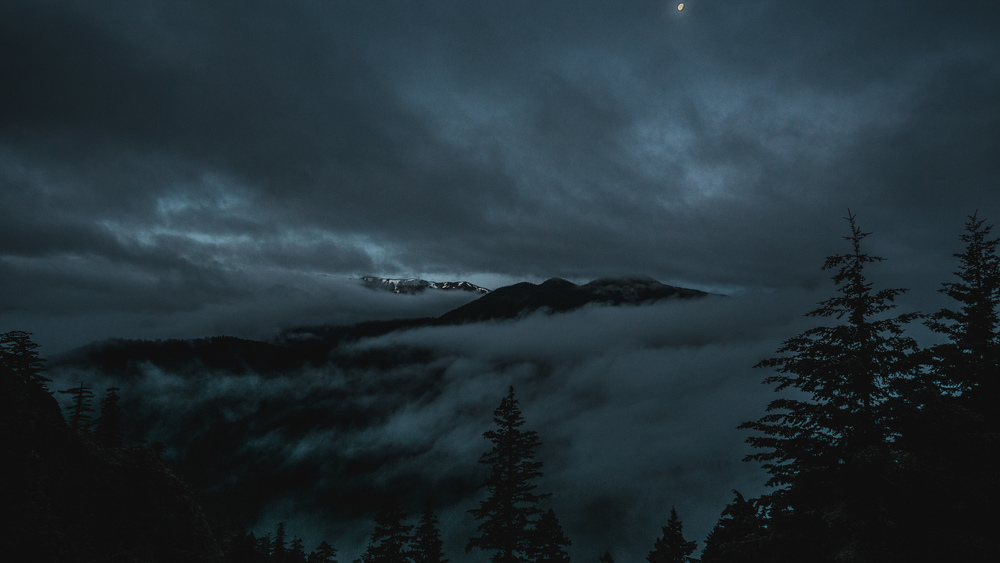
After that it is an easy drive over to Hurricane Ridge (take the interstate 5 south, then follow routes 16, 3, 104 and finally 101). There were occasional rain showers and plenty of fog as I drove to the national park, so you should really be able to be super alert in the car. I was a bit concerned that there was not going to be much of a sunrise in this sorry weather, but as I drove up Hurricane Ridge road (N.B.: if you do not have an interagency park pass, don’t forget to pay your fee at the machine at the park entrance) with twilight in full swing, the clouds started to break (or rather, I was driving up out of the low clouds) and I started to get a glimpse now and again of the mountains looming before me, with extra mood provided by the moon.
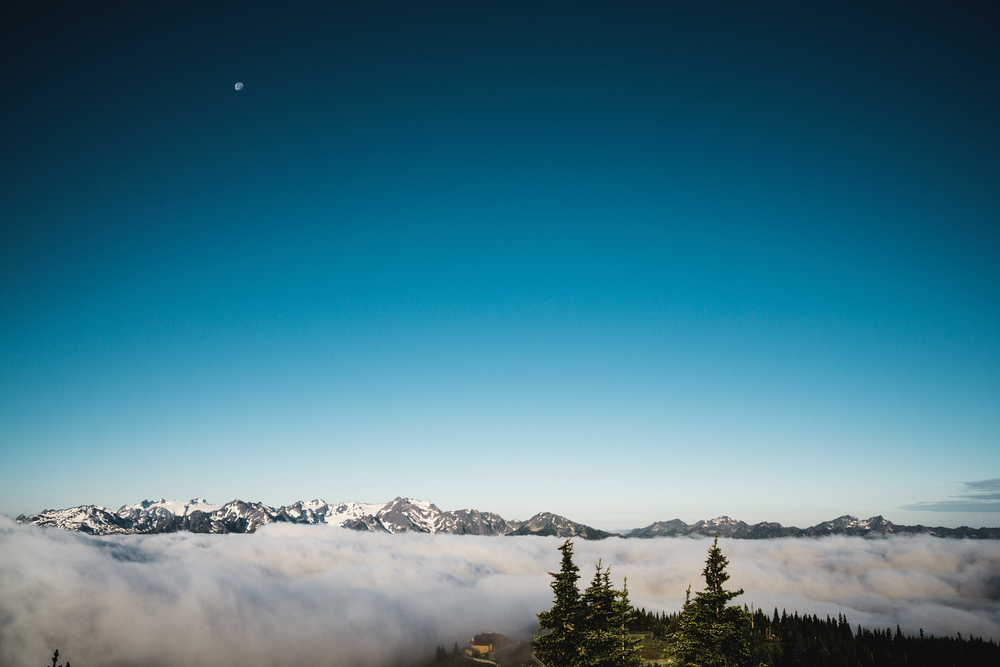
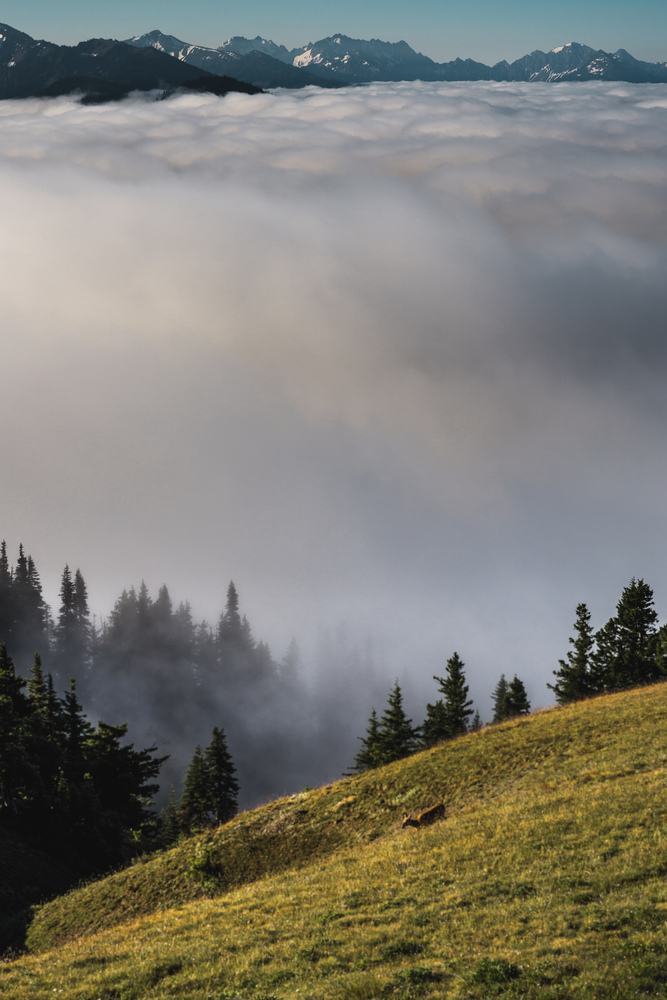
Finally up on Hurricane Ridge, there was fog initially, but it lifted and there were stunning views to be had. The clouds were all lying in the surrounding valleys and you really got the impression of towering over a sea of clouds, with only the high mountains piercing through. There is a short trail you can do from the parking lot (half a mile or so in total length) which takes you to an aptly named Sunrise Point, but with great views all along the trail (see the magical fog-shrouded landscape that presented itself to me on this trail as captured by the feature image for this post).
I regretted not taking my tripod with me as there would have been excellent material for capturing time-lapses of the slow moving clouds in the valley. Anyway there were great pictures to be taken. On the meadows next to the visitor center, a couple of deer came up from the valley and out into the sun, munching happily on the grass.
If you brought picnic, this would make for a great picnic spot. I had not (or rather had eaten my sandwich on the flight) and so was getting a bit hungry. The visitor center would have been convenient but it only opens at 9am, so after having had my fill of the views, I drove down to Port Angeles and had a good heart breakfast at a place called Cafe Garden.
After this, I headed back up to the visitor center in Port Angeles to get my backcountry permit for the night. If you want to do one of the quota limited hikes (e.g. Upper Royal Basin), then it might be best to first get the permit as soon as they open, as there will be a queue of people. I had decided to hike into the Enchanted Valley where there are no limits, so satisfied my hunger first, then went to the backcountry office, after the early queue had cleared.
From Port Angeles I headed for Ruby Beach – a solid 1h45min / 2h drive. Shi Shi Beach might be more impressive (I don’t know as I did not go), but is is a detour and requires you to hike a few miles for none of which I had time, as the hike to Enchanted Valley is a whopping 15 miles long… But if you plan to stay in a guest house somewhere, or do your overnight hike to Shi Shi Beach (my original plan, but reports of serious mosquito trouble and ~100-200 people camping out there on a summer weekend, I decided against this), then by all means do this.
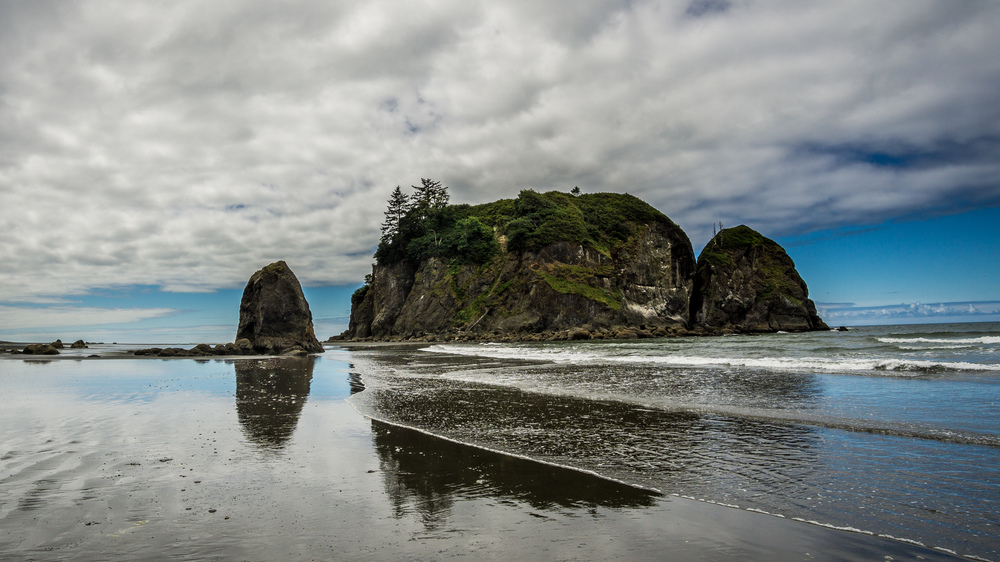
Ruby Beach is conveniently situated along the route from Port Angeles to the Quinault rain forest area, and you only have to hike a quarter mile from the parking lot to the beach. While popular, you will still be awestruck by how wild this beach looks, with Abbey Island towering over it. Ideally the tide is low when you get there (I had of course planned this to perfection…) and you can hike a mile or so up north along the beach. If you’re more flexible with time, hike up the full 3 miles or so to the mouth of the Hoh river and then back down (but really only do this if you have studied the tide chart before setting off as you otherwise risk having your way back getting cut off!). Also, apart from the barnacles, clams, snails, crabs etc that will abound in the tide pools and rock face, keep a look out to the ocean for sea otters and whales. I saw one sea otter hunting just south of Abbey Island. For this it is a good idea to bring a solid pair of binoculars with you as the otters will be quite a bit out at sea.
I still had good 5-6h hike before me, so only went up for a mile or so, then headed back, got into my car and drove to Lake Quinault and the Graves Creek trailhead.
Hike (Enchanted Valley):
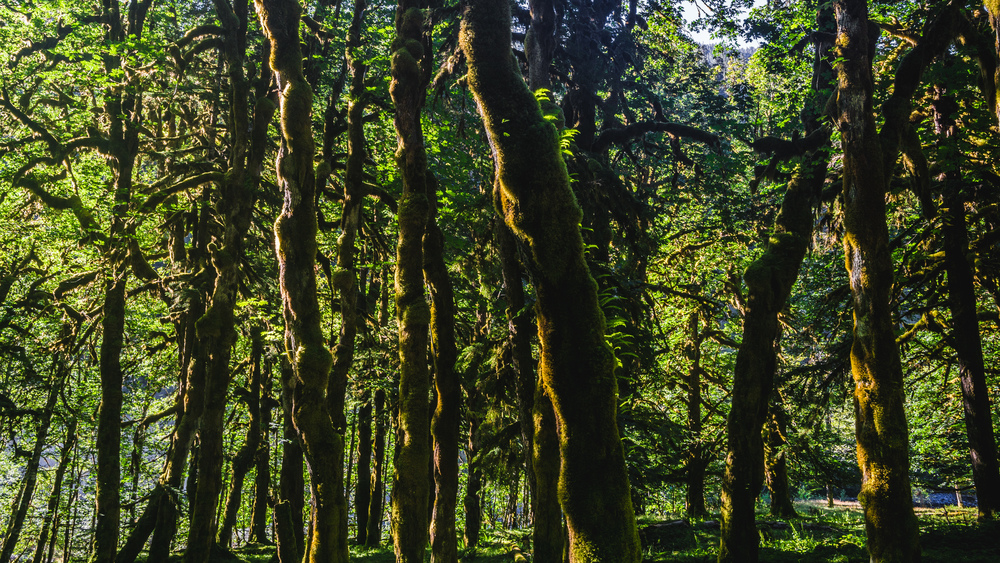
See my detailed post on this hike here. It’s a nice, but long hike. You will be walking mostly through old growth forest, going up the east fork of the river Quinault. The namesake valley is truly deserving of its name and in spring you should be almost guaranteed to see bears here (good to know if you want to avoid bear encounters!). However if you just want to get a maximum of scenery in, then consider trying to get a permit for the Upper Royal Basin, which I hear should be nothing less than spectacular. If you do this, then you might have to adjust the route for this road trip, as your trailhead would be in a quite different part of the park.
Leg 2 (Graves Creek trailhead -> Kalaloch -> Seattle Airport):
If you follow my route, then your day starts with another 5-6h hike: back the way from Enchanted Valley to Graves Creek trailhead. By the time you are back at the car it is lunch time, and there is only so much you can still hope to do, given that you have to catch a flight from the Seattle-Tacoma airport in the evening (if you only got the weekend as I did).
Now the sea otters had quite gotten to me the previous day, so I decided to head back up to a beach to see if I could spot some more. I stopped at Kalaloch, as there was a gazebo up above the beach from which it as much easier to have a good view then down from sea level. Sure enough there were 2 groups of a dozen otters each hunting near the Kalaloch rocks.
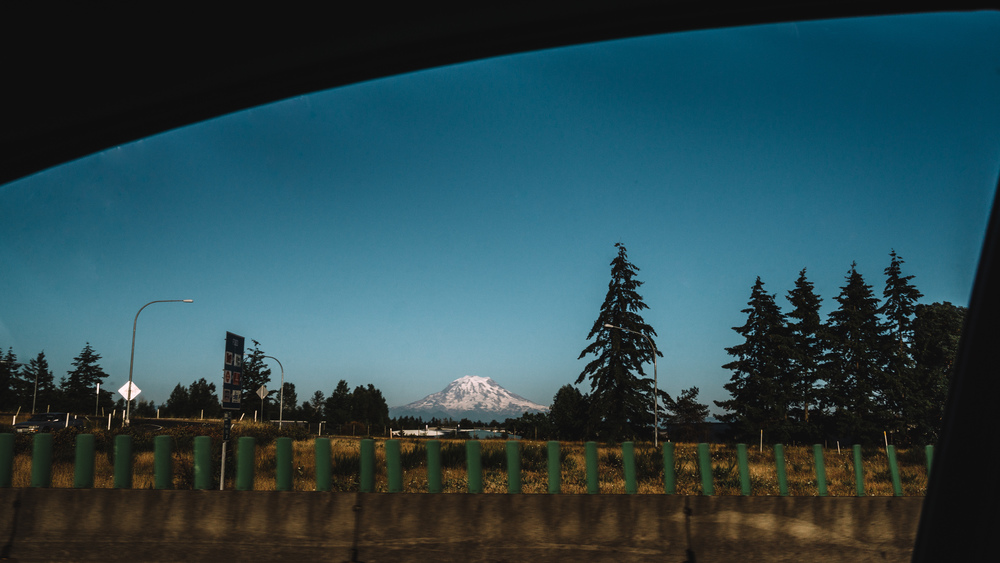
After also getting some late lunch here, I got back to my car and set off for the long drive back to the airport. If the weather is clear then Mount Rainier will loom up spectacularly along the highway at times, so enjoy the drive even if the traffic on a Sunday late afternoon / evening might be bad at times (as it was in my case).
Final notes:
A great little trip, but really a weekend does the park no justice. I did not get to see Shi Shi Beach or hike up in the mountains proper. So I will be back for sure and stay longer than just 2 days, 1 night. But still, considering how charged my weekend was and how much I got to see, it’s difficult to see how to cram in more into such a short time.
Data files (click on the link, then download whatever format you prefer from the gpsies website):
Leg 1 (Seattle, Hurrican Ridge, Ruby Beach, Quinault area): http://www.gpsies.com/map.do?fileId=wotoposopswojapn
Leg 2 (Quinault area, Kalaloch, Seattle): http://www.gpsies.com/map.do?fileId=lwkreedupfxfbyjw
Complete Route: http://www.gpsies.com/map.do?fileId=nzhdhjrbuhayitcq
How long?
6 days, 5 nights
(longer if you plan to stay a few days in San Francisco at the start or end of the trip — we’ve spent 3 nights there)
How many miles?
~845 miles / 1,360 km
How?
Driving (+ hiking in Yosemite)
Phone / GPS or road map recommended
Maps?
National Geographic Trails Illustrated Map #206 or #306 (for the hiking part)
Itinerary:
San Francisco -> Yosemite Valley -> Mono Lake / Lee Vining -> Glacier Point (Yosemite NP) -> Sebastopol / Sonoma Valley -> Bodega Bay -> Point Reyes -> Bolinas -> San Francisco
San Francisco:
We flew to San Francisco from NYC and spent the first 3 days and nights exploring this great city. Now like all great metropoles, a few days is hardly enough to scratch at the surface. Still, you can cover the most popular attractions.
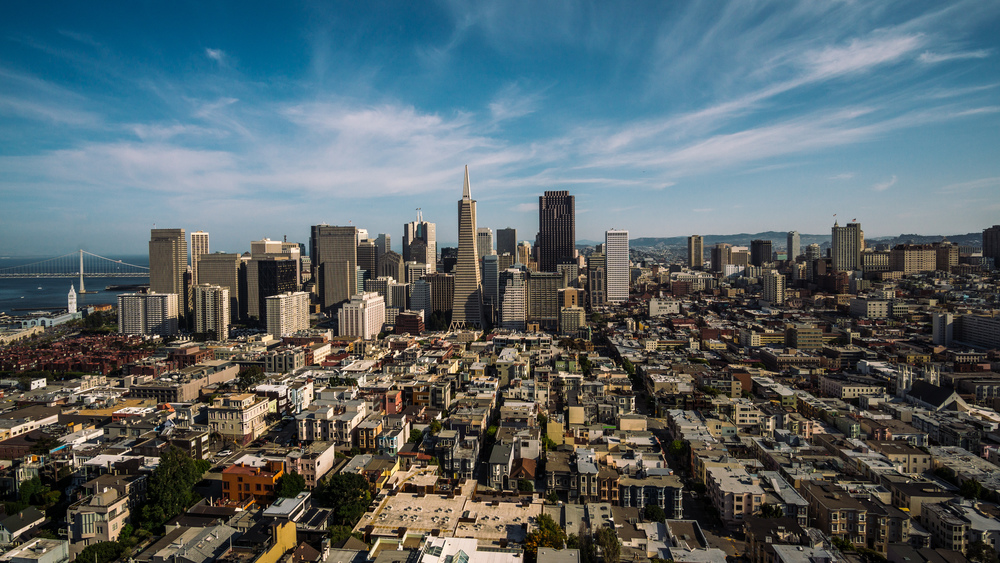
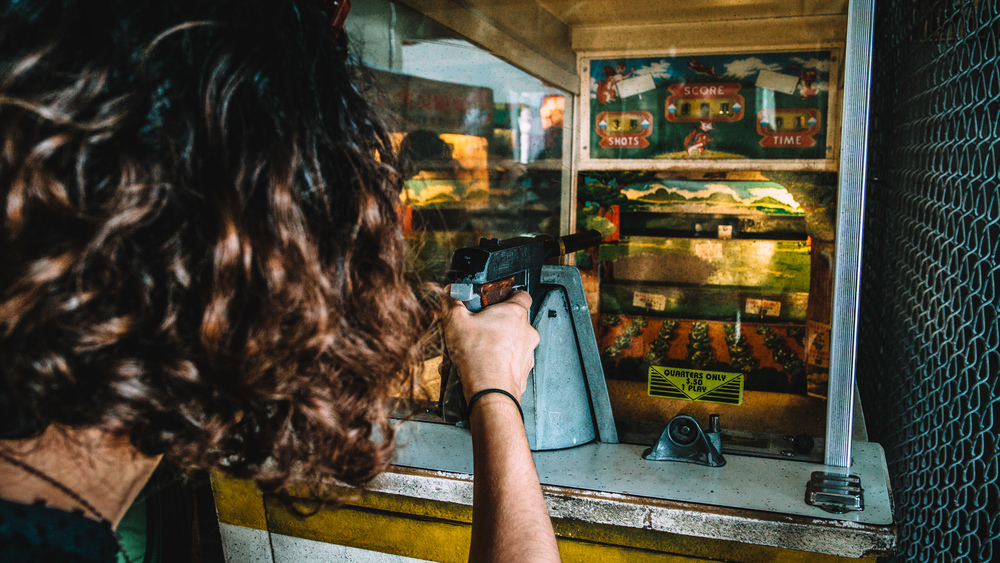
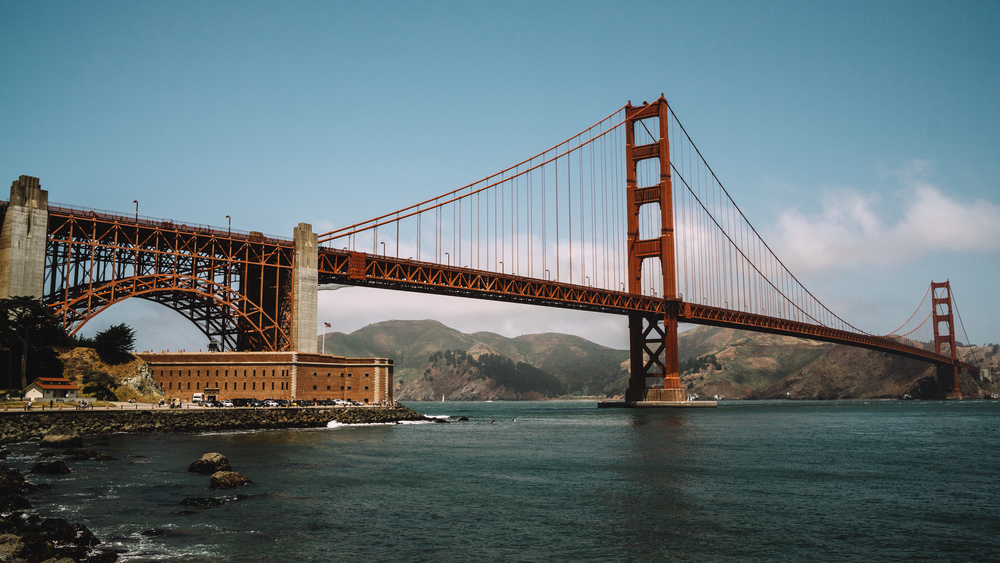
Coit Tower is probably a good place to start your exploration as you get a pretty good idea of the city’s layout. After that is is really up to you. There are the obvious tourist attractions: Golden Gate Bridge, Alcatraz, the cable cars, the Painted Ladies, the Transamerica Pyramid, the Ferry Terminal, the sea lions at Pier 39, Twitter headquarters (really?)… If you are a fan of the beat writers, there’s a museum for it, and you can follow their steps through the city. If you are a fan of Francis Ford Coppola, be sure to stop at the Cafe Zoetrope. If you are interested in LGBTQ history and/or scene, pay a visit to the Castro District. Eat some shell fish on Fisherman’s Wharf, play antique arcade games at the Musée Mécanique, stroll through Golden Gate Park and visit some of the great museums in town — your options are endless.
While quite touristy, it is a really great idea to rent a bike to explore the city, especially if you plan to cross the Golden Gate Bridge to visit the Marin Headlands. There are so many shops in town that rent bikes, so it is quite cheap and convenient. Best of all, as this road trip will see you backpacking in Yosemite National Park in a few days’ time, you can rent bikes from a place called “Essentially Free Bike Rentals”. The deal here is that you pay for the bike rental, but then get the fee as store credit in an outfitter store called “Sports Basement”. Since you probably need some camping food, gas canister for the camping stove etc, you will definitely get that money back. And it couldn’t be easier too, since the outfitter store is bang on the route you will have to cycle if you plan to ride from downtown to Golden Gate Bridge and the Marin Headlands. If you do plan on crossing the bridge, pack a pullover or jacket as there will be wind and quite likely some fog too, so you will get cold if you are only wearing shorts and a t-shirt (I speak from experience here!).
After a few days in town: escape!
Leg 1 (San Francisco -> Yosemite Valley -> Tioga Road -> Mono Lake -> Lee Vining):
When we were in town (Memorial Day weekend 2016), car rentals in town were much more expensive than at the airport, so we just took the BART train early in the morning to the airport car rental center and got our car from there. Once you got your wheels sorted, it’s time to hit the road and set course for the awesome place that are the Sierra Nevada mountains in general and Yosemite National Park in particular.
The plan for the day is easy: visit Yosemite Valley, then cross famous Tioga Road (if you are doing this trip in late May / early June: check the NPS website to make sure it has indeed opened for the season — it depends yearly on the snowfall how early the road opens) and spend sunset on the shores of otherworldly Mono Lake.
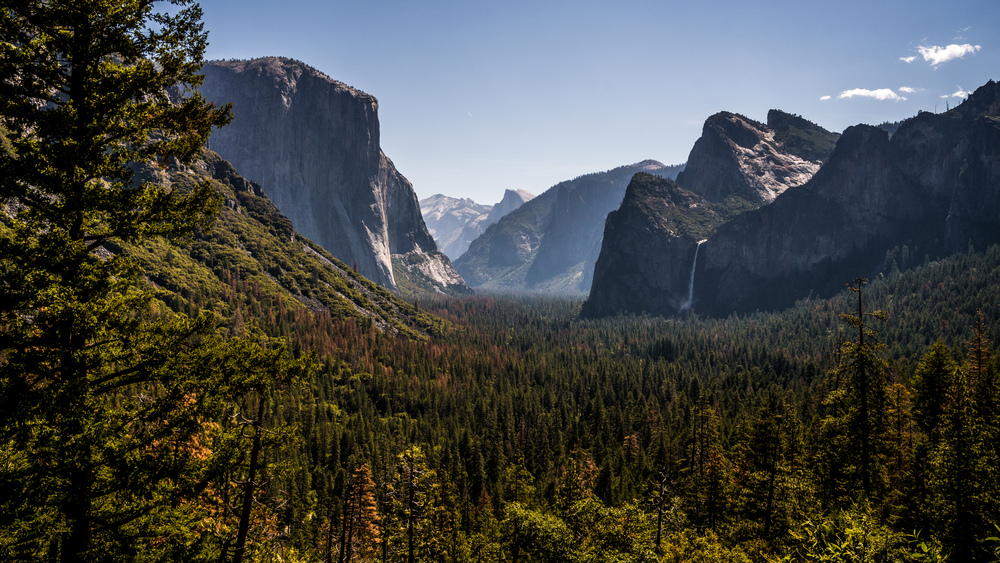
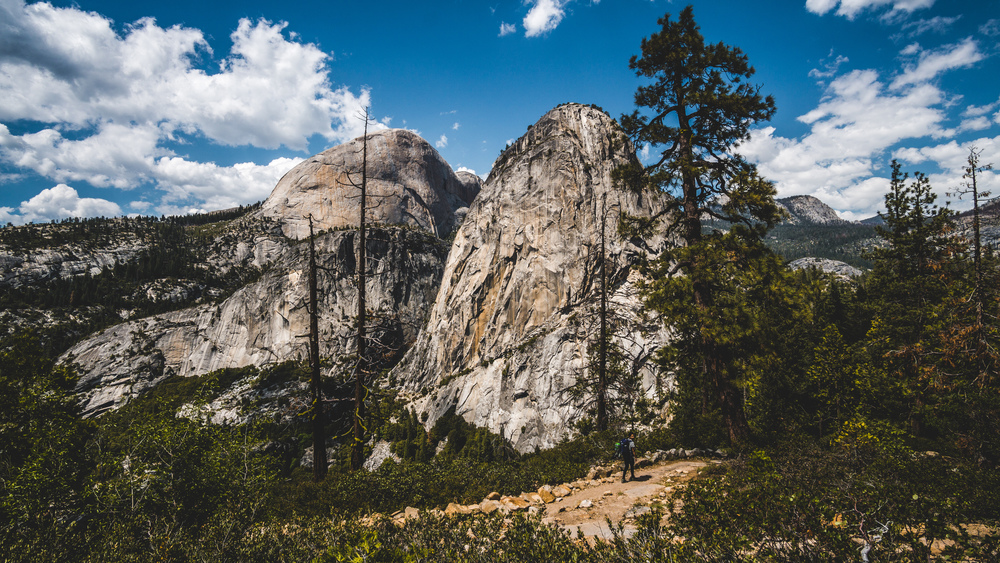
It’s a solid 4 hours of driving to get to Yosemite from San Francisco airport, but it’s a reasonably nice drive along gently rolling Californian hills. As you drive down route 120 after entering the park, you will get your first glimpse of Yosemite Valley with Half Dome at the very far end. It’s a nice view, but merely OK compared to the other views you can have in the park, so don’t go crazy yet, jumping out of your car and getting run over — be sensible!
If you are going to go for an overnight hike, don’t forget to pick up your wilderness permit from the ranger station at the park entrance. You will always be able to get permits for the night or the next few days, but if you plan to start off from some of the more popular trail heads (e.g. Happy Isles or Glacier Point) you better reserve them online in advance or they will have sold out. If you plan to include an ascent of Half Dome in your trip, then you absolutely will have to get them online, as it will be a lottery to get one at the park. The good thing about going for an overnight hike is that you can reserve the Half Dome permits to go with your wilderness permit and the reservation window for wilderness permits opens well before the day permits for Half Dome are allocated, so you will have very good chances of getting one of these coveted permits — the only condition for getting one is that your hiking route takes you reasonably close to Half Dome in the first place. Note that the cables for ascending Half Dome are only in place from late May to mid-October each year.
Soon enough you will come to a crossing with Big Oak Flat Road. Actually the road branching off to the left at this crossing is route 120 (also known as Tioga Road) whereas the straight road ahead of you is Big Oak Flat Road. Go straight and follow this road down to the valley floor. Here traffic is one-way and counter-clockwise. There will be two lanes for the car and camper van traffic and it is dearly needed as each year between May and October the place is flooded with people (75% of all visitors to the park come between these two months according to the NPS website). Be careful for other cars coming to abrupt stops when a turn gives way to an epic view of some mountain or waterfall and people jumping out of cars, their camera phones at the ready.
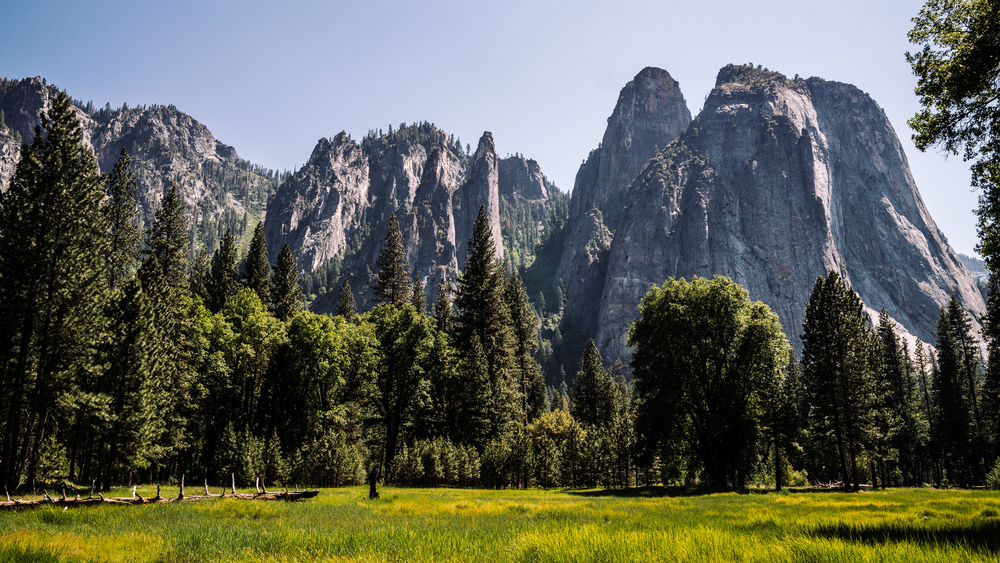
When you are in the valley, you would not believe it, but the park is huge and 95% of it is wilderness (the valley is less than 1% of total surface area). However the vast majority of its 4+ million visitors a year visit the valley only, hence why it is so crowded. That said, no matter how crowded it is, the valley is really nice and it is perfectly possible to find secluded and solitary spots on the valley floor for a nice quiet picnic with gorgeous scenery all around you.
Spend a couple of hours in the valley, have a picnic in a shady corner of the valley, have lunch at one of the park concessionaires or simply go for a short hike. If the weather and visibility are good, and you think it may be worse the next day, then before heading back to the crossing with Tioga Road, head up to Tunnel View for the classic view of Yosemite Valley that every OSX user will know quite well from their Desktop wallpaper. Otherwise, after passing Valley View, just head straight back to the Big Oak Flat Road and when you get to the crossing with route 120, take a right turn and drive up on Tioga Road. Frankly, of all the drives I have done in the US so far, Tioga Road is one of the best and most scenic drives, right up there with Beartooth Highway in the larger Yellowstone area.
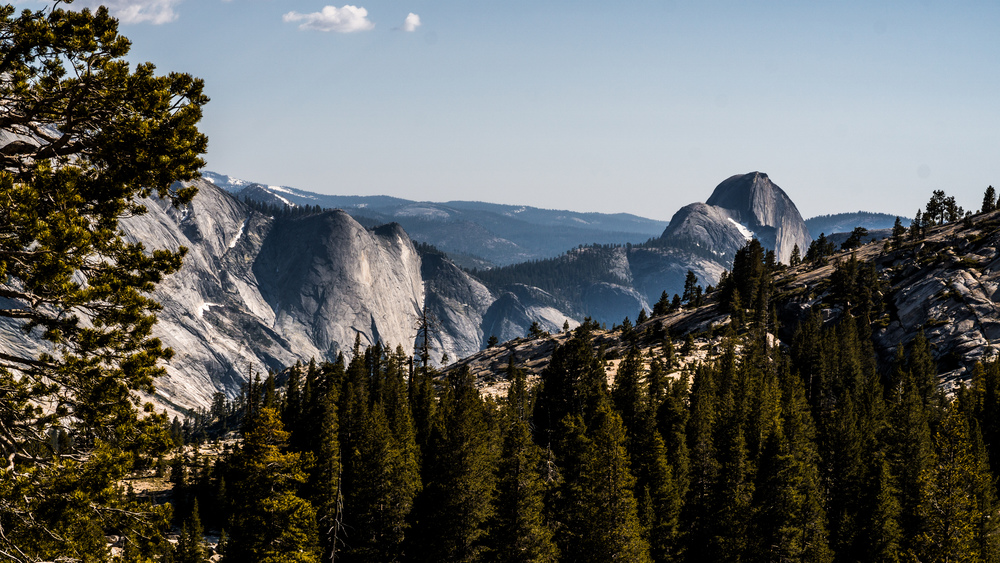
This is because Tioga road takes you up into High Sierra landscapes and over to the Eastern Sierra Nevada. The Eastern Sierra is so spectacular because the mountains rise much more dramatically on this side than they do on the western side; it’s simply one of the most beautiful sights I have every seen. The High Sierra landscape with its spectacular geology is just unbelievable. Hard to believe that these granite rocks were once just molten rock in the inner crust of the Earth, then pushed upwards by fault lines and exposed and shaped by erosion (rain, snow and glaciers) over millennia. The area around Olmsted Point, Tenaya Lake and Tuolomne Meadows is just wonderful.
Be sure to stop at Olmsted Point for some of the best views in the park and, if you have time, have a picnic here or go for a short hike. Winter lingers longer up here, so if you are visiting early in the season, be aware that there may still be snow or a lot of flooding from freshly melted snow.
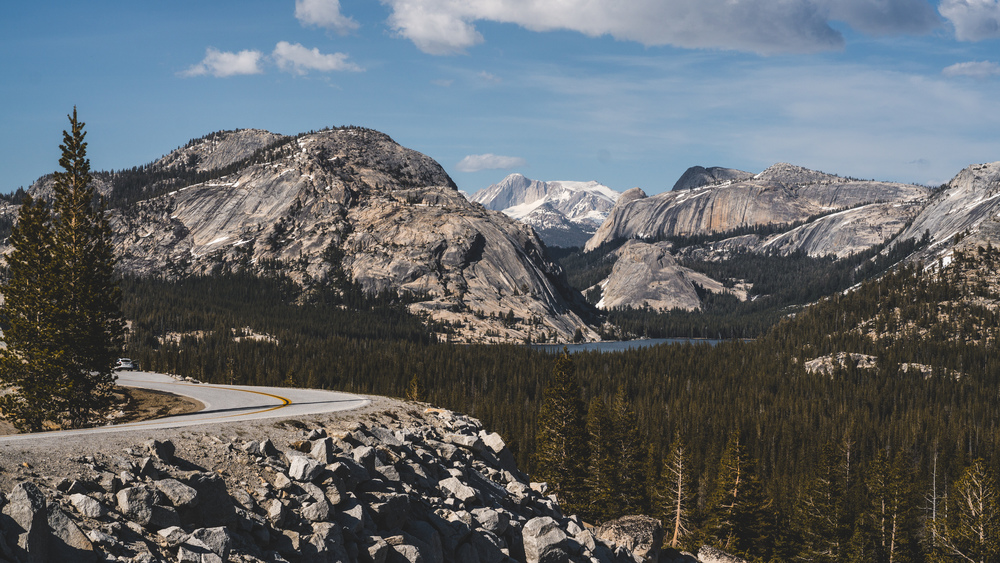
Finally, continue your drive along Tioga Road until you exit the park. As you drive down from the Sierra Nevada you will see a large lake stretching out in front of you: this is Mono Lake – your final destination for the day. You want to head straight for a place called the South Tufa Area. To get there take a right turn when you get off Tioga Road / route 120 and onto route 395. Continue for some 4-5 miles, then take a left turn back onto route 120, which now is called Mono Lake Basin Road. Follow this road for another 4-5 miles, then make another left turn onto a dirt road (Test Station Road) and this will take you to a small visitor parking lot. You will need to pay for day use permit at the ticket machine, but if you’ve got the America-The-Beautiful interagency pass, this will be accepted here — just display it in your car.
Mono Lake is a saline soda lake, which simply means that it is highly alkaline (i.e. pH > 7). Soda lakes are characterised by the relative absence of soluble magnesium or calcium (otherwise the pH would be neutral). This means that when underground, calcium-rich springs seep into Mono Lake, the calcium reacts with the carbonates of the alkaline lake water and forms limestone, which builds up as weird and beautiful columns, so-called tufas, along the water’s edge.
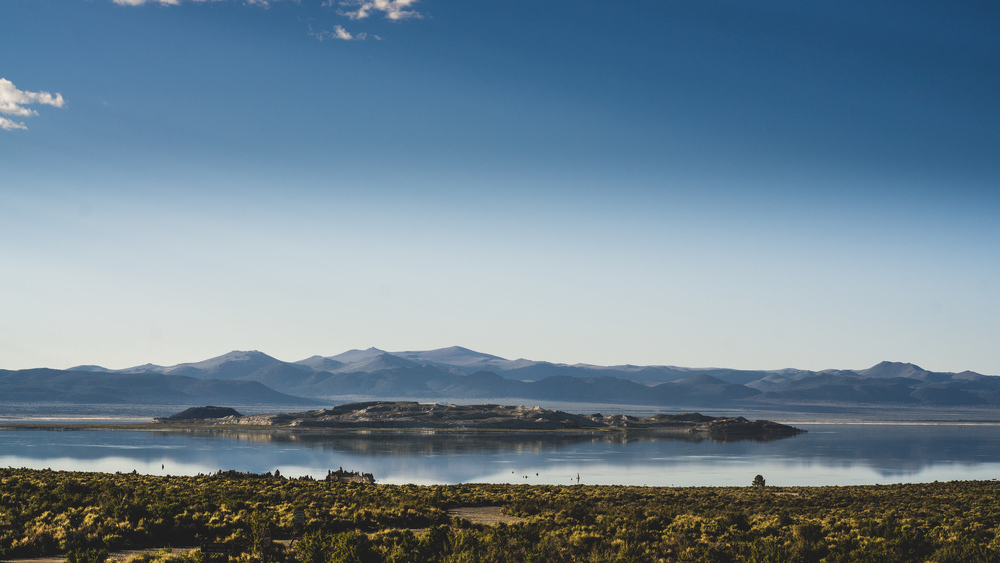
The incredible beauty of the surrounding natural scenery, together with the tufas and the calm, reflective waters account for Mono Lake’s otherworldly charm. It’s such a weird and surreal place, you really need to see it to believe it. Sunsets are spectacular here (just look at the feature image for this post!) so if you time this first part of the road trip right, you’ll be here just in time for magic hour. There are no fish in Mono Lake (the water is too salty), but there are brine shrimp here and these attract quite a lot of birds that feed on them, so if you are into birdwatching, you’ll have a good time at Mono Lake.
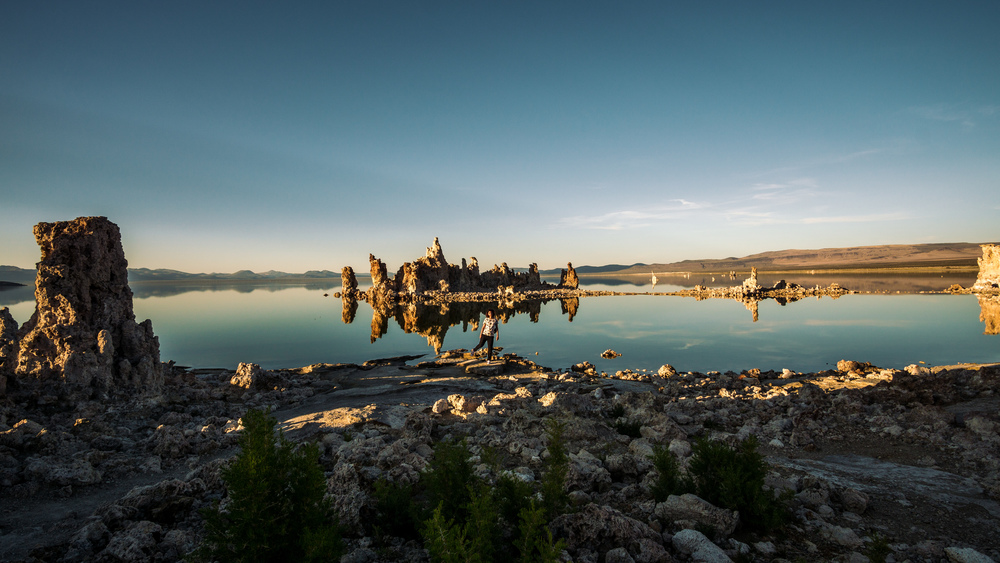
After the sun has set behind the mountains, head back to your car and drive to Lee Vining, just a few miles north along route 395. Its a small town, but there are a few good hotels here and you can get decent, low-key dinner here too.
Leg 2 (Lee Vining -> Tioga Road -> Tunnel View -> Glacier Point):
Get up early (or not — the schedule for the day is less packed, so if you are decently fast hiker, you can have a bit of a lie-in), get a good breakfast (again there are several decent places for this in town, e.g. El Mono Motel’s Latte Da Coffee Café) and get back in your car. Drive back up Tioga Road (and marvel again at the natural beauty along this road) and cross the park from east to west, then take a left turn onto Big Oak Flat Road and head back into Yosemite Valley. However, instead of driving all the way to the end of the valley, take a right turn now onto Wawona Road and head up to Glacier Point.
There will be several great viewpoints along the road, first of all Tunnel View, so be sure to stop and let your gaze wander. Tunnel View will be packed with people, so be patient if there is a bit of a traffic jam or if it is tricky to find a parking spot — the view is well worth it. Also watch out for people crossing the road in excitement.
Finally continue along Wawona Road, and take a left turn onto Glacier Point Road. Just before you reach Glacier Point, there will be Washburn Point to give you a little taste of the views that are to come during your backpacking trip.
Once at Glacier Point, get your backpack ready, be sure to leave all food and other smelly articles in a dated bag inside one of the bear storage boxes in the parking lot (or risk finding your car’s door torn open by a hungry bear on a midnight food binge) and set off hiking for a couple of days!
Backpacking trip in Yosemite NP (Glacier Point -> Little Yosemite Valley -> Half Dome -> Illilouette Ridge / Mount Starr King -> Glacier Point):
This is a fact: there are about 4 million (tendency rising) visitors to Yosemite National Park each year, but only some 56,000 (or about 1.4% of visitors) will actually go on an overnight hike. Considering how large the park is, unless you venture only to Little Yosemite Valley (which has a backpackers campground) you are guaranteed to find solitude, even at the peak of the summer season. So don’t miss this opportunity to get away from it all and pack your tent and hike out!
I have written up our 3-day, 2-night backpacking trip as a post of its own, so please refer to that post for this section of the road trip. I have also posted my best effort yet of capturing timelapse footage of the Milky Way rising in the night sky — just so you know what you can hope to see in the Yosemite wilderness.
Leg 3 (Glacier Point -> Sebastopol):
Three days after setting off, you will probably get back to your car for lunch time at the earliest and you will be exhausted (it’s a mercilessly uphill and exposed hike back up to Glacier Point). So take the time to freshen up a bit, changing into a new set of clothes and having a good cool drink or ice cream from the concessionaire store at Glacier Point.
This leg of the road trip will be the longest drive of the entire trip, and since you will probably be fairly tired from the 3 day backpacking trip that preceded, whoever is driving will find it the toughest too. Anybody else who has joined you for this trip will probably just happily doze off in the car.
Once you get to Sebastopol (or some other town in the Sonoma or Napa valleys), relax, take a shower and go out for a well earned dinner and go to bed early (or hit a bar and have a beer).
Leg 4 (Sonoma Valley exploration):
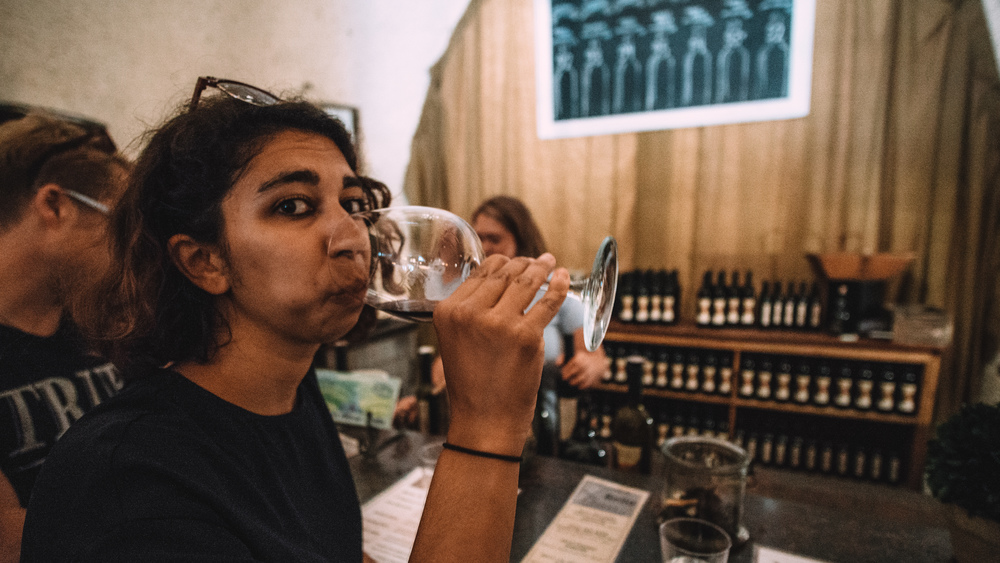
So after a couple of days of hiking and plenty of driving, take it easy the next day, get up late, then head to either Sonoma Valley or Napa Valley, rent a bike (or not, if you plan on getting stopped for a DUI) and go wine tasting! We rented bikes in Healdsburg, then cycled up West Dry Creek Road and stopped at several wineries that the bike shop had recommended to us (I don’t think they got kickbacks for this advice). If you are really serious about your wine, then you probably want to have researched this part of the trip as not all wine estates accept visitors without reservations (though in most cases all you need to do is phone the number on the sign, then come back half an hour later or so…).
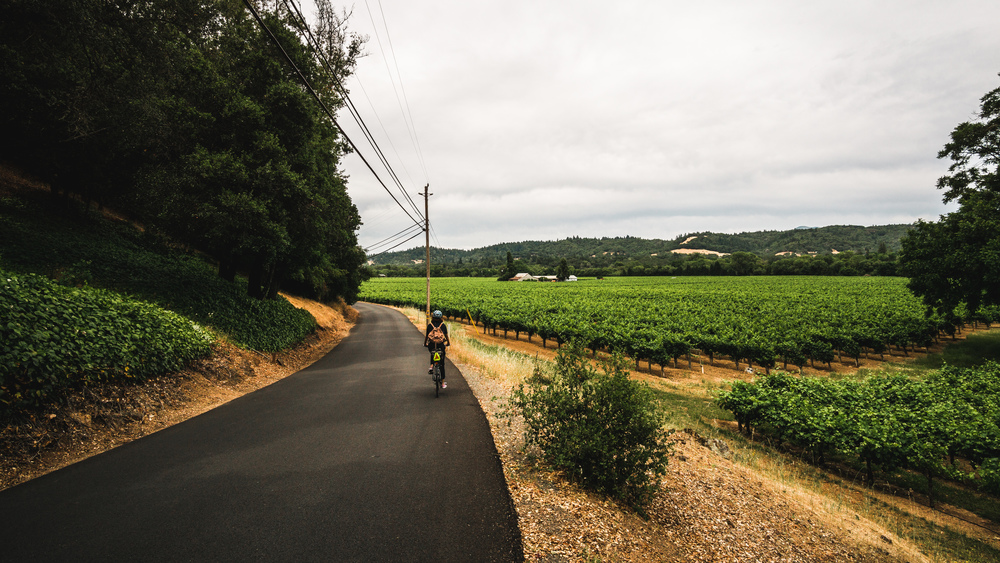
The roads were pretty quiet, with much fewer drunk drivers than I thought there would be (it was a Saturday when we did this trip). The cycling is easy, along gently rolling hills with the wine plantations right along the road.
You can have a decent lunch sandwich from the deli at the Cry Creek General Store (busy!) and enjoy a very relaxed day out on the bike here.
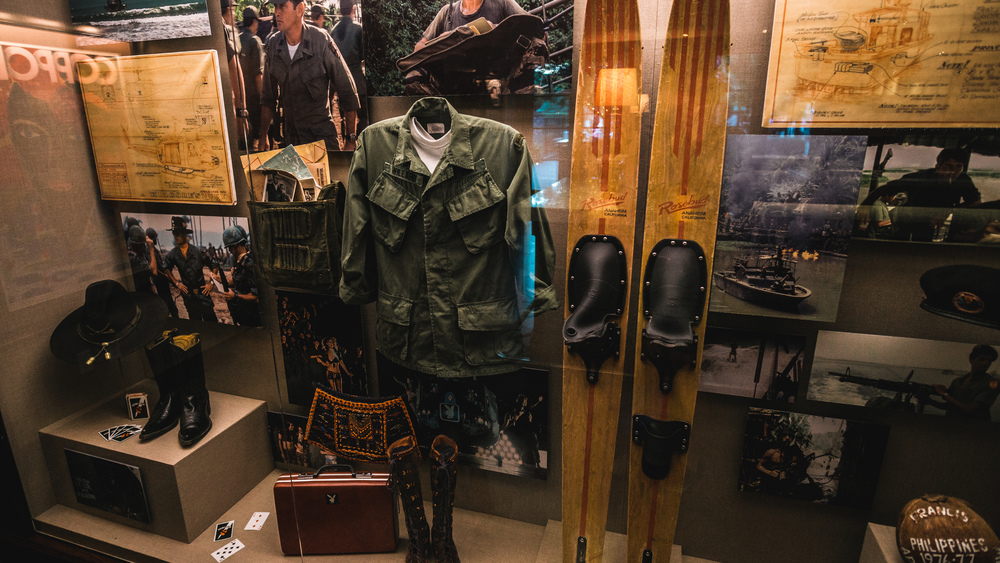
Now, if the first thing you did in San Francisco was to visit the Zoetrope building, then you probably definitely want to reserve a table for dinner at Francis Ford Coppola’s wine estate (just north of Healdsburg). It’s quite a good business he’s got here: a winery with an hotel, a pool, several bars, a restaurant and a museum. It is a pleasant corner of the world, the weather is good, you can play a game of Bocce (if you know how) and visit the museum. There is the original desk that Marlon Brando’s godfather sat at, there is the cavalry Stetson hat (or at least one of the several that were used during filming) that Robert Duvall’s napalm sniffing Kilgore wore in Apocalypse Now and plenty of other props and artifacts from Coppola’s films. There also seems to be a gift shop every five meters, but don’t let that distract you and the museum is free anyway.
The restaurant, though a bit posh and on the expensive side, is very good and I definitely recommend the roasted rack of lamb. Have a nice, relaxed evening.
Leg 5 (Sebastopol -> Bodega Bay -> Point Reyes -> Bolinas -> San Francisco):
For the final leg of the trip, get up early again: there is plenty to do. From Sebastopol (or wherever you sat up shop in the wine country) head west to the Pacific coast. Drive to Bodega Bay (again if you are a film buff, this will be right up your alley: much of Hitchcock’s The Birds was shot here and on locations nearby). If you have not yet had breakfast, have some in town and then head up to Bodega Head for a nice short walk along the cliffs and, if you are lucky (we were not), some whale sightings.
After Bodega Bay get onto Highway 1 (yes this is the famous Pacific coastal highway, but really it is the Big Sur section between San Francisco and Los Angeles that is the most spectacular) and drive south the Point Reyes National Seashore. Along the road there will be several very good seafood shacks, so be sure to stop and have a bite. If it is weekend and lunch time when you get through here, be aware that it will be quite busy.
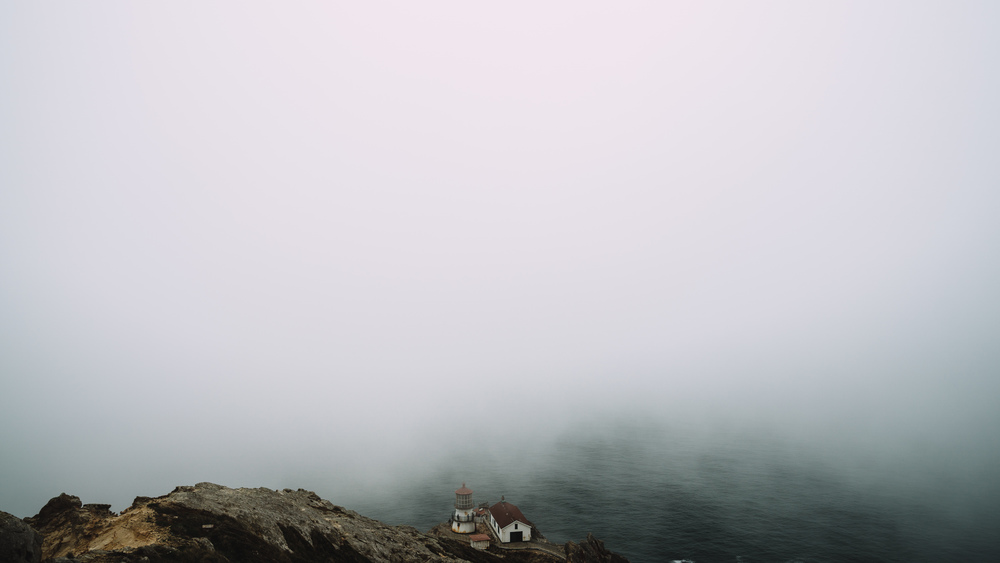
Point Reyes National Seashore has good hiking and spectacular wild, hike-in beaches to offer and there is nice lighthouse at the tip of the peninsula. This happens to be the foggiest spot in the US, so even if the sky looks clear when you are down near Tomales Bay, it may be quite a different story up at the lighthouse. There are also good spots to see sea lions and elephant seals on Point Reyes, so bring your binoculars.
Finally continue south towards San Francisco. There is a nice little seaside village that you can have an early dinner at: Bolinas. It’s a short detour off Highway 1 at the southern end of the Point Reyes peninsula, but there is no posted sign as the villagers kept stealing it. The local authorities no longer bother to put another one up and so the town has acquired a bit of a reputation as a reclusive community. However when we visited, the local folk were very friendly and there is even a small town museum, which presumably is still catering to tourists.
After your visit to Bolinas, keep going south. If you are still good in time, you can stop to visit Mt. Tamalpais (aka Mt. Tam). Otherwise continue south and cross the Golden Gate Bridge (you will have to pay for the tolls, but you get the bill in the mail as it is totally automated), then continue to San Francisco airport (or head into town if you are planning to add a few days here).
Final notes:
This was one of the best road trips I’ve done in the US so far, so I would not change much. It’s got a good balance of city trip, outdoor adventure and spoiling yourself / wine tasting. As with all trips, feel free to change where you stay for the nights, where or how long you hike out into the wilderness etc etc etc. If you have a few extra days at your disposal, I would add visits to Kings Canyon and Sequoia National Parks and maybe a detour south of San Francisco to Moss Landing (to see sea otters), Monterey and Big Sur.
Data files (click on the link, then download whatever format you prefer from the gpsies website):
Leg 1 (San Francisco, Yosemite Valley, Tioga Road, Mono Lake, Lee Vining): http://www.gpsies.com/map.do?fileId=gmjxwsxhlgwgahzg
Leg 2 (Lee Vining, Tioga Road, Glacier Point): http://www.gpsies.com/map.do?fileId=spckqiuwbglfiban
Leg 3 (Glacier Point, Sebastopol): http://www.gpsies.com/map.do?fileId=bifzusgwdbdhvikh
Leg 4 (Sonoma Valley exploration): http://www.gpsies.com/map.do?fileId=jupcojbdbrhcrese
Leg 5 (Sebastopol, Bodega Bay, Point Reyes, Bolinas, San Francisco): http://www.gpsies.com/map.do?fileId=kbtjdbzwjecamwuq
Complete Route: http://www.gpsies.com/map.do?fileId=ntngjbosehuibugd
How long?
2 nights, 2 days
How many miles?
~1,000-1,100 miles
How?
Driving
Phone / GPS recommended; for the backpacking part a map and compass are required
Maps?
National Geographic Trails Illustrated Map #239
Itinerary:
Denver Airport -> Mount Rushmore NM, SD -> Devil’s Tower NM, WY -> Badlands NP, SD -> Minuteman Missile NHS, SD -> Denver Airport
N.B.: There are airports closer by, but they are much more expensive to fly to. Feel free to change the starting and ending point — it’s a long drive up from Denver!
Leg 1: Denver Airport -> Mount Rushmore NM, SD -> Devil’s Tower NM, WY -> Badlands NP, SD
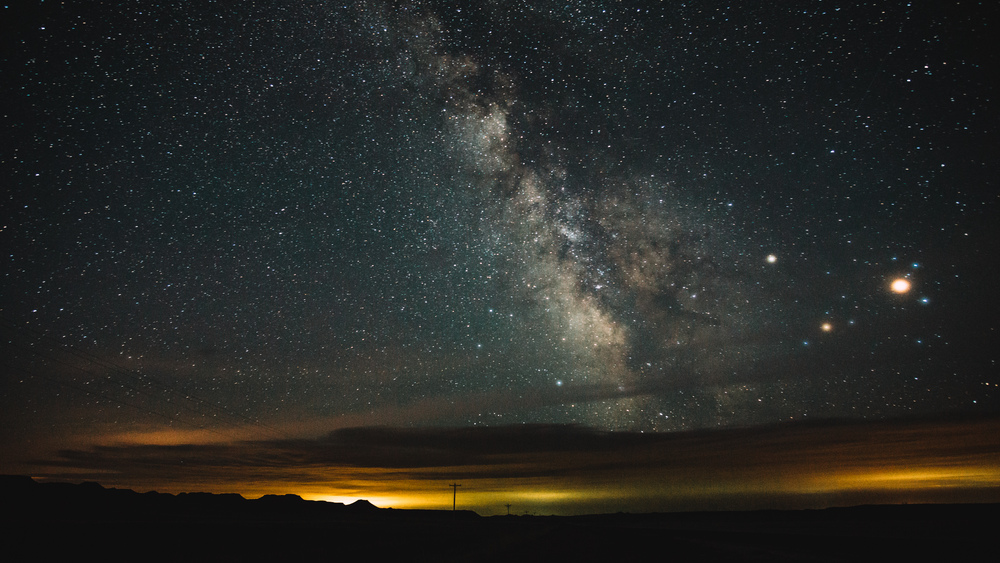
So it’s kind of difficult to find a reasonably priced flight to South Dakota. Hence Denver, a major US hub airport, is your best bet. The only problem: it’s a solid 6h drive away from where you want to get to. Anyway if you come from the East Coast, you can take a Friday evening flight, be in Denver at around midnight or so, then drive up and be at Mount Rushmore just after sunrise (unless you do this in winter). This makes for a long drive through the night. Be sure to get some shut-eye on the flight or you are putting yourself in serious risk of causing a sleep-drive accident. With this disclaimer out of the way, I king of like driving on empty country highways at night. If the skies are clear, and there is no moon out, you should make a few stops along the way and gaze at the sky. That’s exactly what I did and it was amazing. At 3am in the middle of nowhere in Wyoming, the skies are amazingly dark. Also when I did this trip (May 2016) there was a cool Saturn and Mars constellation up in the sky. Mars was super big and bright and it was quite a show. A few such stargazing stops help to break up the long drive and shake out some of that fatigue.
The advantage of that long drive through the solitary night: you will be at Mount Rushmore at around 6am. The visitor center, cafe and gift shop will still be closed, but that also means that the parking lot is free (otherwise it’s $8 or so, I believe). Further, I was the only one at the memorial this early in the morning: it was brilliant. It was a nice, crisp sunny morning and doing the short hike that loops around at the base of the morning was a quiet, pleasant affair. I took my time, enjoyed the scenery (the Black Hills really are gorgeous; next time I go, I sure plan to spend more time there and also visit Custer State Park), then as soon as the cafe opened, I went in and had a good hearty breakfast. The waiter also showed me where the original cafe, the one that is featured in North By Northwest (a favourite film of mine and prime reason for wishing to visit Mount Rushmore), had stood and that they in fact had to reshoot the cafe scene in the studio back in LA as the film they shot over here was damaged during the shipment to the West Coast.

After you had breakfast, head back to your car: there’s still plenty of driving to do for the day. Next up is another iconic film location (this time Spielberg, not Hitchcock; Strange Encounters of the Third Kind): Devil’s Tower in Wyoming. It’s roughly a 2h to 2 1/2h drive to get there from Mount Rushmore.
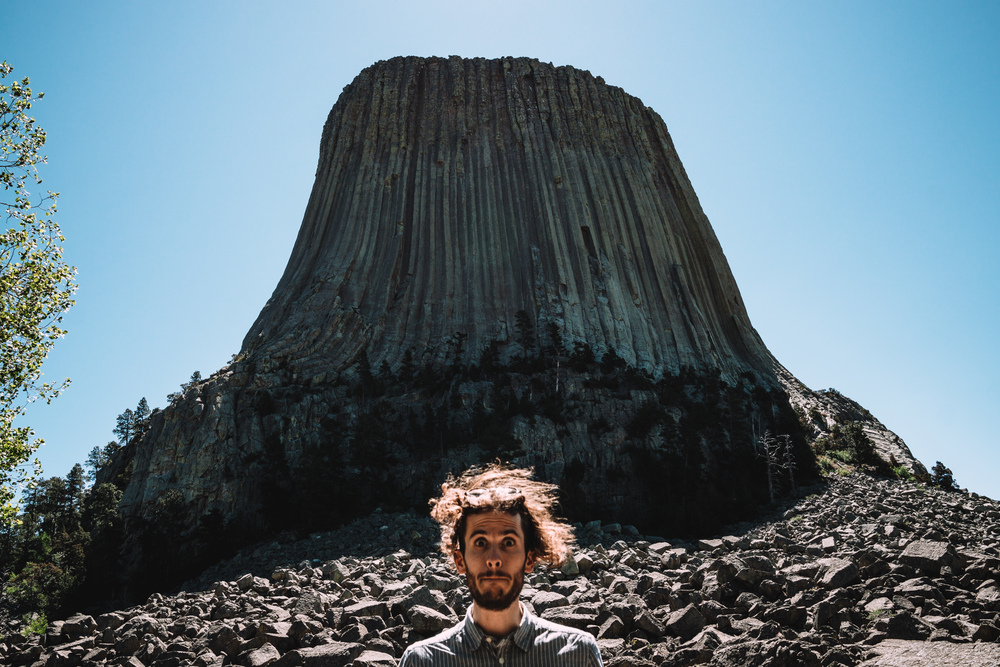
Even though you know is going to be waiting for you, seeing that cylindrical monolith of a rock jutting out into the landscape is just breathtaking. It’s a really surreal and bizarre natural feature. Turns out it is not fully understood how this rock came into being. Most commonly it is believed that molten rock was pressed through the sedimentary rock beds (hence those weird vertical columns that run around the face of the tower) and then the much more solid tower emerged over the years as the surrounding sediment was carried away by the Belle Fourche river. However it could also be a volcanic plug and there are a few other theories as to how the tower came into existence. Certainly the most poetic explanation is the old Lakota tribe legend. This story has a bunch of girls being chased by giant bears. They run, but then stop and pray to the Great Spirit to be saved. This Great Spirit then raises the earth around them and the girls are safe from the bears. The latter try to climb atop, but they fail to do so and their claws leave deep scratches on the sides of the hill — the vertical columns that you can still see today.
There’s two nice circular hikes around the tower; a short on and a long one. I did the short one and it was quite pleasant. Don’t forget to scan the sides of the mountain for climbers — this will put the scale of the thing into perspective.
When you are done: back to the car — more driving awaits. After this you want to drive out to Badlands National Park — this is where you’ll spend the night. It’s an almost 3h drive to get there. You’ll drive through a lot of empty countryside, but you’ll also have to go through Rapid City and a little town called Wall in South Dakota.
The main attraction in Wall, SD, is a shop: the Wall Drug Store. It used to be a small drug store with very little business back in the 1930s, until the owner had the great idea to put up adverts for free ice water on the highway that lead to the then new Mount Rushmore monument. Since then the store has become hugely successful and nowadays it is a huge mall, way too big for such a small town as Wall. Anyway they still serve free ice water, but other than that it really is just a gigantic tourist shopping mall. I stopped there out of curiosity, but feel free to just skip this. I appreciated the large silos next to the railway more than the Wall Drug Store to be honest. Anyway, if you haven’t had lunch yet, the town is a good bet to get some food.

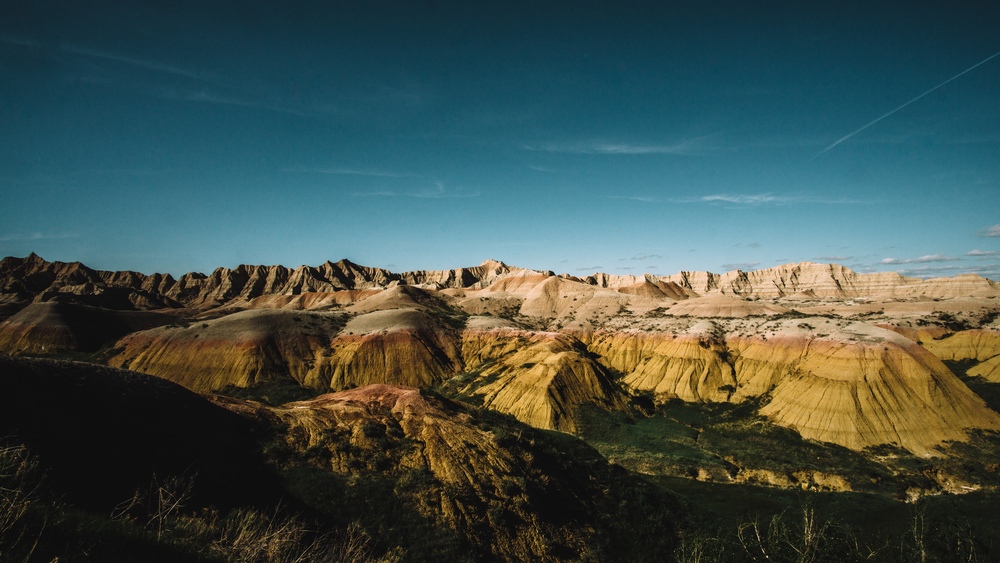
Anyway, keep going and eventually you’ll get to Badlands National Park. Now the more spectacular entrance to the park is from the south: that way you really appreciate what the Badlands really are (and why Wall is called Wall): a huge, impassable rise of rock in the landscape; really a very long wall. Since these lands were so bad to travel through, they earned their name. Anyway, this trip does not enter from that direction, but the next day, you’ll exit that way and will appreciate this view.
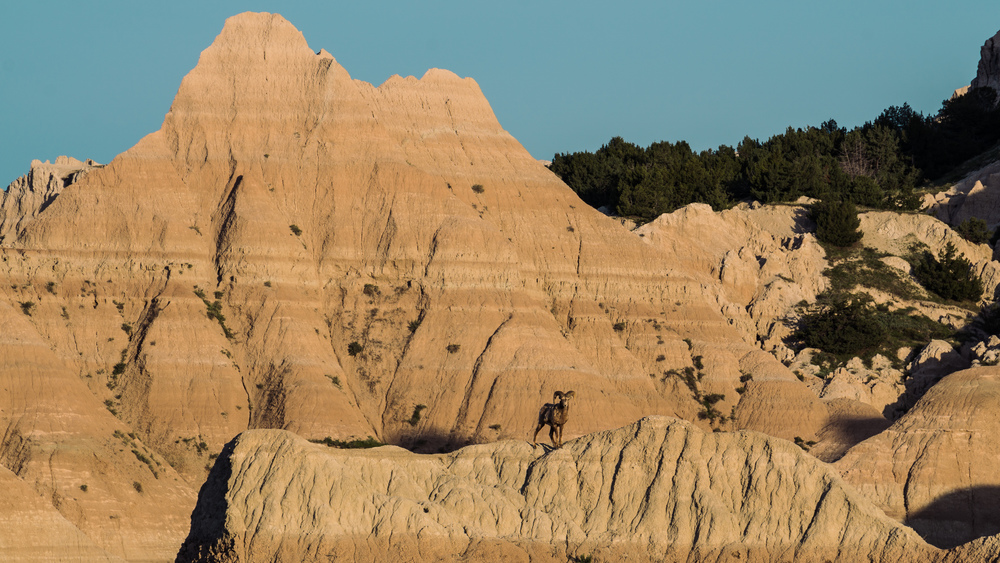
Either way, when you stop at the first viewpoint, you will be blown away by the scenery: wild rocks as far as the eye can see and with wild colours (though beige and red dominate). You’ll feel as if you were on a different planet and a strange one at that.
By now it should be late afternoon, so unless you plan to stay in an hotel / motel / BnB in Wall or other nearby town, you should be starting to get ready to hike out. Much of the hiking is cross country and you do not need to get a permit in advance. It is advised to get one from the ranger station (on the other side of the park that you enter from). By the time I would have made it to there, they would have closed and the ranger at the Pinnacles entrance told me to just fill out the backcountry register at the trailhead. So that’s what I did. Since hiking is cross country, you will need a good topological map and a compass. The latter is not really required depending on how deep into the badlands you venture. I simply hiked out from the Conata picnic area trailhead and went southwest along the badlands. So to the south there was open & flat prairie, while to my north the badlands rose steeply — difficult to get lost. I hiked out for 2-3 miles, then cut into a little valley that lead into the badlands (this part is called Deer Haven). I then hiked up the ravines and found a good spot on top of a grassy area. However getting up (and the next day down) the steep sides of the badlands is iffy and potentially dangerous. If it rains or looks like it might be raining the next day, don’t do it — it’ll probably be just one slippery mess.

The skies in Badlands NP are famously dark, so make sure to get up in the middle of the night to gaze at the sky. Other than that you night will be quite and peaceful. I was woken up in the morning by the howls of a coyote. Quite eerily beautiful.
Leg 2: Badlands NP, SD -> Minuteman Missile NHS, SD -> Denver Airport
After you had breakfast, pack up your tent, hike back to your car. There’s plenty of deer and bighorn sheep in the park, so keep your eyes out for them. As I came down from my perch high up in Deer Haven, a bighorn sheep just made its ascent of a rock a hundred yards west of me. We both were surprised to be eyeing each other and it was a bit of an uneasy stand-off (those big horns sure look as if they can hurt you pretty badly). In the end the bighorn just kept staring at me as I continued with my descent, then ignored me once I was far enough away from it.
Take your time to leisurely drive through the park, stopping at the viewpoints and taking it all in. It’s a really impressive park, so make the most of it. Go for another short hike (e.g. the Door or the Window Trails near the main visitor center) if you feel like it.
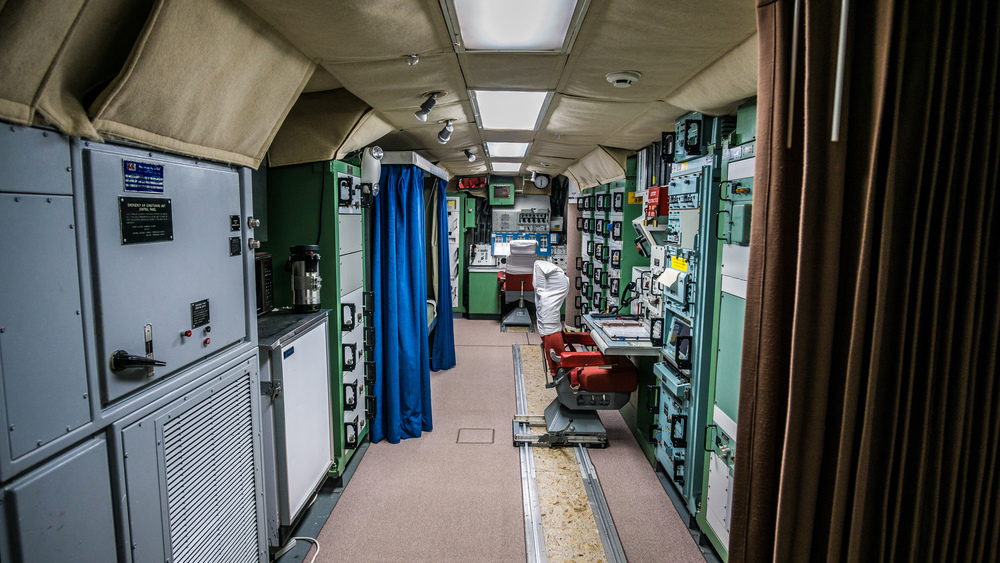
Just a few miles north of the park sits a newly built visitor center for the Minuteman Missile National Historic Site. There you can get free tickets for a tour of the command center, as well as directions to the rocket silos which you can visit on a self-guided tour (both the command center and the silo are a few miles to drive west of the visitor center to get to). The Minuteman Missiles were part of the cold-war nuclear deterrent. It’s not much to see, but quite interesting to visit. It’s all a bit scary when you think that they could have launched the nuclear holocaust from here.
Once you are done, drive back south, through the park, towards Interior, SD. Be sure to stop as you head south to appreciate the wall that is the Badlands as you drive south on highway 377, then west on highway 44. Finally, make your way back to Denver. It’ll be another long, 6h drive.
It’s a lot of driving for a 2 day trip, but it’s all true American Wild West landscapes. And you’ll get to see so much on this trip, it’s well worth the drive. If you’ve got a few extra days, be sure to include stops to Wind Cave NP, Jewel Cave, NM, Custer State Park etc — there is so much more to explore in this corner of the US. There’s also a lot if Native American heritage and history here, not least the Ghost Dance movement and the massacre at Wounded Knee, so it was a bit of a shame I did not have more time. I really only realised how much there was to explore in this part of the world once I was out there, so really should have made a long 3-4 day weekend of it or maybe even a week.
Data files (click on the link, then download whatever format you prefer from the gpsies website):
Leg 1 (Denver, Mt. Rushmore, Devil’s Tower, Badlands): http://www.gpsies.com/map.do?fileId=mrlcsydftzyufvis
Leg 2 (Badlands, Minute Man Missile NHS, Denver): http://www.gpsies.com/map.do?fileId=jdudywwmcbzuuojcComplete Route: http://www.gpsies.com/map.do?fileId=fdjsufuwtpncrhfe
]]>
How long?
2 days, 1 night (though to be fair you have to spend a first half night driving up from Las Vegas…)
How many miles?
540 miles / 870 km (of which ~18 miles are hiking not driving)
How?
Road trip + short wilderness backpacking trip
Map required for driving optional for hiking, compass optional (i.e. you can clearly see where you have to hike to in Panamint Valley)
Maps?
National Geographic Trails Illustrated Map #221
Itinerary:
Las Vegas -> Dante’s View -> Zabriskie Point -> Badwater Basin -> Artist’s Palette -> Panamint Valley -> Father Crowley Point -> Owens Lake -> Rhyolite -> Las Vegas
Leg 1: Las Vegas -> Dante’s View -> Zabrisikie Point -> Badwater Basin -> Artist’s Palette -> Panamint Valley
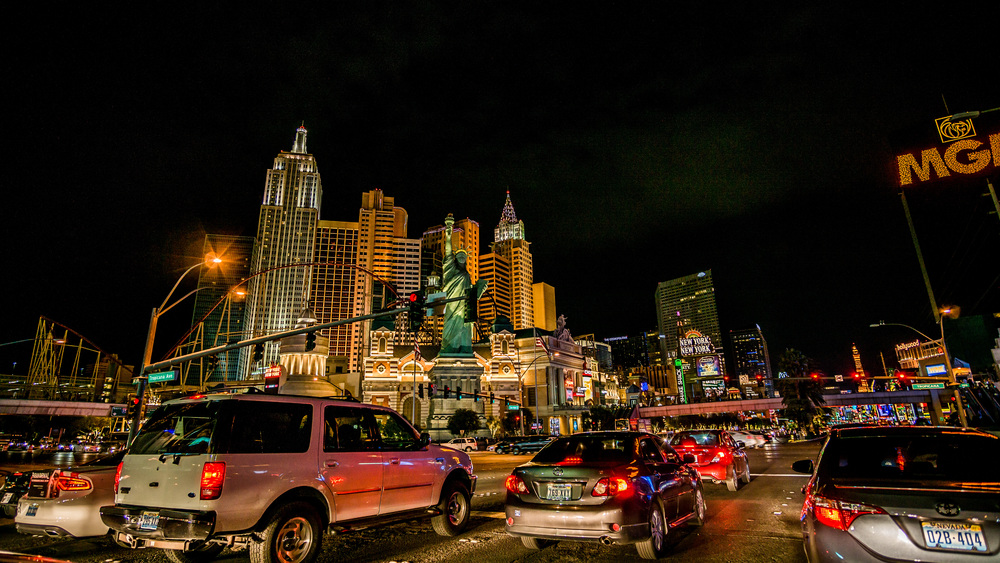
You want to go to Death Valley to seek solitude? Well, the best airport to get there is Las Vegas, so you’ll have first to escape from the weird concentration of human life and folly that is Las Vegas. Now, I had never been to Sin City, so I was looking forward to seeing all those kitschy hotels-cum-casinos that I only knew from films. Once you got your rental car, you can either speed out of Las Vegas on interstate 15 or you drive leisurely (even at night there seems to be a lot of traffic) along the Vegas Strip before heading onto route 95. I had arrived at 11pm and did not plan to be in Death Valley before 5 or 6am, so I had plenty of time and did the latter.
Now if you arrive like me at 11pm or midnight, you have plenty of time to drive up to Death Valley. I caught a bit of sleep on the flight over from NYC, but still, your internal clock will be a bit upset and you will get tired behind the wheel. So you can either drive to a motel along the way or, if you are a cheapskate like me, you can head to the Amargosa Valley rest area at the junction of routes 95 and 373. From Las Vegas it will take you about an hour and a half or so to drive up to here and it will be just over an hour from here to Dante’s View, where you want to be for sunrise. So you will be able to take a nap for a couple of hours in your car (or motel if you went with that option). Hell, at the rest area there’s even a weird Alien / Area 51 store which runs some kind of a truckers’ brothel on the side. The truckers that came out of there looked like you can spend a good few hours in there too! Anyway I also stopped on the way up from Vegas at a superstore to buy a few gallons of water and some food for the entire trip, so you should also calculate some time to do that.
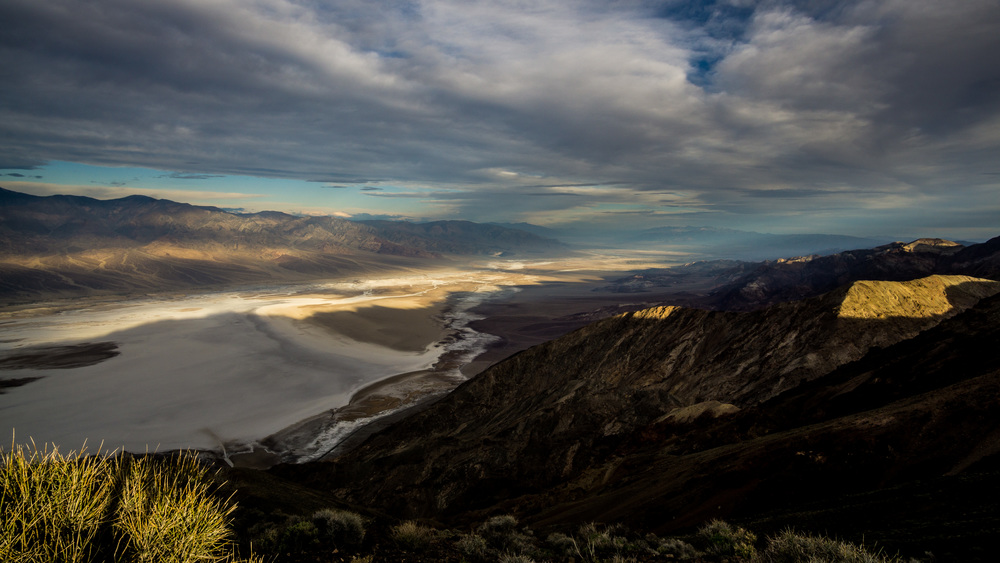
Now, depending on what time of the year you do this trip, you want to leave between 4 and 5am from the Amargosa Valley rest area so as to arrive on top of Dante’s View for sunrise or shortly thereafter. If you don’t have an America The Beautiful multi agency pass, don’t forget to stop at the park entrance to pay your fee at the machine. Dante’s View is the best place to start your trip in Death Valley: you get a full (on clear days) overview of the entire valley from north to south. Badwater Basin lies pretty much straight ahead at your feet and you can clearly see the expanse of the salt flats. Telescope Peak (the highest point in the park) is just opposite across the valley. As the sun rises, the valley slowly catches its rays and lights up. You can hike for a bit along the ridge — a great way to stretch your legs after the drive up here.
Once you filled up on the georgeous view, get back in the car and take the short drive down the mountain and to Zabriskie Point. If you’ve seen Antonioni’s film you probably want to strip naked and make love with someone, anyone, but it’s not a great idea: you’ll probably get arrested. Zabriskie Point is probably THE most iconic scenery of Death Valley. Most people will just walk up the viewpoint from the car park and snap a few pictures (like the feature image of this post), but I highly recommend you take a short hike (or do the full loop; about 6-7 miles) in the badlands. You’ll get up close to Manly Peak and be quite on your own. Considering how much other stuff I wanted to cram into the day, I only did a short 2 miles loop rather than the full hike.
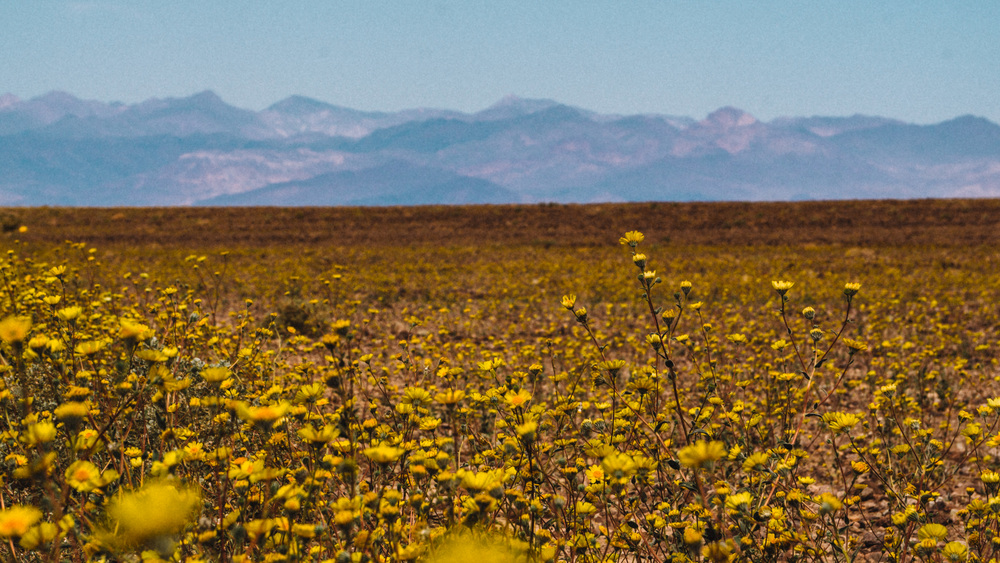
Next up: drive to Badwater Basin, passing through Furnace Creek, where you can get some food, drinks or gas if you are in for any of these. At Furnace Creek, take a left turn onto Badwater Road and from here it’s a magnificent drive down to Badwater Basin. If you do this in late winter and there was a lot of rain in the weeks / months prior, you can get lucky and witness a superbloom: the valley just turns yellow with wild flowers. This was the case in March 2016 and it was stunning!
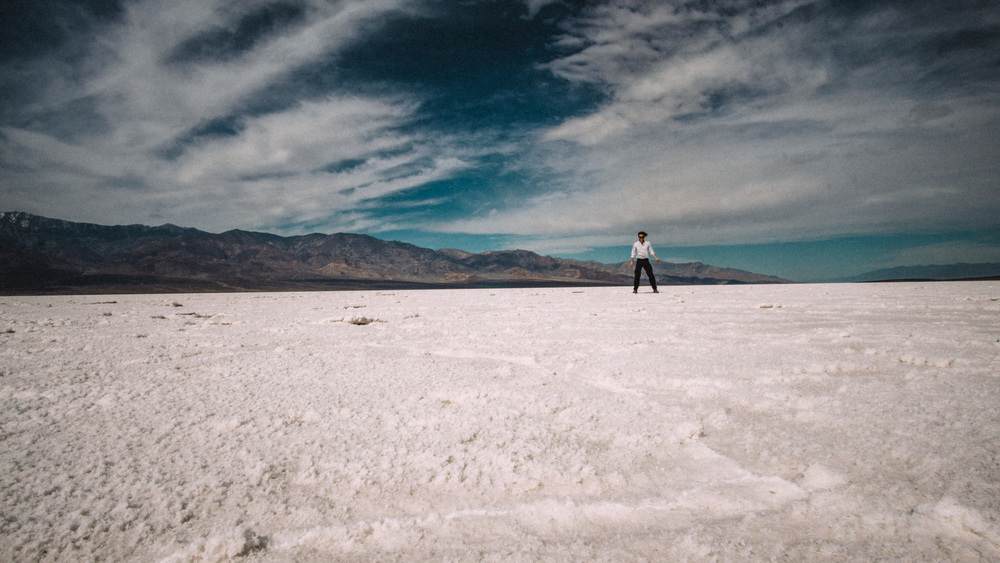
When you get to Badwater Basin, you will probably struggle a bit to find a parking spot (I just parked a bit further down the road), but do get out of your car and walk out onto the salt flats — you will feel as if on a different planet. If you do this trip in summer, do not attempt this without sunscreen, sunglasses, a hat and plenty of water or you’ll be in trouble in no time. Even in early March it was pretty hot out here and blindingly bright as the salt reflects most of the sunlight.
When you have had enough, walk back to your car, and drive back in direction of Furnace Creek. However before you get all the way up there, be sure to take a right turn signposted for Artist’s Palette. It a nice drive through rolling badlands, and mid-way through you get to the namesake badlands with all their splendid colours. You can take a short walk / hike here too if you are still good in time.
After this, drive back up to the junction with route 190 at Furnace Creek. Go left now, driving north past Furnace Creek, then west through Stovepipe Wells. Backcountry permits are optional in Death Valley and you can backpack pretty much anywhere (though no camping on the lower Death Valley floor), but it is a very good idea to get one in case of emergency (the rangers will know where you planned to go). You can get this at either the visitor center at Furnace Creek or the ranger station at Stovepipe Wells.
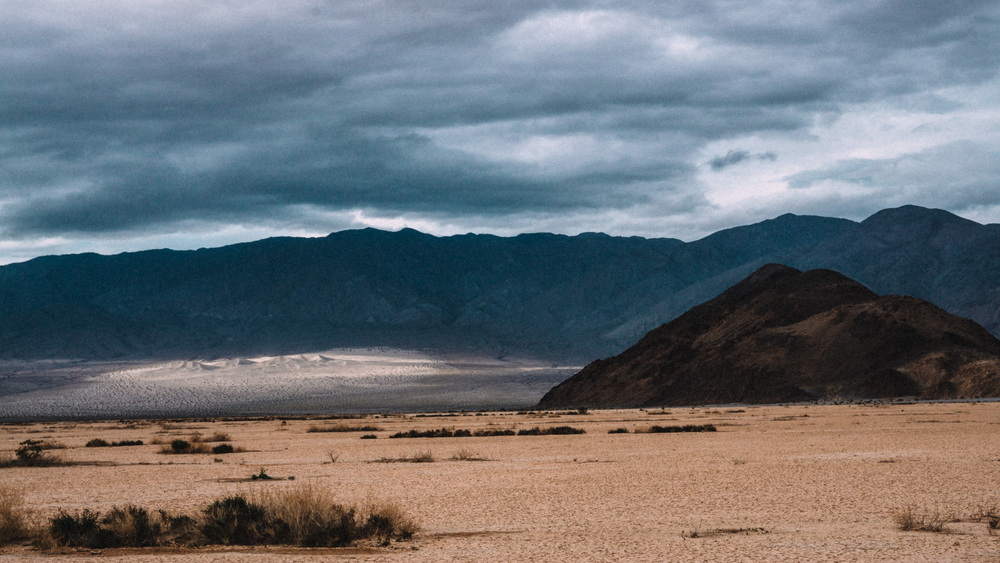
Continue along route 190, crossing the Panamint range into Panamint Valley. In the valley there will be a road going left / south to Trona and beyond. Before this, a little under 2 miles up the road, is a small dirt road going off to your right. Take this road. If you want a longer hike (what I did), then just park your car on the side of this dirt road and set off for the Dunes at the end of the valley (7-8 miles one-way). If you want a shorter hike, then continue the dirt road until its end, and from there it’s a shorter 3 mile hike to the dunes.
Overnight hike: Panamint Dunes
My original plan had been to drive up to Ubuhebe Crater, then take the long dirt road to the Racetrack and spend the night there. However there were several reasons why I did not do this: i) it is a long drive up there and a longer drive on the dirt road down to the Racetrack, ii) you cannot camp next to the road anywhere and you should camp on a small campground south of the Racetrack (or you need to park you car along the road and hike out for at least a mile), iii) I was on my own in a small economy car, so if I had gotten more than one puncture along the dirt road or stuck in loose sand (a real risk from what I’ve read) I would have been in serious trouble. So if there are a few of you, you have a high-clearance 4×4 car and you have a bit more time at your disposal, then I would still urge you to do this: the sliding rocks of the Racetrack are another key Death Valley sight.
My back up plan was to hike to the Panamint Dunes: an easy hike: flat and impossible to get lost as you see where you need to go all the way. That said, it’s not the most exciting hike, since the scenery never really changes. You are also quite exposed to the elements, so if the sun is fierce or there is a sandstorm in Panamint Valley — don’t do it. Panamint Valley is also a training area for the local airforce bases, so if you are seeking solitude, the noise of jets flying overhead might not be what you are looking for. That said, watching their crazy weaponised ballet in the sky is pretty spectacular in itself.
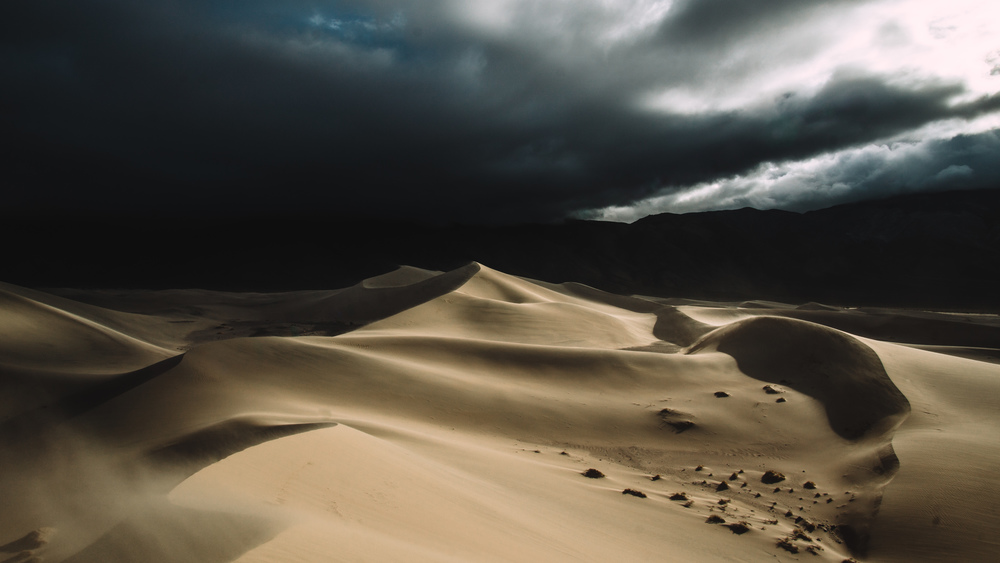
Now I have to admit, camping at the foot of the Panamint Dunes was not the brightest idea I’ve ever had. It was quite windy (I think it is always windy in Panamint Valley), and even though I pitched my tent somewhat sheltered by a big bush, I did not spend a quiet night and feared constantly that my tent would be blown away. Also the sand gets blown up to the norther end of the valley (that’s why the dunes are there in the first place!) and it will get blown under your tent’s raincover and through your mosquito net. In fact the mosquito net will filter the sand so that all your stuff (including yourself) gets covered in very fine sand.
The upshot was, that in the morning I was up early, and had the Panamint Dunes all to myself. There were a few storm clouds from the windy night that were just beginning to disperse and when the sunlight hit the dunes, it was just magical.
I packed up my tent and stuff before setting out into the dunes and I left my backpack near a bush so that I would not have to carry all that stuff up onto the dunes. If you do this, take good note of your surroundings as finding you backpack later can be much harder than you think.
Once you have had enough running up and down the dunes (they are really high, so be aware of this if you’ve got vertigo), get your backpack and hike back out the way you came.
Leg 2: Panamint Valley -> Father Crowley Point -> Owens Lake -> Rhyolite -> Las Vegas
OK so day 2 in the desert. You will probably spend most of the morning in the dunes and hiking back to the car (unless you did the short option). You will also need to get back to Vegas for your flight back in the evening. So not that much time left, but still plenty enough to see a few things. First off, overlooking the valley you just spent the night in is Father Crawley Point. To get there, simply continue along route 190 which snakes uphill out of the valley. The first exit on your right, sign-posted Father Crowley Point, is the one you want to take. You can either leave your car at the main parking lot, or drive the final mile on the dirt track. I hiked, but it’s up to you. The turn-around point of the dirt road makes for quite a fine view over Panamint Valley with good views over the valley floor and Telescope Peak on the far end.
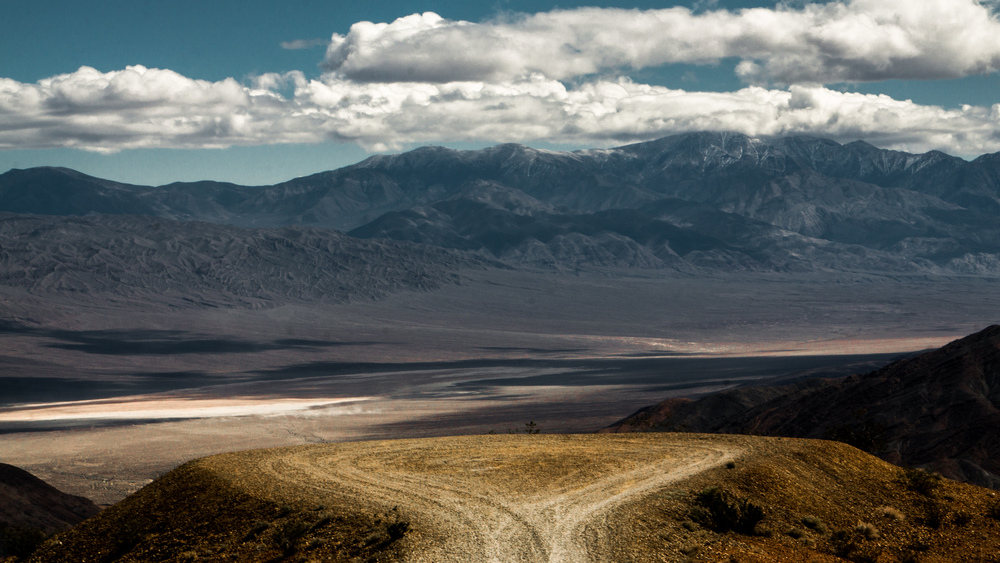
After this, get back into your car and continue along 190. You will reach a plateau and, if you have never seen them before, watch out for the Joshua trees on either side of the road. As you continue along 190, get ready to be blown away by the sight of the eastern Sierra Nevada as the road bends downhill into Owens Valley. If you are like me, you will have to stop several times along the road, get out of the car and just scream in excitement at this sight.
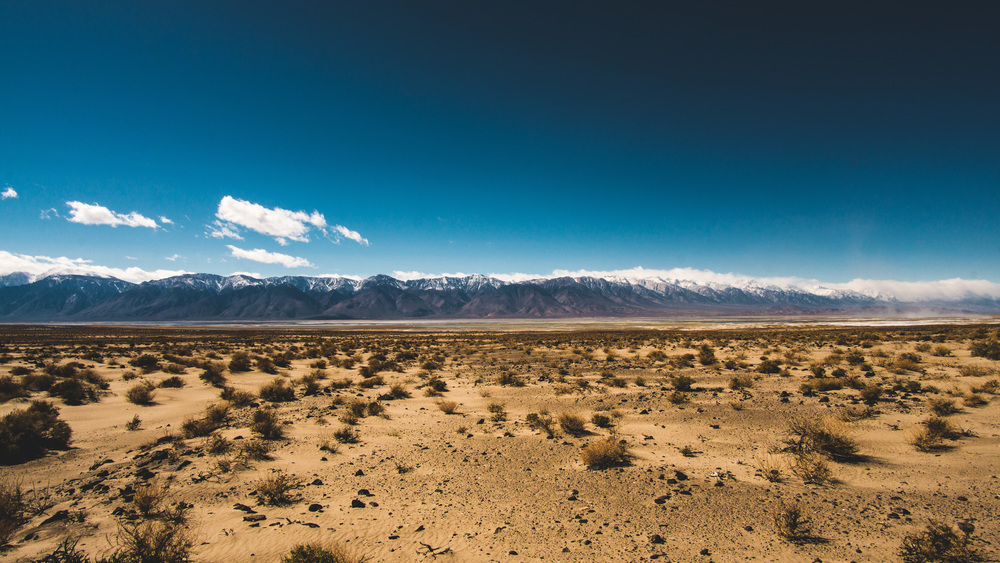
Finally, as the road reaches the valley you will come to a junction: route 190 veers left / southeast to Olancha whereas straight ahead (northeast) starts route 136. At this junction is a handy little parking lot, where you can park your car and walk a bit towards Owens Lake. There is also an informative panel with a bit of history about Owens Lake. Now this is a mostly dry lake, but there is still some water. The reason is simple: you are standing in front of the single biggest source of dust pollution in California and the state decided it was a good idea to divert some water here to keep the worst of it at bay. Owens Lake used to hold much more water in the past but fell victim to the Californians thirst for water and much of the river feeding it was diverted into the Los Angeles Aqueduct. Flanked by the glorious Sierra Nevada mountains, the place does not look that bad, but sure enough when the wind picks up you can see the sand flying around. In fact you can see it being kicked up on the picture above. It’s a lovely spot for a picnic and the road down to Olancha is pure American road trip scenery, so enjoy the view.
Finally get back into your car and head back towards Death Valley: after all you need to get back to Las Vegas. You can take the longer way and after you go past the Mesquite Sand Dunes, take a left, and then immediately a right to get onto the Daylight Pass Road. It is a glorious exit from Death Valley, so do stop at the top for a farewell view over the valley.
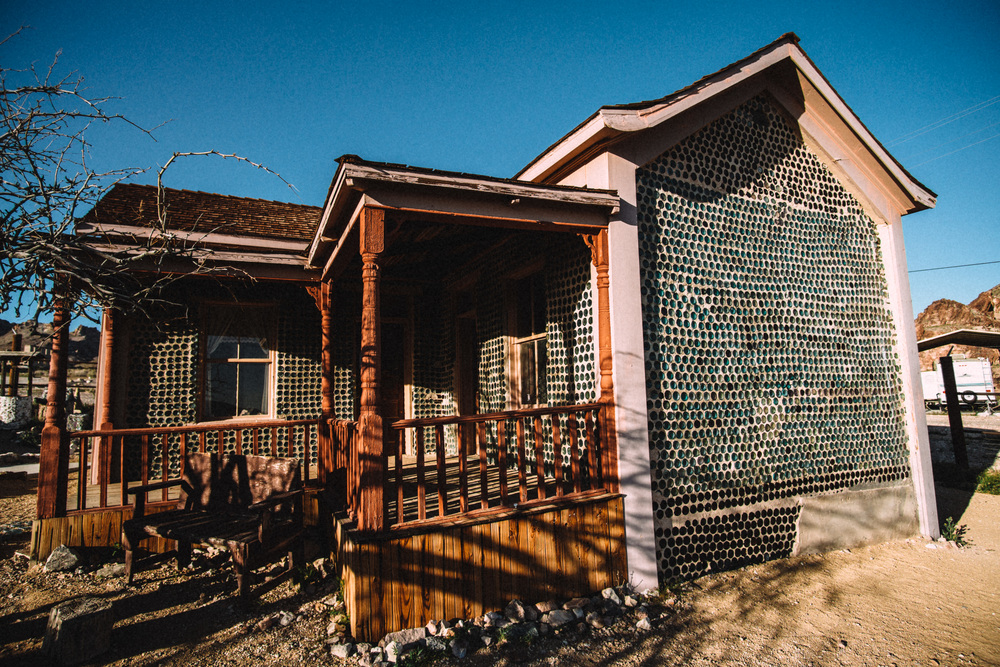
Continue all the way to Rhyolite, Nevada. This is a ghost town now. It was founded as recently as 1905 after a gold rush exploded in the area. The population reached about 5,000 at its peak, but by 1920 the town had been abandoned — the local mine had been hopelessly operating at a loss and in fact closed in 1911. Most of the buildings are in ruins now, but some like the bottle house have been restored. It is a charming little place and it does not take too long to explore it.
Finally, head back to Vegas. If you need food or gas, Beatty, NV, is nearby so do stop there. Sunset will be in full swing as you drive down Amargosa Valley towards Las Vegas. It is an awesome sight, so enjoy the drive.

All in all this is a great, power-charged trip. Probably best to do it on a long weekend or even over 4 days. This gives you more time to explore other areas of this desert park. For overnight hikes, there are plenty of options. I decided for convenience on the simple hike to Panamint Dunes, but if dunes and sand are not your thing, you can easily plan a more exciting route for that bit.
Data files (click on the links, then download whatever format you prefer from the gpsies site):
Leg 1: http://www.gpsies.com/map.do?fileId=znfeagoqcnradnah
Overnight hike: http://www.gpsies.com/map.do?fileId=yephwbvssvxmlqes
Leg 2: http://www.gpsies.com/map.do?fileId=ctmseslrvqkwvnjh
Complete Trip (road + hiking routes together): http://www.gpsies.com/map.do?fileId=hauyjffkbzirvxnm
]]>